We remain fully operational. Our teams are working around the clock to ensure your deliveries continue safely.

DOWNLOAD THE APP


Customer Services
Copyright © 2025 Desertcart Holdings Limited
DOWNLOAD THE APP
💧 Elevate your hydration game with pure, pressurized perfection!
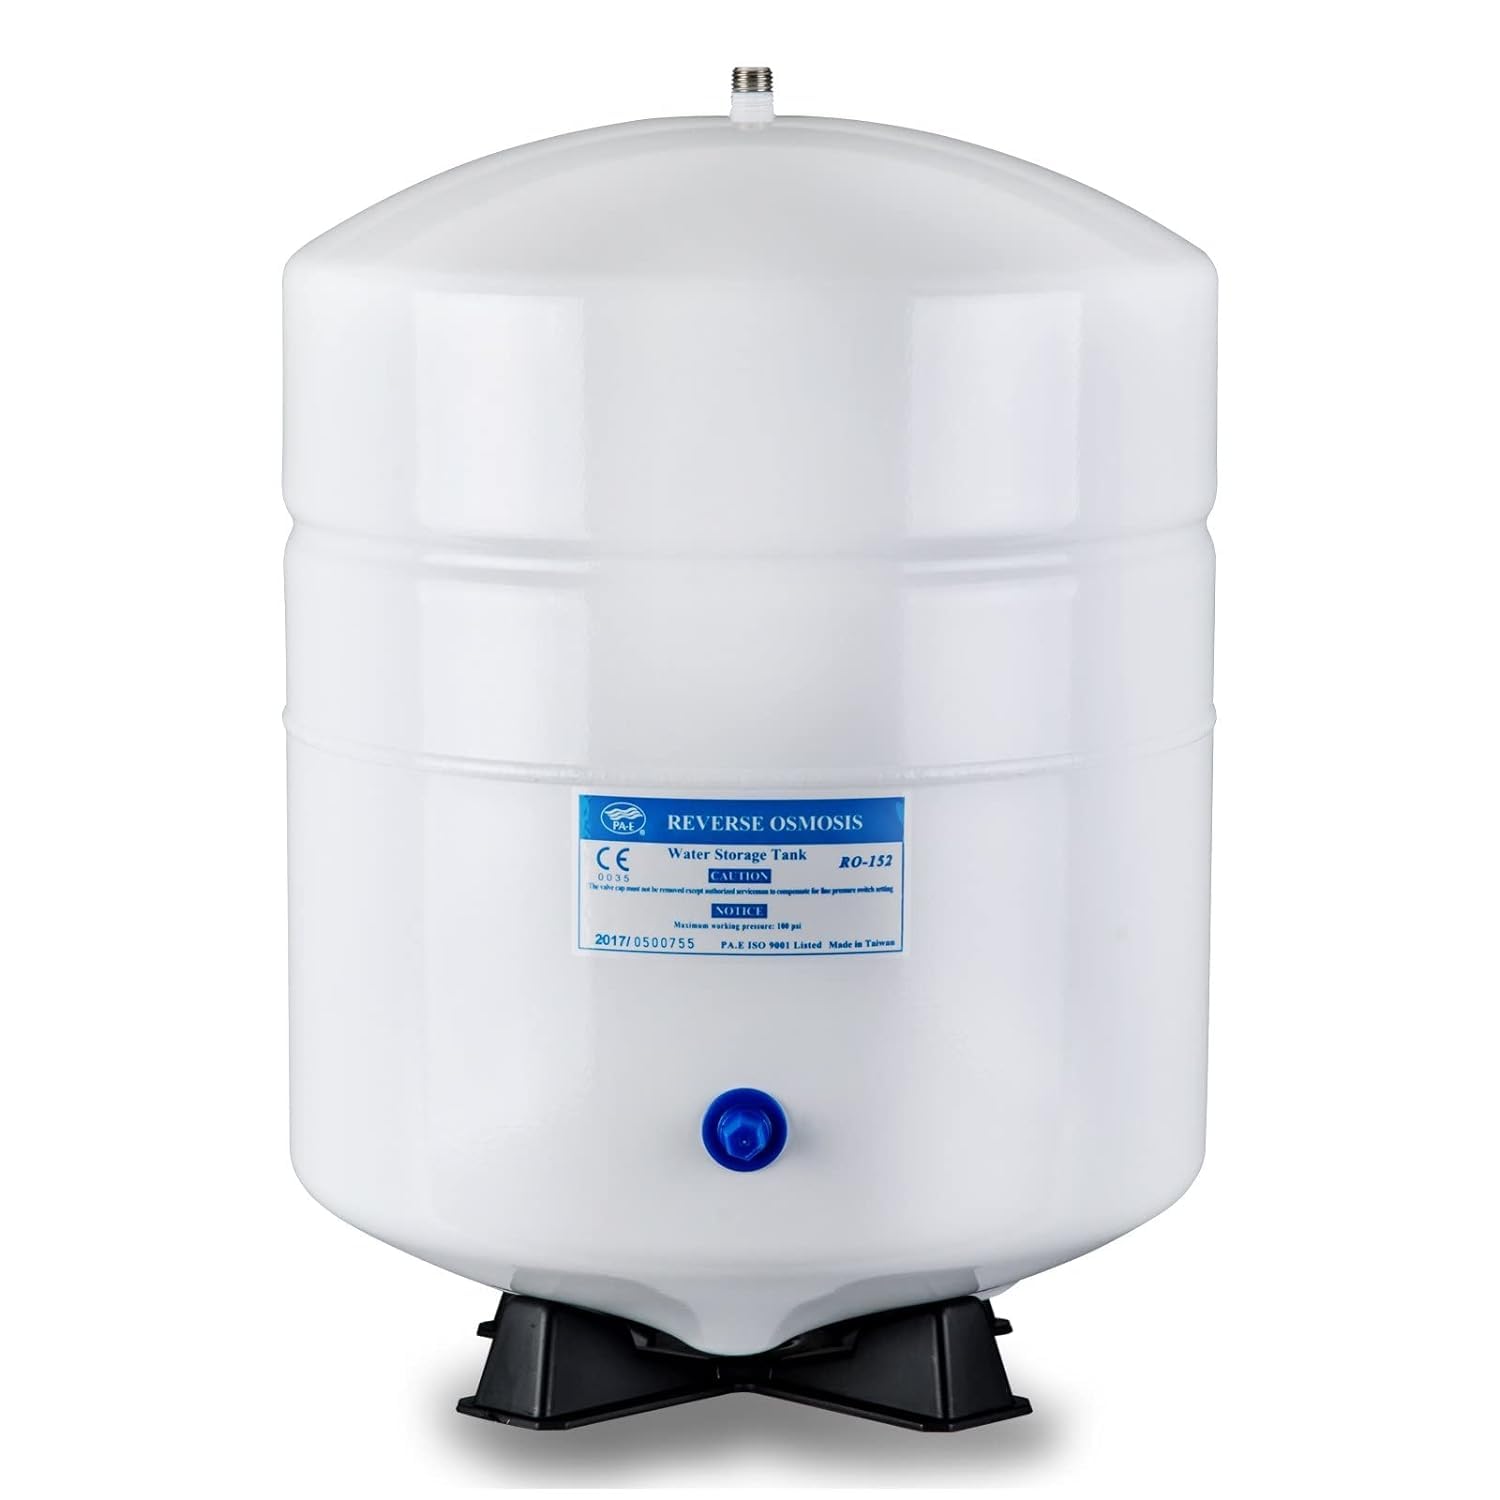
The iSpring T55M is a 5.5-gallon pre-pressurized water storage tank designed specifically for residential reverse osmosis systems. Featuring a food-grade butyl diaphragm and stainless steel valve, it delivers tasteless, odorless water with reliable pressure between 7-10 psi. Certified to NSF/ANSI standards, this tank supports efficient water discharge in any orientation and is compatible with most RO systems, making it a trusted upgrade for enhanced water capacity and system performance.


| ASIN | B01CES39N0 |
| Best Sellers Rank | #6,084 in Tools & Home Improvement ( See Top 100 in Tools & Home Improvement ) #14 in Under-Sink & Countertop Filtration |
| Brand | iSpring |
| Date First Available | March 1, 2016 |
| Global Trade Identification Number | 00662425080236 |
| Installation Type | Under Sink |
| Is Discontinued By Manufacturer | No |
| Item Weight | 8.63 pounds |
| Item model number | T55M |
| Lower Temperature Rating | 40 Degrees Fahrenheit |
| Manufacturer | iSpring Water Systems |
| Model Name | T55M 5.5 Gallon Residential |
| Package Information | Can |
| Product Dimensions | 17"L x 12"W x 12"H |
| Special Feature | NSF certified |
| Supported Water TDS Level Maximum (PPM) | 1000 |
| UPC | 662425080236 |
| Upper Temperature Rating | 100 Degrees Fahrenheit |
A**H
Great Tank, Great Customer Service
This is a large 20 gallon tank that holds roughly 14 gallons of clean water for a reverse osmosis system. As a disclaimer, this arrived dented for me, but Sean from iSpring's customer service was wonderful to work with, and he quickly sent a replacement tank that arrived in perfect condition. This has multiple connectors provided, and the connections are done at the BASE of this unit. This works best with 3/8" line. The top part of the tank is where the bladder is, and the water sits near the bottom. This arrives charged and almost ready to use. They recommend flushing this once filled to ensure it is clean. I HIGHLY you do that with tap water prior to using. This takes forever to fill with RO water, so tap is much faster. Enough connectors were provided that I was able to hook this up to a utility sink to fill and drain this several times before install. This works just as well as smaller tanks, but the pressure is maintained much longer with this size tank. Overall, I am very happy with the performance and value of this tank.
N**D
Excellent product!
Excellent quality and performance...improved my RO system's capacity and pressure dramatically! Easy to install and the process was very simple.
C**.
What oily residue? Simple fix, thoughts.
Edit 2: It's November 2023, 5 years later, still working A-OK. The espresso habit acquired last year now also demands tasty water, lol. Edit: 2.5 years and three sets of filters later, still no issues to report. I made a couple tweaks below. Read #1 - very important! This is a great filter for anyone who wants to leave the good minerals in your water and filter everything else out. The only better filtration is reverse osmosis, but it needs its own separate storage tank so the water is just room temperature, and it has a metallic taste and low water pressure = slow flow. After significant research we decided on this filter for all the reasons above. This fit the bill perfectly with a healthy four filtration stages, great flow and no RO! I had it running in a half an hour with simple inline connections to the 'fridge water line and it eliminated the pesticides and city water taste instantly. Important Notes: #1) This one tip might save you from expensive plumbing repairs down the line and is something you need to know before you install this unit. TEST YOUR WATER PRESSURE! This filter needs to be run at under 80 PSI. There are various $10 simple screw-on testers like the Watts IWTG that take seconds to use. I attached the tester to our backyard hose hook-up and discovered we were at 80 PSI. We then tested my in-laws' house and they were at 92 PSI. No big deal right? Well residental water pressure should be under 60 PSI, ideally 50 to prevent water hammer (banging pipes) and damage to copper plumbing pipes over time! After installing a water pressure regulator on the main water line in the basement ($100 from local hardware store and a couple hours' work) we immediately noticed the pipes wouldn't bang when we flushed a toilet, or when the clothes washer ran. Plus, the filter was now right in its sweet spot of 40-80 PSI. If your water pressure is over 60 PSI, at the very least add the iSpring APR40 to your purchase to reduce the pressure to this filter to 40 PSI and help protect it from damage. #2) As others have mentioned there is a slight oily sheen in the water upon first installation. The oil is there to help seal the cartridges. Simply run 15 gallons of water through the filter to purge it all out, really not a big deal, see images 2-3. Residue and cloudiness are common to nearly ALL water filters upon first installation and the 1-star complaints are indicative of inexperienced DIYers. #3) The included push-to-fit 1/4" water line couplers work on both Copper and PEX/plastic tubing as they are both relatively soft materials with the same outer diameter Water tastes like bottled now and we're extremely satisfied, plus no more pesticides. If I have any problems, you know where I'll be posting them!
J**O
Ispring cares about customer satisfaction
Update: As per my review below, I had some trouble installing due to instructions that were not really clear or suited to this particular product, which Ispring says is brand new. Since then they actually tracked me down and cared about what I had to say. According to them they are rewriting the instructions, not shipping with the funny dust caps, and considering additional parts to make the installation go smoother. I was impressed because in this day and age few companies actually seem to care about what their customers really think. I have come to the conclusion that this company does. And the filter system is now working fine, so don't hesitate to buy. I'm leaving my review below in case it takes a while to update the instructions. It might shave a few hours off someones install time. Changed to 5 stars. If you have any problems they will definitely help, and that is a really good thing. ================================================================ Just finished the installation. I'm a pretty handy monkey, but the installation took about 5 hours of my time (including 3 trips to the home improvement store and a some-what helpful phone call to ispring). First-off the manual is misleading and clearly written for another product or previous version of this product (or maybe a new-fangled sausage making machine). The parts of the manual that do apply to this product, like how to connect the little push-on connectors, suffer from an excess of brevity and lack of detail and conciseness. In an attempt to be helpful to future purchasers of this product, at least until ispring updates these kits and instructions, here's what I learned: First tip: the faucet included in my box does not require a 1/2 inch hole, as the instructions state, but a one inch hole. Actually one inch is too tight, make sure you have a 1 1/8 inch hole saw attachment for your drill, and make it a good bi-metal one if you need to cut through a stainless steel sink. Home depot sells rigid brand bits that suit this purpose. It will run you about $15 unless you already have a rigid brand bit shaft (or equivalent). Second tip: the faucet that came with my filter has three colored plastic hoses already permanently attached. Red, white and blue (I dig the patriotism). Unfortunately which gets attached where is not mentioned anywhere in the manual. In the manual it says to screw the water hose to the bottom of the faucet. Clearly referring to a different type of faucet. Also if the three hoses were just a little longer you would probably not need to bother adding extension hose (an extra leak risk). More on extension hoses later. The colors are mentioned in the Amazon description, way at the bottom, but it bears repeating. "Connect the BLUE tubing of 3-color tubings on the faucet to cold water line, RED to the 1st stage on the right, WHITE to the 3rd stage on the left." Note: This is #ssbackward if you are from an English speaking country ... just saying. Third tip: The filter box itself has funny little horn or funnel shaped things on the ends of the inlet (left) and output (right) angle connectors. These are not mentioned at all in the manual. You can not push the hoses on with these in place (you can try as I did ... if you get excited by frustration) because these are some weird sort of dust plugs. You must pull up with your fingernail on the very outer ring of the connector (pushing it on a spring ever so slightly towards the more bulbous part) then with other hand pull the horn thing out. You can discard these, or I found they make nice hats for very small garden gnomes. Basically you can connect the red and white hoses now by pushing them with force into the connector until they snap. Pull back a little to make sure it is connected. If you need to cut extension hose cut it straight, and use the supplied double-sided connectors. I recommend you push the little blue horseshoe shaped clips (supplied) between that outer part of the connector and the more bulbous part. These (I think?) are to make sure the connectors can't shoot apart from water pressure. No mention in manual about these. You can leave them off, as I did at first, if the under side of your sink needs a good spraying out. Fourth tip: In order to connect the blue hose to the cold water line you need to first install some parts. My sink had a 3/8 inch stainless steel hose with female compression fitting attached to a male 3/8 compression fitting shutoff valve coming out of the wall. Pretty typical I would assume. The kit comes with a 1/2 inch plumbing style thread, male to female connector, with a hole to thread the valve the blue hose goes onto, in the middle. A way to tap into your cold water line, would be eazy peezy if it was threaded for 3/8 compression fittings, but it's half inch and has coarser plumbing style threads. So off to the Home Depot you go. Don't forget another roll of Teflon tape to add to your Teflon tape collection while you are there. Actually the folks at the Home Depot weren't that helpful (surprised?), but the small local hardware store in my old town was. You will need, as it turns out (if your sink is like mine) a 1/2 inch plumbing style male to 3/8 inch compression male adapter to connect your current hose leading to your cold faucet to this new part (btw thread the little supplied valve the kit came with into this part with a little teflon tape first so you can get it good and tight before you are lying on your back under the sink). Then on the other end you will need another short stainless hose (only way I can find to do this with available parts ... why it took three trips) 1/2 inch plumbing female, which attaches to other end of this new part, 3/8 compression female which connects to the part your faucet hose used to be connected to. These parts should run less than $15. Tip five : To connect the blue hose to the metal valve from the previous section you need to put it against the nipple, screw off the nut collar and slide it down the hose temporarily, then push it on the nipple all the way, and man it's a tight little bugger (I sprayed the nipple with a little Pam cooking spray, hey it was in the kitchen), then put that nut collar back on and tighten it down real tight with a half inch wrench. Why these filters don't come with a 3/8 inch compression fittings on each side of the filter box, so you can just screw your standard hoses on that you can get from any hardware store, is beyond me. There must be a reason. Maybe these filters are designed by the same folks who design those charming "blister packs" that you need a chainsaw to open? When I tested the water it was cloudy and tasted a little funny, it got better after I ran the tap for a while. Now it tastes pretty darn good. Even my cat likes it. Hopefully it will not develop leaks.
A**S
My Experience with the iSpring CU-A4 Under Sink Water Filter I recently installed the iSpring CU-A4 under sink water filter, and I'm genuinely impressed. As someone who's always been a bit skeptical about the true efficacy of home water filtration systems, this unit has completely changed my perspective. First off, the installation was surprisingly straightforward. I'm no plumbing expert, but the clear instructions and well-organized components made the process relatively painless. Within an hour or so, I had fresh, filtered water flowing from my dedicated faucet. And what a difference it makes! The most noticeable improvement is in the taste and smell of the water. Our tap water, while generally safe, often had a slight chlorine odor and a somewhat metallic aftertaste. With the iSpring CU-A4, that's completely gone. The water is crisp, clean, and incredibly refreshing. It's truly a pleasure to drink, and I find myself reaching for water more often throughout the day. Even my coffee and tea taste noticeably better. I also appreciate the compact design of the unit. It fits neatly under my sink without taking up an excessive amount of valuable cabinet space, which is a huge plus in smaller kitchens. The dedicated faucet is sleek and unobtrusive, blending well with my existing fixtures. While I can't scientifically measure the contaminant reduction, the peace of mind knowing that my family is drinking water filtered through a reputable system is invaluable. The four-stage filtration process, including activated carbon and ultrafiltration, gives me confidence that we're significantly reducing chlorine, sediment, and other common impurities. In conclusion, the iSpring CU-A4 under sink water filter is an excellent investment for anyone looking to improve the quality of their drinking water. It's easy to install, produces great-tasting water, and offers genuine peace of mind. Highly recommended!
A**E
Top Qualität Anlage funktioniert einwandfrei
J**Y
I use this product to filter water for our production process as well as for drinking. I did need some hoses the larger tank did not come with so I called up Richard and he was able to help me out with some complementary hoses. I was up and running within a week!!
A**ー
投稿が遅くなりました。 もう何年長い間利用していても、特に問題なく利用しています。 もちろん、水の出方が弱くなった時は、空気を入れるなどのメンテナンスは必要です。フィルターを替えるタイミングで、メンテナンスをするくらいです。
J**O
Un tanque de buena calidad y de buen precio, por su tamaño ya no ne he quedado sin agua potable cuando tengo invitados en casa ni cuando los filtros estan cerca de su vida util.
Trustpilot
1 month ago
2 weeks ago