
DOWNLOAD THE APP


Customer Services
Copyright © 2025 Desertcart Holdings Limited
DOWNLOAD THE APP

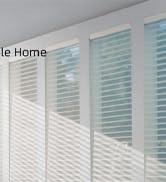
🪟 Elevate your space with smart shades — because your windows deserve a glow-up!
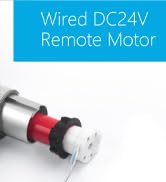
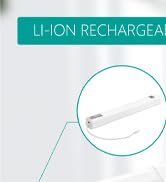
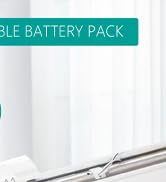
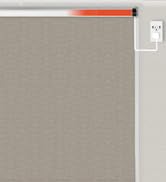
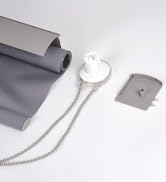
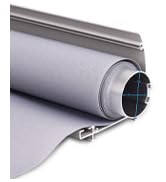
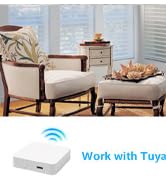
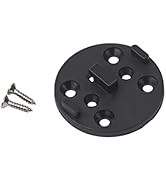
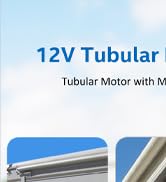
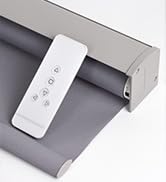
The Rollerhouse Rechargeable Wireless Tubular Roller Shade Motor Kit is a sleek, battery-powered upgrade for 1.5 inch roller shades, enabling effortless motorization with wireless remote control. Featuring easy installation, sunrise/sunset automation, and compatibility with popular smart home systems, it transforms traditional blinds into a modern, voice-controlled luxury. Perfect for professionals seeking seamless home automation without rewiring or bulky hardware.


| ASIN | B074TKQ8DJ |
| Batteries | 1 Lithium Ion batteries required. |
| Batteries required | Yes |
| Best Sellers Rank | #226,735 in Home & Kitchen ( See Top 100 in Home & Kitchen ) #1,364 in Window Treatment Hardware |
| Brand | Rollerhouse |
| Closure Type | Motorized |
| Color | Red |
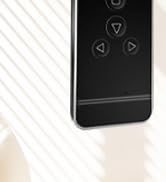
| Control Type | Shade movement control |
| Customer Reviews | 4.2 4.2 out of 5 stars (419) |
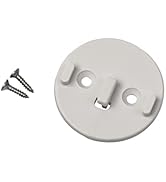
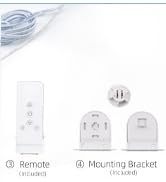
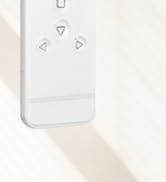
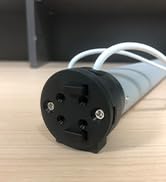
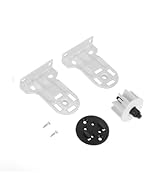
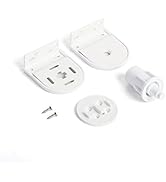
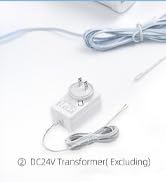
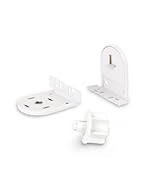
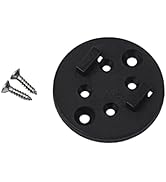
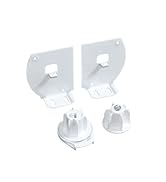
| Included Components | 2x 38mm rubber fittings, 8.4V plug charger, Install Instruction, Remote, Roller shade motor |
| Is Discontinued By Manufacturer | No |
| Item Weight | 1.61 pounds |
| Item model number | ERB25-1.1/28 |
| Manufacturer | Rollerhouse |
| Material | Metal, Plastic |
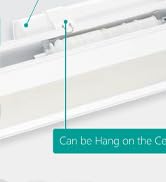
| Mounting Type | Inside Mount, Outside Mount |
| Number of Items | 1 |
| Number of pieces | 1 |
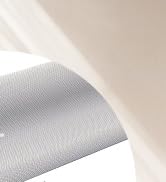
| Opacity | Blackout |
| Operation Mode | Electric,Rechargeable |
| Pattern | Solid |
| Product Care Instructions | Spot Clean Only |
| Product Dimensions | 16"L x 1"W |
| Recommended Uses For Product | Inside Mount and outside mount |
| Room Type | Home Office |
| Shape | Rectangular |
| Size | 1"W x 16"H |
| Specific Uses For Product | Motor to motorize existing blinds shades |
| Style | 38mm(1.5") Shade Tube |
| UPC | 612289935586 |
| Water Resistance Level | Not Water Resistant |
J**O
Easy Install. Great Find
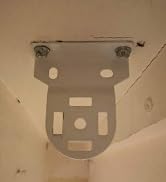
I was a bit apprehensive buying this given the varying degrees of difficulty people had reported. My experience was surprisingly simple. I was ready for cutting, grinding, and fabricated yet didn’t need to do any of that — the motor fit perfectly inside my tube, and the extra bracket assembly kit had an end plate fit perfectly on my existing brackets. I was able to take down my roller blind, insert the motor pulse end plate, and had it reinstalled in ten minutes. Here’s what I did 1. Carefully measured my tube. It was 38mm 2. Confirmed with seller the right motor to buy given my tube diameter and the metal tabs on the tube 3. Bought the motor kit AND the mounting accessory kit. The accessory kit was mandatory for me to have the right end cap that would work with my existing brackets. 4. Charged the motor battery 5. Removed metal valence and popped out my roller blind. One end of my blind is a push pin and the other was the chain drive 6. I pulled the chain drive out of the tube. Took a little force but it popped out 7. I inserted the motor into the tube, rotating the motor so the rubber piece on the end aligned with my tabs on the tube. The motor slid in 8. I made sure the charge port was facing down for easy access 9. I found the end cap in the accessory kit. The black end cap whichworked with my existing brackets. 10. I screwed the end cap in with the two screws. Many said the screws were too long. I didn’t find that to be the case 11. I put the roller blind back into the brackets. The push pin allowed me to get the blind into the space while i worked on getting the end cap hooked onto my bracket. 12, I tucked the antenna wire around back of the blind so it didn’t get clipped by the valence. 13. Made sure the power port and remot program were facing down where I could access them 14. I pressed the program button on the motor. It jogged twice. and then the c button on the remote. Roller and remote were now paired. And I could raise and lower 15. I realized the motor direction was going the wrong way with remote. Pressing up caused roller to go down. Followed the instruction to reverse the motor direction. I held the limit button and stop button which reversed direction. Now remote worked correctly 16. Programmed upper and lower limits per the directions 17. Everything working flawlessly My test case worked and I ordered six more. Will update when done with the project. But so far…a big success and huge improvement to having the chain drive for so many rollers Edit: I ordered six additional motors and installed each. I did not run into any problems. Followed the sequence from above and all seven motors are programmed and working I also purchased the 15 channel remote and linked each motor to the single remote. I can now control all seven from one remote with each window being on its own channel Next I purchased a BroadLink rm4 pro to connect the motors to an iPhone. I configured the BroadLink and added each shade to my hub. Bin each case, I went through the process of having the BroadLink learn the remote codes. And ultimately programmed open, close, and stop buttons. Now I can control each motor with my iPhone through BroadLink. I subsequently linked groups of shades to a BroadLink scene allowing me to control multiple windows at once. Even cooler was BroadLink allowing me to pair with Siri. Now I can say open living room shades and a block of four shades opens. Couldn’t be happier with the outcome. Have another five kitchen windows that I would like to automate in my next round. And my project will be complete.
M**K
Works on Smith and Noble Roller Shades
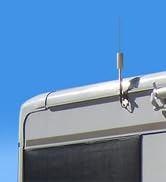
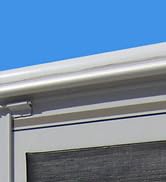
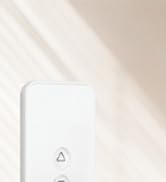
TL;DR: I don't regret the purchase. It works like a charm. You'll just have to struggle with the creatively-worded instructions. I wanted to motorize two Smith and Noble roller shades (each about five feet wide and four feet tall), but I only bought one Rollerhouse (AKA Rollerhouses) motor assembly to try out. It works beautifully, and I just ordered a second one. It took me over an hour to figure out the charming pidgin-English instructions and to manhandle my existing shade to remove both ends of the tube (without completely ruining the shade material). I suspect the second one will only take me about 20 minutes to install. To determine the correct size before ordering, I removed the chain end from one roller shade tube. I measured the tube diameter, but I also noticed that Smith and Noble prints the size on the end piece. Mine said "25mm," so that's what I ordered. When I first tried to put the motor tube inside my shade tube, it wouldn't fit, and I thought I'd ordered the wrong size. But it turned out that the company had pre-fitted it with adapters for a larger tube. They provide the correct "crown and drive adapters" needed, and it only took me another 15 minutes to figure out how to get the larger ones off! The instructions for setting up the remote are clear, but the diagram does not quite match the remote they sent. In order to both pair the remote with the motor and set bottom and upper limits, you'll need to remove the remote's battery cover and access two small buttons found inside, marked C (for confirm) and L (for limit). One review suggested a battery was not included, but mine had a new CR2450 in the box. What is NOT included are the four screws that will attach the brackets. So don't throw your existing ones away! The recharging cord looks very short in some of the promotional illustrations, but it's actually about five feet long. In any case, it's very easy to just remove the shade if you need to move it near a power outlet when it needs recharging. The instructions say that it takes 5-6 hours to charge. It seems to have been mostly charged before going into the box, so you won't need to wait half a day before installing it. The limit settings work well, so, after pressing the up or down arrows on the remote once, it will stop exactly where you want it to. It's perfectly fast enough for me. And it's pretty quiet. Cat Owners Alert: The motor end-piece has a four-inch-long wire antenna that protrudes horizontally and is semi-visible when the shade is open. That means cats will spot it immediately and try to play with it (just prior to destroying it and making your Rollerhouse--AKA Rollerhouses--useless). My temporary solution was to use some painter's tape to attach the wire to the wall. So far, the cats are none the wiser. But we'll see. They're pretty clever.
M**.
Es justo lo que quería para no tener que depender de la cadena y, además, poder integrarlo en mi controlador para poder programarlo. Estoy muy contenta.
V**.
dans le temps et exactement comme décrit
F**O
Tuve de inicio problemas para configurar los limites de la persiana, pero una vez que lo logre, me gusto mucho y ya compre otras 3
C**N
Je voulais motoriser mes stores enrouleurs et après avoir longuement regardé mes différentes options en terme de difficulté de mise en oeuvre et de qualité/prix, j'ai finalement choisi Rollerhouse. Lors de ma première commande, ils ont immédiatement pris contact avec moi afin de s'assurer que le moteur tubulaire était compatible avec mon installation, puis m'ont envoyé le colis. Le moteur a été très facilement installé, sur un store légèrement plus grand que la recommandation. Et depuis +- un mois, tout fonctionne à merveille, du coup j'en ai recommandé un second :)! Bref très bon produit, je recommande..
V**O
Ho dovuto adattarlo perchè il tubo della mia tenda non era da 38mm ma da 25 e il motore non poteva entrarci. Avevo quindi chiesto la restituzione. Il venditore mi ha dato alcuni spunti per provare a usare il prodotto e devo dire che mi è stato utile, ora la tenda è automatica. PS: le procedure di inversione dei comandi (alto/basso) e di set del minimo non sono proprio intuitive... dovrò tornarci sopra o tenermi la tenda in manuale.
Trustpilot
1 day ago
3 days ago