🌟 Peel, stick, and wow—your space just got an instant upgrade!
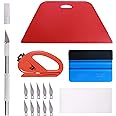
Decotalk's Walnut Wood Grain Contact Paper offers a 12" x 120" self-adhesive vinyl wrap that covers 10 sq.ft. Designed with a thick, matte finish, it is waterproof, stain resistant, and easy to clean. The peel-and-stick design features a bubble-free application with a pre-printed grid for precise cutting, making it perfect for countertops, cabinets, and various DIY home decor projects.


| Material | Vinyl |
| Color | Brown |
| Brand | Decotalk |
| Style | Wood Wallpaper |
| Product Dimensions | 120"L x 12"W |
| Coverage | 10 sq.ft |
| Pattern match | Random Match |
| Theme | Wood (Walnut) |
| Is Stain Resistant | Yes |
| Pattern | Wood Grain |
| Manufacturer | Decotalk |
| Special Feature | Waterproof, Removable, peel and stick |
| UPC | 016071778946 |
| Installation Type | Self-Adhesive |
| Global Trade Identification Number | 00016071778946 |
| Item Weight | 11.3 ounces |
| Item model number | contact paper peel and stick |
| Size | 12" x 120" |
| Finish | Matte |
| Thickness | 0.02 Inches |
| Item Package Quantity | 1 |
| Number Of Pieces | 1 |
| Measurement System | English/Standard |
| Special Features | Waterproof, Removable, peel and stick |
| Usage | Wood Wallpaper Peel and Stick |
| Batteries Included? | No |
| Batteries Required? | No |
S**E
Looks like wood 👍🏼
Used it on an ikea tabletop & looks amazing
A**R
The transformation was amazing!
This is amazing! What a transformation of our table! This table is 18 yrs old , it has seen better days. We are not ready to buy new since we have a very active toddler that will likely make more messes… so we decided to give this a chance. It was so easy to lay. It was a two person job. One to smooth, one to pull the backing. We had to over lay, but it looks seamless. So happy with the finished product!
R**S
Gorgeous!!!
The media could not be loaded. I was t sure about this product but boy did it transform my countertops. I love it.
G**K
Go for it!
I have to admit that after a month, it is holding up well! I have rounded edges on my counters and this was a beast that I could not master. I ended up ordering a flat walnut veneer to cover that edge. I also added Gorilla Tape underneath to hold it. It will stretch if you don't take it slow and get the bubbles out and bubbles will appear days later defying all logic but a pin and rub did the job. I also used the soft side smoother that I ordered here. These are necessary to not cause any stretching issues to rub out those stubborn bubbles. Will it last forever? Nope. Will it last a year? I hope so. It is very thick and I liked it better than the DC stuff. Walnut color is beautiful and made such a difference in the look and feel of my kitchen after living with fake black marble laminate countertops that I hated with every bone in my body. Super sticky, the extra width was a life-saver. It took me all day to complete and I have an average sized kitchen but I took my time, learned some lessons (wet method!) and am happy with the outcome!
G**R
Easy to apply. Sticks well. Looks authentic.
...impressed. this started as a little lunch time/boredom project. This was an all white/gloss lacquer TV cabinet. Always a bit boring. All dust and any speck of dirt shows immediately. Found this on Amazon and wanted to give it a try.Really impressed. I started with the top part. Almost carelessly put it in place and gentle pushed it to the board right to left and back to front. Shockingly easy. Did have some bubbles in the end but decided to use a small sewing needle to poke a tiny hole into the large bubbles, which worked well. It looked so good that I did the sides, too, and had enough left to cover the visible part of the inside, as well.I used an old member ship (like a credit card card. Gentle pushes from the center of the vinyl out to the edges/sides...one side, then the other, and down the center...the backing of the sticky side rolled or nicely...Some reviews noted this rolls up, and it does. I didn't have any issues working while it curled. And if you cut it, put a phone or tablet or some weight on it and you'll be fine.By the third side I was a pro haha so test out what works best for you on the most inconspicuous side and go from there.Definitely keeping this in mind for future projects.The one thing I noticed is that you are best of with about 1/2 inch overlap, i.e. in my case under the top board of the cabinet. Less does seem to not stick consistently. Granted, the instructions say to use a hairdryer for these 90° edges but I only own a heat gun.Def recommended.
K**B
Surprisingly nice
I used this to wrap some old yellowing closet shelves and it really looks nice, applied easily, and seems really durable.
B**N
Worst product I have ever used.
Way too sticky. Ripped paint right off. Super hard to work with because it’s so sticky. Once you put it on it warps if you need to try to reposition it. I have worked with many types of contact paper/wallpaper and vinyl. This is by far the worst.
T**Y
looks fantastic
Still need to do alot of work on this stair case going to the basement but this looks amazing. So my steps are original to my 1967 home. The wood had about 7 layers of paint on them. While I tried to strip them down to the original wood grain, it was nearly impossible. So I removed what I could and sanded forever to get them smooth that to was impossible with all the chips and nicks etc. So I bought this wood sticky paper and OMG what a difference. I did just the top of the steps, leaving the base to put white there (haven't done that yet) I actually needed two rolls of this because I have 12 steps. This stuff okay, I didn't have the best smooth surface so I had to use additional adhesive. If you have a smooth clean surface it would stick alot better without the adhesive. I put these rugs on there because of the cats and I the surface I am dealing with wasn't smooth and so I had to prevent it from getting a hole or tearing. I am very happy with the result so far, once I get the other part white and paint the stairwell it will be a very nice entry way to the basement.
Trustpilot
2 weeks ago
5 days ago