
SGPC K70 (K77 V2) ITX Computer Case Aluminum ITX A4 Small PC Case Tempered Glass Side Panel (Silver)
Product ID: 302637948
Desertcart purchases this item on your behalf and handles shipping, customs, and support to Hungary.
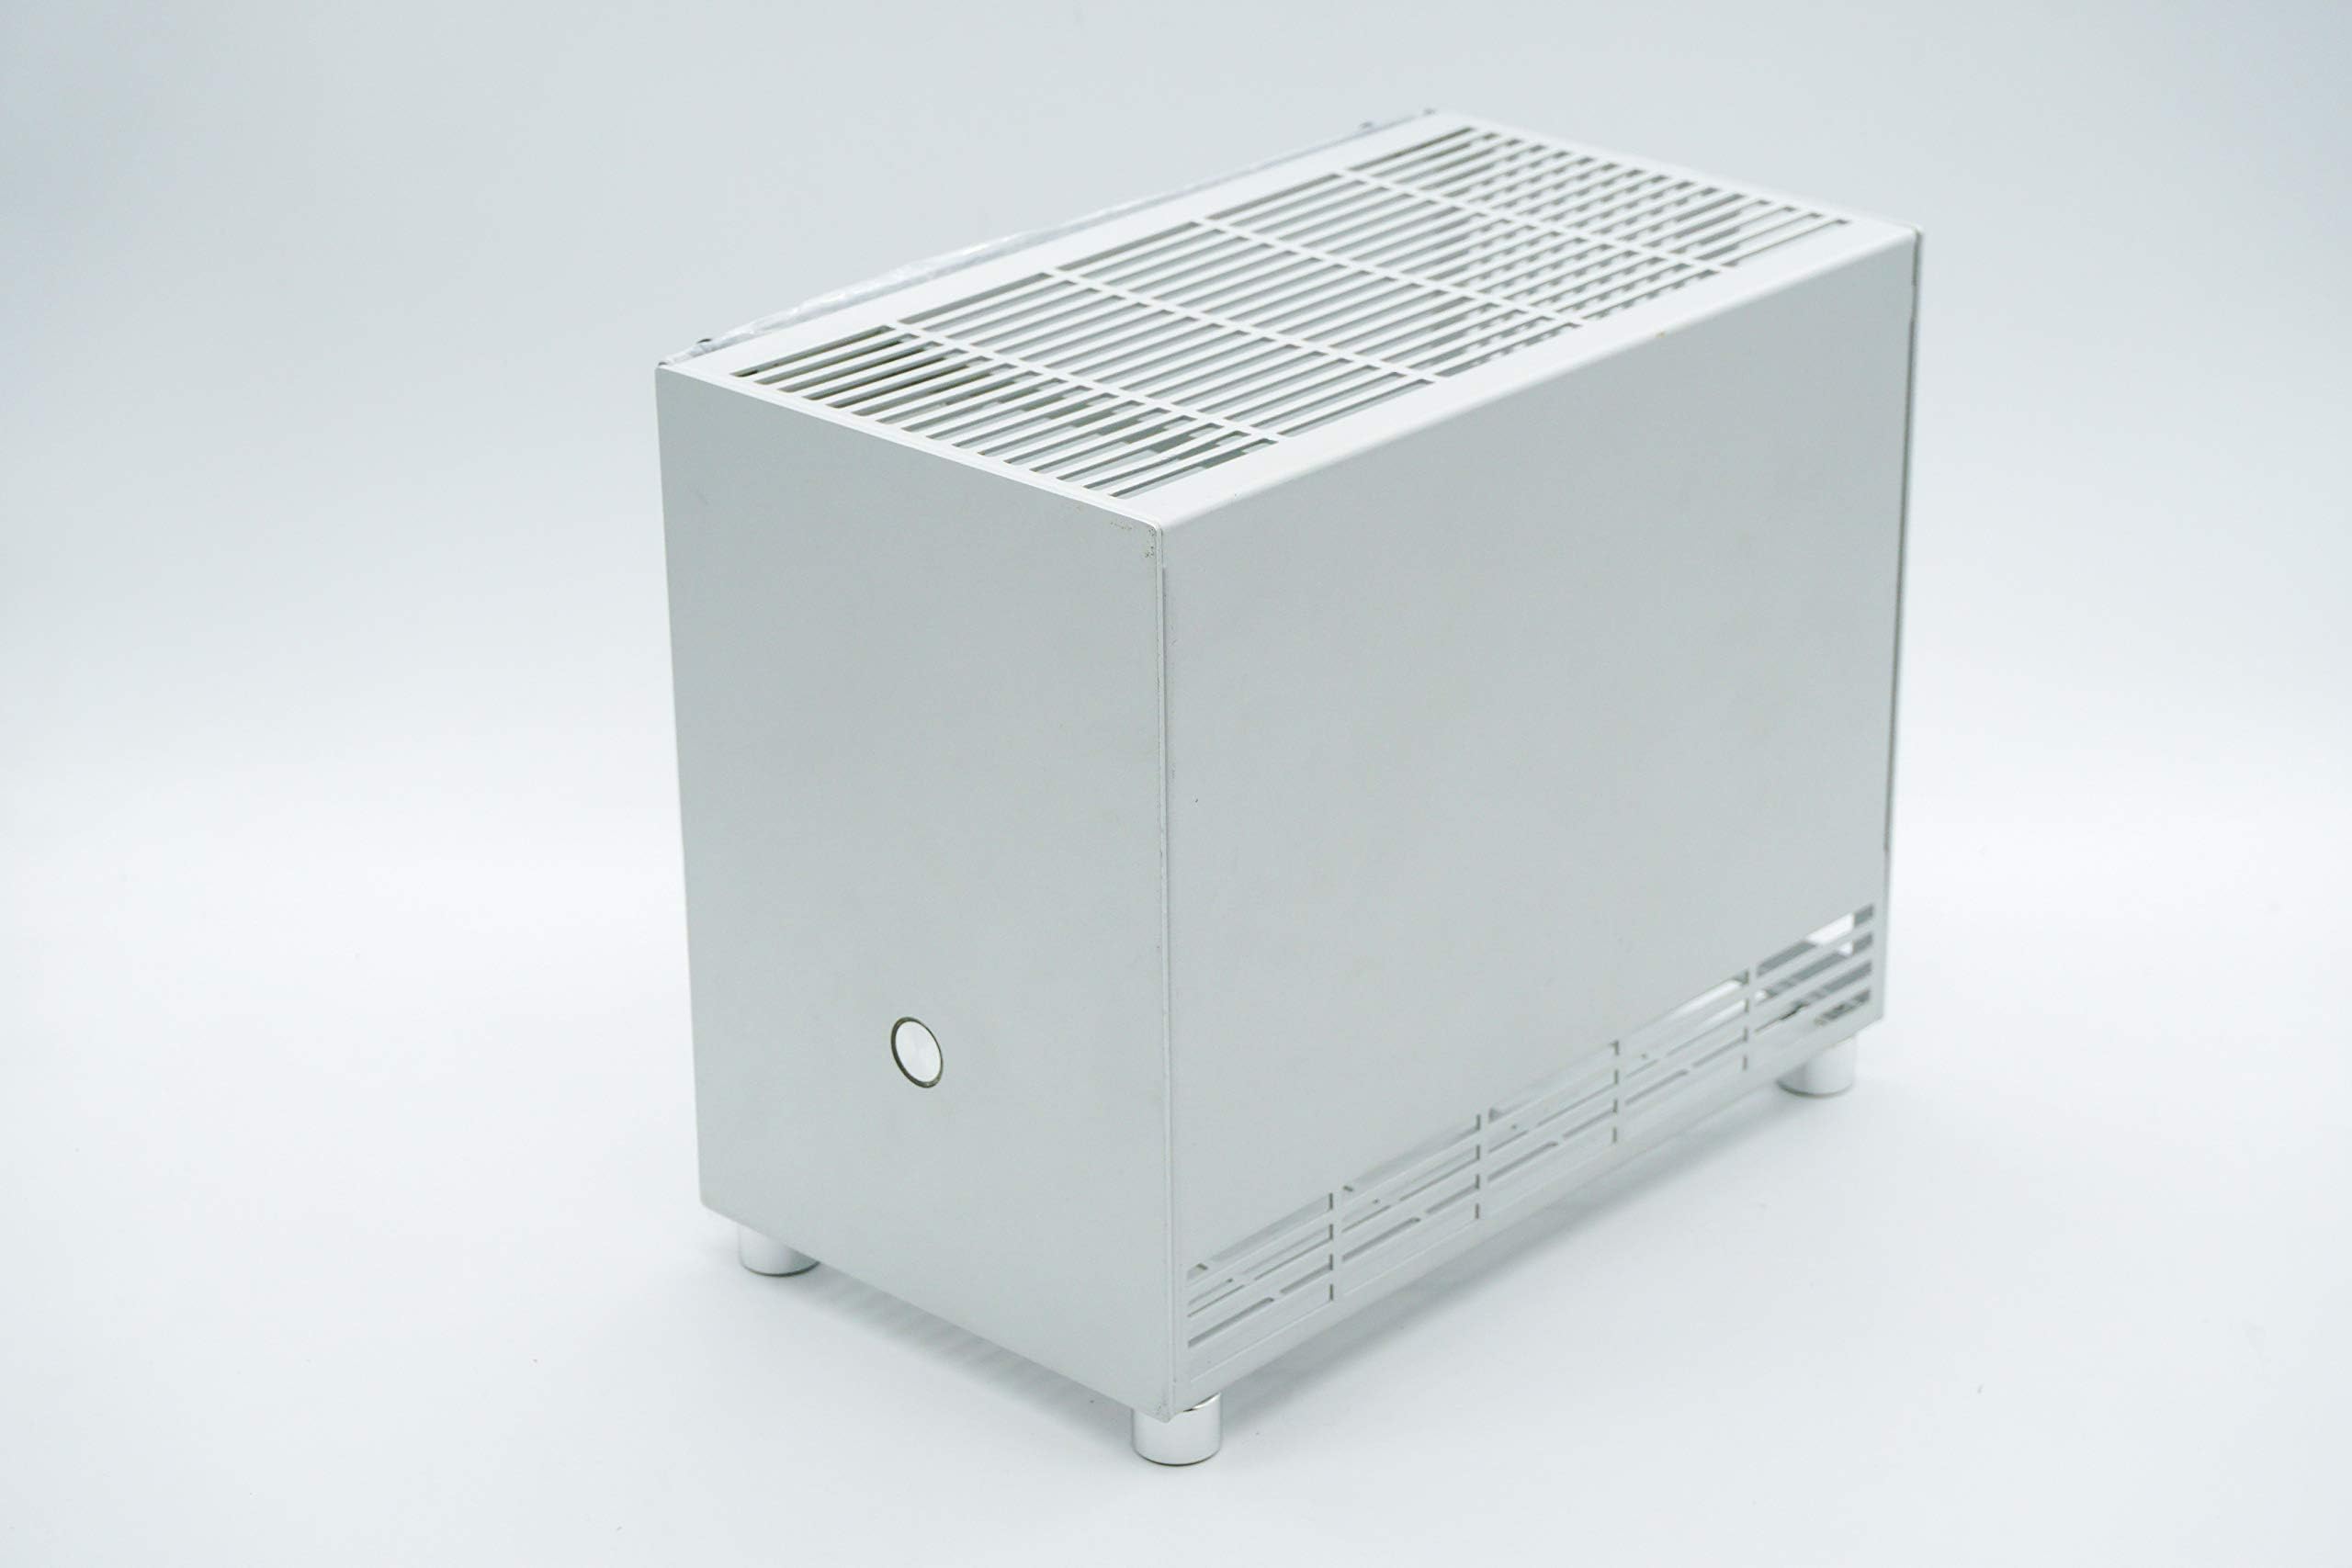
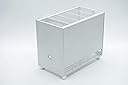
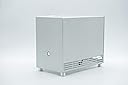
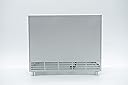
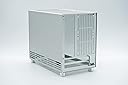
Color:Silver SPECs ◆Model:K70 ◆Cooling method: air cooling ◆Power position: upper ◆Dimensions: 21*27*15cm, volume 8.5L ◆Material: Magnesium aluminum alloy 1.5-2.0mm + tempered glass 3mm ◆Top performance: support i9 10700k + RTX3070 SYSTEM REQUIREMENT ◆Graphics card: Length<27cm, thikness<50mm (Standard 2 slot is fine), height<138mm ◆Motherboard: ITX, 17x17cm ◆CPU heat sink: height<13.5cm , ◆Power supply: Standard SFX power supply ◆HDD: 2.5" * 3, unlimited thickness, attach to the power supply ◆Memory: unlimited height ◆Chassis fan: Recommend to install 8025*2 chassis fans at the rear side◆pre-installed IO plate support: No
S**R
Pretty solid A4 form factor case, know that you are paying $100 for a $30 case
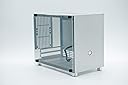
TL;DR: It's a great A4 form factor ITX case if you are looking for a cheaper option to downsize, but keep in mind you are buying a $30 case for $100. It is a niche product for a small market so the bulk of the costs are going towards the premium of a small volume product and paying for shipping/import taxes to get the case from China.The name of the case is a bit confusing. On SGPC's listings, the K77 and K70 are completely different cases. From what I can tell, this case is a K70 case based on the pictures on TaoBao and Superbuy (don't use CaseEnd as a reference as it appears to be outdated photo wise). There is a power button in the front, the C14 female connector for the power cord is on the bottom right of the case near the front.Build quality wise, the case is definitely a $30 case. The fit and finish isn't superb but it looks great from medium distance. The paint doesn't look spectacular under harsh lighting, the finish for it isn't great especially near the ventilation cutouts and edges. The panels aren't completely flush. The power button feels cheap, pressing the power button pushes the entire button back including the plastic LED ring which exposes the inside of the case (I expected something like an elevator button where the center button piece pushes down but the led ring stays in place). The drive activity indicator is a red LED on the ring itself, but is basically not visible due the brightness of the white LED.My biggest issue with the case is the included power cord (and why I retracted a star). There is a power cord included but it is a type I plug for China. While there is an adapter included, it is a less than ideal solution (the plug I form factor is very bulky) and most folks probably wouldn't want to keep their expensive computer powered through essentially a travel adapter. I ended up spending an additional 40 dollars attempting to a find solution until I settled for a compromise I was willing to accept. First thing to note is that you want to find a low profile LEFT-ANGLE power cord as a left angle cable will point the wire towards the back of the case. In hindsight, you could probably unscrew the C14 port on the bottom of the case to flip it. In short, my solution is a extension cable with the model 120-C13RAS-60/075 (I found one from Aliexpress for $8.12 for the left angle variant). Unfortunately it does require connecting to a regular power cord but on the bright side, the extension cord's C13 connector clearance is basically the exact height limit for the power cord. The power cord needs to be under 35mm; this is very difficult to achieve via Amazon (I bought two different cables claiming to be low profile and both arrived with a clearance of over 40mm). I tried alternatives such as clear rubber feet to raise the case (the feet diameter is approximately 20mm) but it only made the case look cheaper.Note that I would not suggest the hardware I used for my build, I definitely bit off more than I could chew, but hey it looks alright. The biggest challenge with working with such a small case is (obviously) the lack of space. All the cables are too long and my hands were scuffed from banging anything and everything while trying to piece everything together. I strongly recommend taking your time with the build and researching the hardware you buy to make sure it fits before committing. I had been planning an A4 ITX build since I first saw the Dan A4 ITX case years ago but could never justify dropping 200-300 dollars on a case. Now that the K70 exists, I decided to give it a shot.I downsized from a Fractal Nano Define S (26.8L to this 9.54L K70); this was a transplant build so I was essentially trying to fit hardware from a build with a larger case.Specs:- Ryzen 5800X @ Stock, cooled by be quiet! Dark Rock TF- MSI B450i ITX Gaming PLUS AC AM4 Motherboard- G.SKILL RipJaws (2x16) 32GB DDR4 @ 3200- EVGA RTX 2070 Black- 2 x Samsung 860 Evo (1TB, 500GB)- 1 x ADATA SU800 (1TB)- Samsung 960 NVME 500GB- EVGA SuperNova 650GM (650W/80Plus Gold)- airgoo NEON RGB LED Strips (looks cool--but I don't recommend)- 2x Noctua NF-R8 80mm (doesn't fit internally)- CableMod CM-EV2-CKIT-KKW-R; (note that the stock cables with the 650GM are shorter! These are purely aesthetic, but do bend a little bit easier)I was actually planning to shove a 5900X in there but I was impatient. Given the 5800X temps, I'm glad I didn't (it regularly hits a toasty 88~ C on Cinebench).Size considerations:I was able to fit 4 SSDs originally: you can fit up to three stacked SSDs to the side of the PSU (this is what I currently have). I was able to fit the fourth by cramming it in between the PSU and the front of the case, but it was unsightly from cable management standpoint and I wasn't comfortable having the SSD squeezed tightly for the long term so I settled for 3 SSDs.The two biggest limitations are the GPU length (270mm) and the CPU cooler height restriction (135mm). I went with the be quiet! Dark Rock TF and a existing 2070 from a prior build (pre-pandemic luckily). My EVGA 2070 has a clearance of 267mm so it was a non-issue.While the case can fit a be quiet! Dark Rock TF, I do recommend against it; it was the largest challenge for the build. The cooler itself requires securing/fastening the screw from the bottom of the motherboard which means you pretty much need to have everything connected and installed on the motherboard prior to dropping it into the case (fan headers/ power pins connected, ram installed--everything), especially since the cooler basically covers the entire motherboard. Should I need to adjust the cooler, I will need to remove the entire motherboard (and cables basically) since the case does not have a removable rear side panel to access the motherboard from the back. Not only that, given the height clearance of my ram (about 1.5 inches with the G.SKILL RipJaws) only one orientation for the Dark Rock TF would install on my motherboard. This inadvertently resulted in a lack of clearance for installing the Noctua NF-R8's. I got around this by installing the fans on the outside of the case, which is less than ideal. Due to the footprint of the Dark Rock TF, I wasn't able to install the top left screw for the motherboard. The Dark rock TF fan has about half a centimeter of clearance from the glass panel.Airflow: There's a decent amount of ventilation: holes for two 80mm fans in the back with a bizarre (40mm x 45mm) square hole in between the PCI-E mounting brackets and glass panel, the top of the case is ventilated (cutouts with black perforated grille), cutouts on the bottom, cut outs on bottom right side of the case. Essentially the entire case is ventilated from all sides except the front.Dimensions (approximations based on eyeballing and measuring tape):L x W X H:277mm x 158mm x 218mm (without legs)277mm x 158mm x 232mm (with legs)Given the dimensions, this is a 9.54 L case.Included accessories:- 3 port USB 2.0 hub (I suggest picking up the Anker 4-Port USB 3.0 Unibody Aluminum White for color consistency)- Low profile power cable but has a Type I plug (used in China); the stock cable C14 connector has a clearance of approximately 1 (1/8)'' or 29mm- Power Adapter: Type I to Type A (USA)- Couple of Zip Ties- Magnetic Strips (I'm assuming for attaching SSDs to the Power Supply)- Motherboard Standoffs (I didn't use these, It seems like there isn't enough clearance to use them)- Various screwsOther thoughts:- Note that aluminum case itself isn't magnetic so you won't be able to use the magnetic strips on anything else besides the metal sides of your power supply.- Side window is actual glass and not acrylic which is a nice touch- I felt that the top and bottom aluminum sides being visible behind the glass side panel looked a bit jarring. I adjusted the look by covering it with black washi tape. Looks a bit cleaner IMO.- There's quiet a bit of unused space between the gpu and the right side of the case due to the plug layout as seen in one of my pictures.Overall despite the negatives/oddities of the case, I very much like it given how much cheaper it is than the alternatives. Appearance wise, I would have preferred to have ventilation holes as perforated circular holes rather than the long rectangular cutouts on the case (I'm assuming this was by design to reduce costs for production).
S**V
Smol case
Good little case. Easy to damage/scratch and a little hard to build in, but that's par the course for some of these tiny cases. It looks great once built up!One side note is that the power cord exits on the bottom and you'll basically be stuck using the included one for the low profile 90° plug. It's fine though.
Trustpilot
3 weeks ago
2 weeks ago