
Desert Online General Trading LLC
Dubai, United Arab Emirates
Desert Online General Trading LLC
Dubai, United Arab Emirates


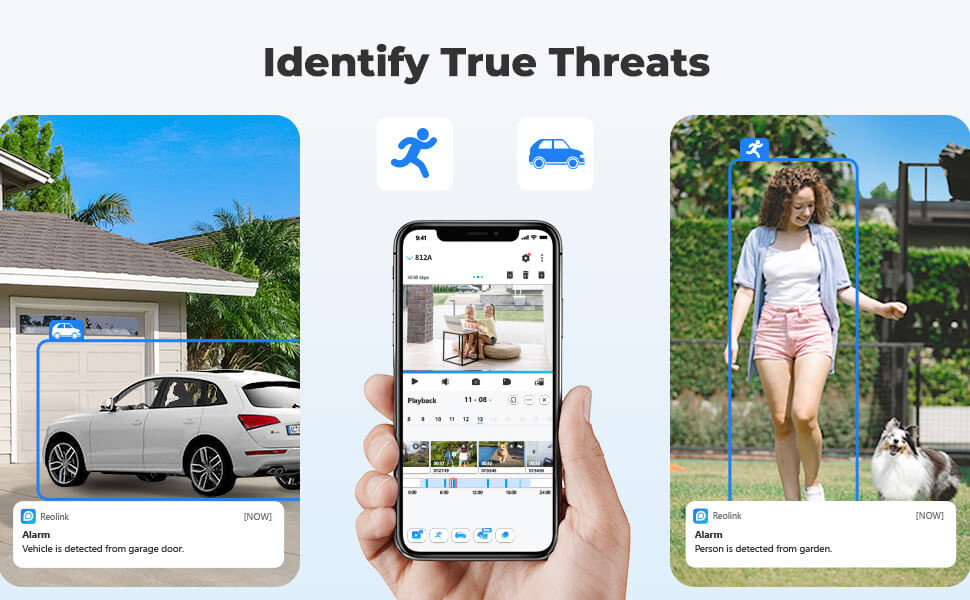
🔒 See everything, miss nothing — security that’s as smart as you are.
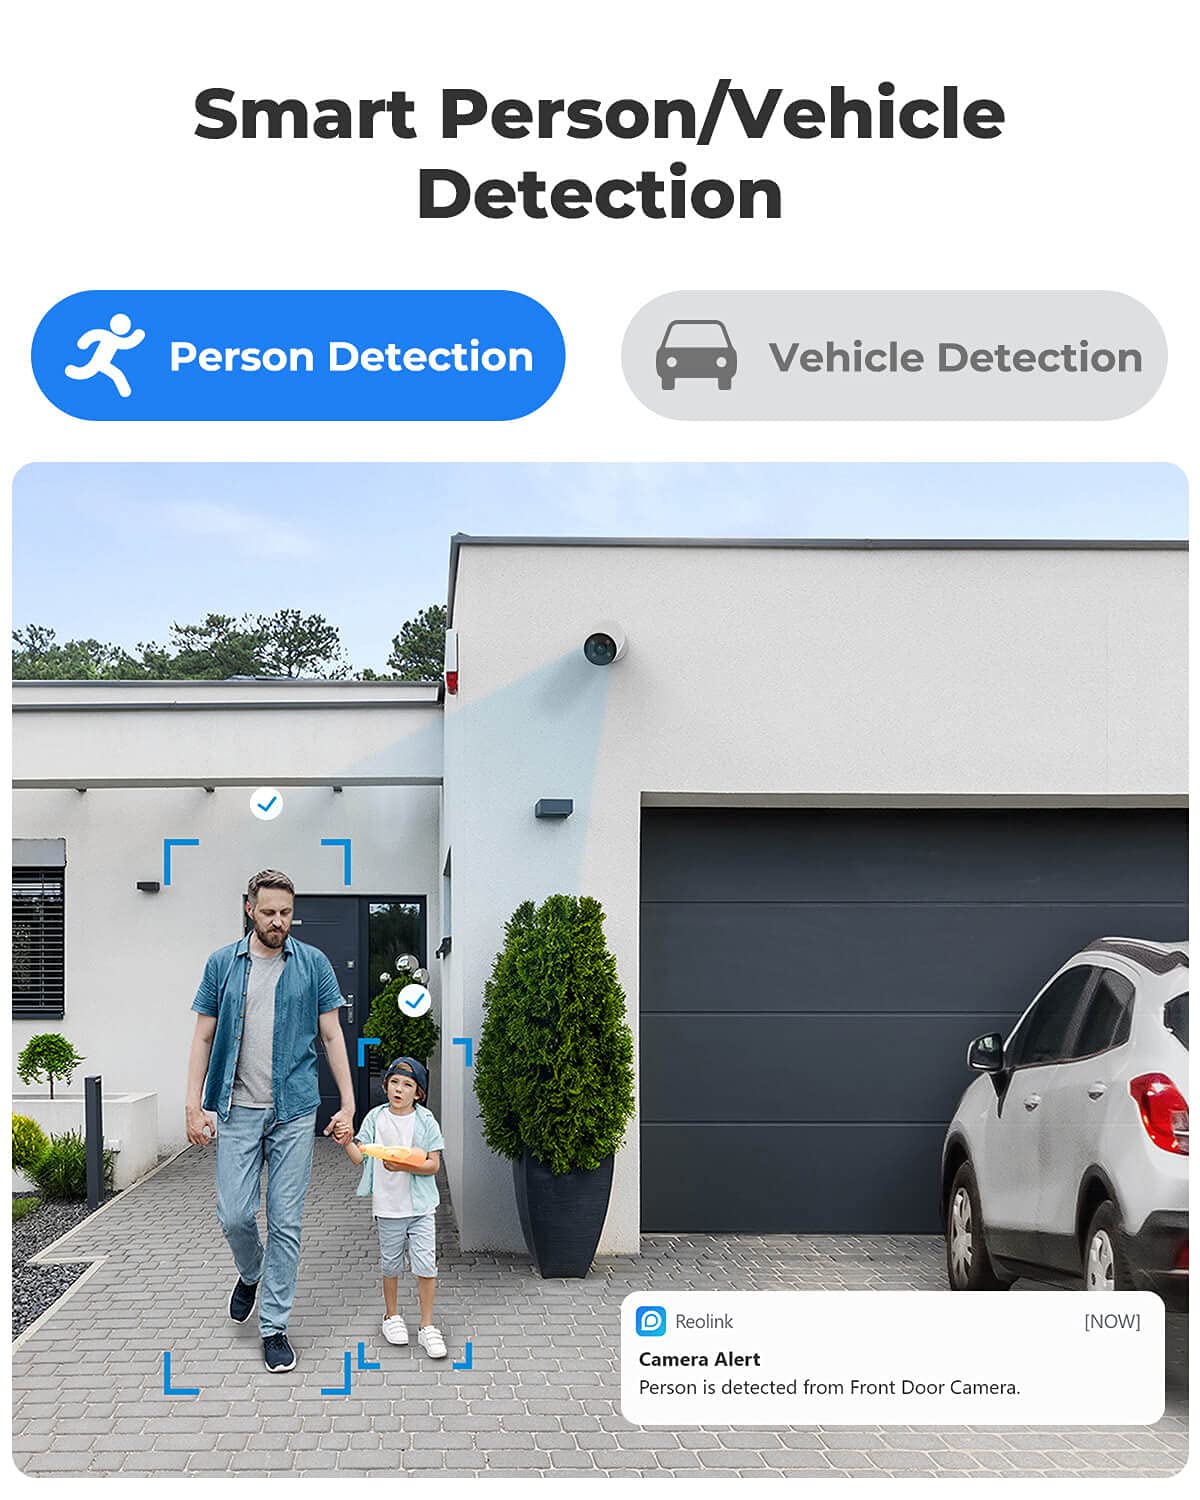
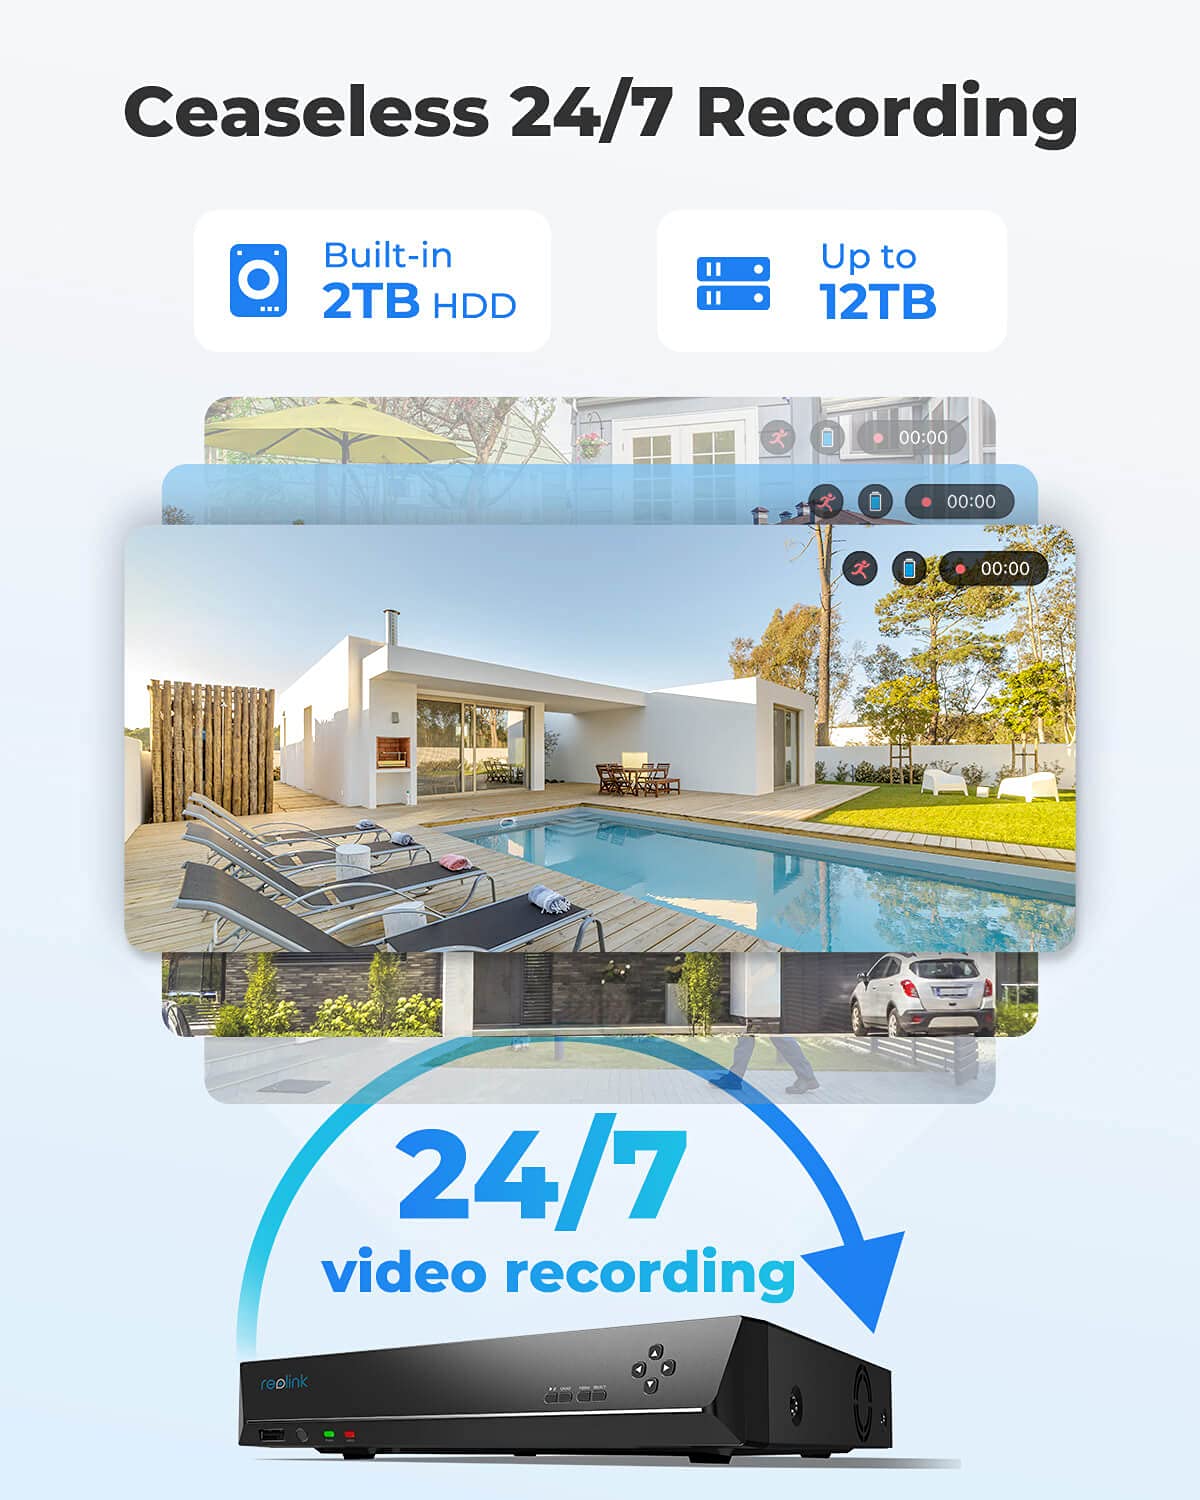
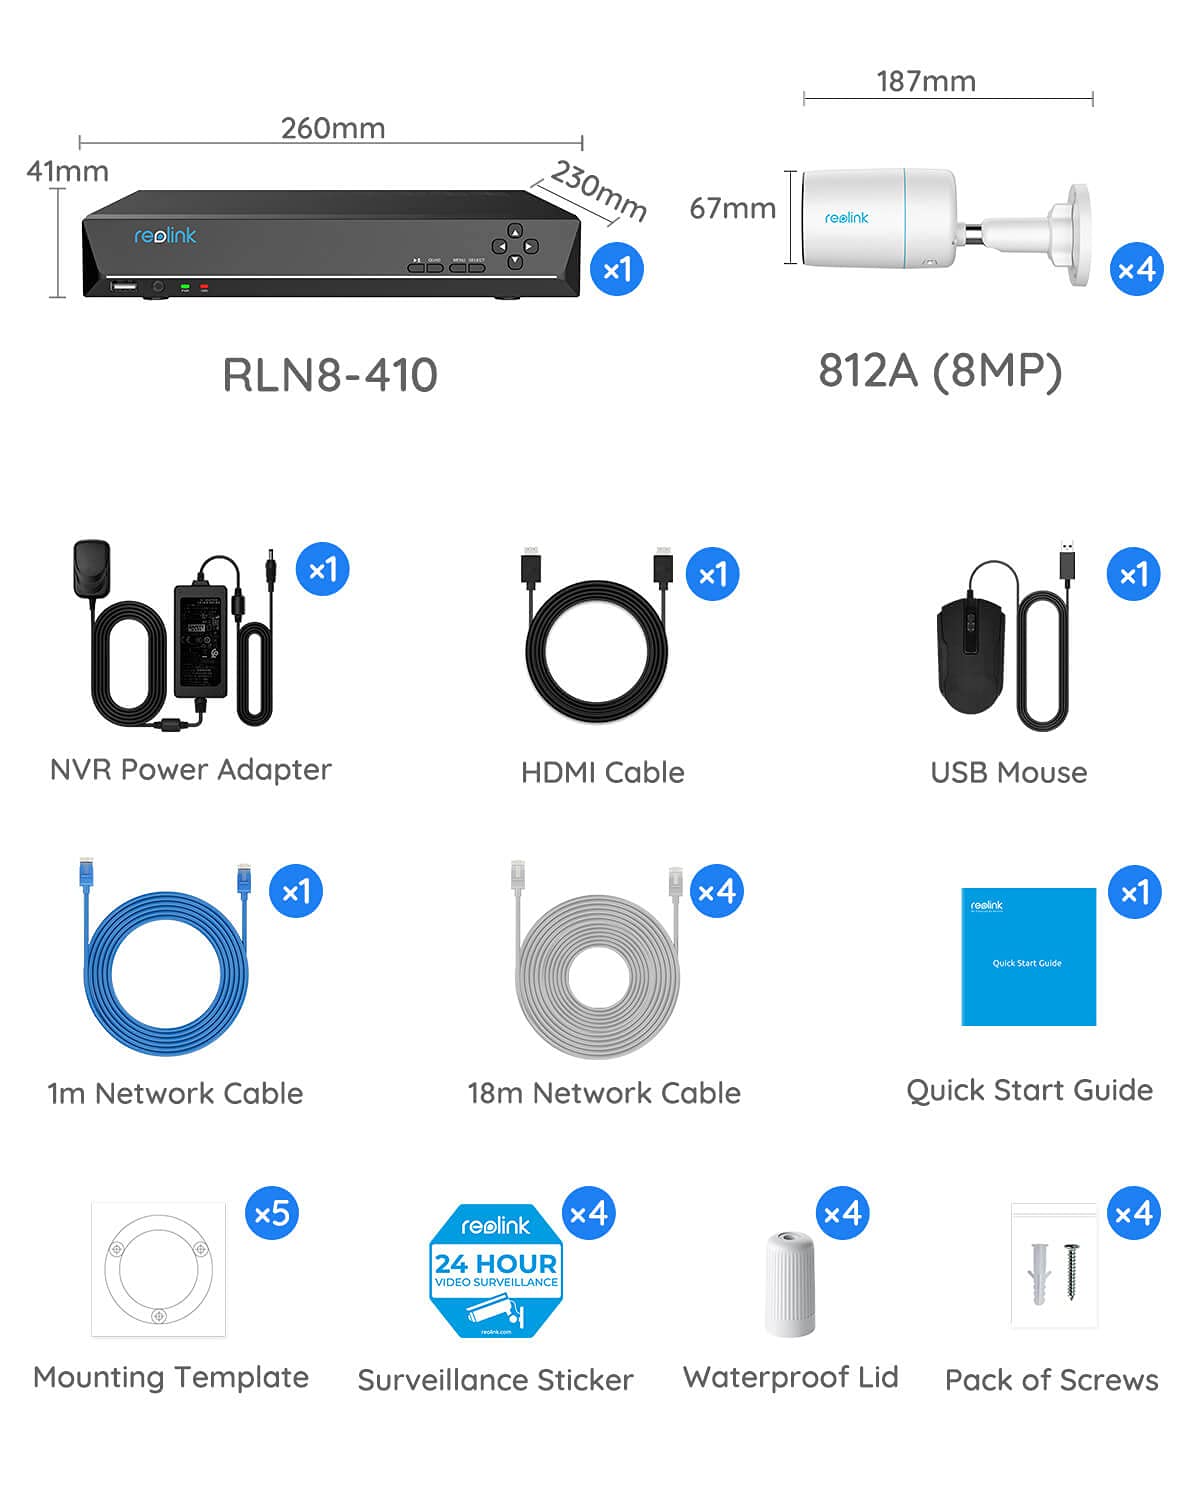
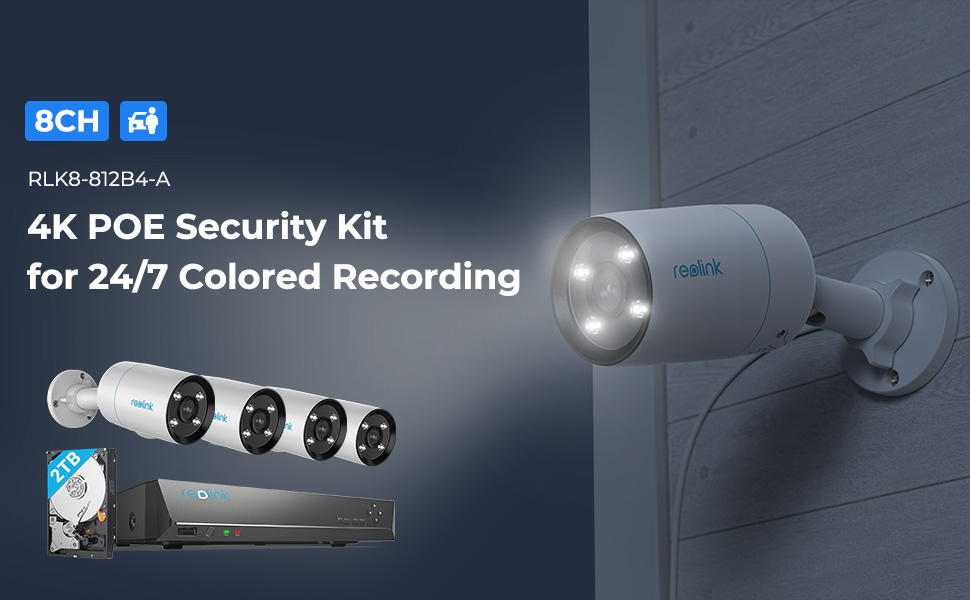
The REOLINK 4K Security Camera System delivers ultra-high-definition 8MP video with advanced person and vehicle detection to minimize false alerts. Its PoE technology enables easy single-cable installation up to 330ft, perfect for comprehensive home or office coverage. Equipped with a 2TB HDD for continuous 24/7 recording and expandable up to 6TB, this system supports up to 8 cameras, ensuring scalable, reliable surveillance tailored for the modern professional.


D**R
Excellent quality camera and software.
Very easy to setup software. Image quality great. I was surprised how well 2 way audio works even at 7 feet overhead mount. There is a slight delay as audio is processed thru the system. Android phone app works great. I did purchase good quality copper Cat6 cable and installed may own ends as others have recommended. But no one reported problems with supplied cables. I did mount the cameras to 2 x 4 blocks of wood and then screwed those into wood under the wood under roof line. This allowed use of bigger screws to make it harder to remove the cameras by thieves, makes a very sturdy mount interface. Led lights on camera work well very bright. I would not recommend enabling motion detection at initial setup. You will probably dissable it because you will get to many false triggering. If you do set that up turn way down the sensitivity. You can map out area of detection using software.
N**N
longer distance on wifi from dvr to camera
great and easy setup
W**N
Works well but work around need for home wifi network
I bought these cameras to work with my home mesh wifi network (orbi specifically).Currently you need to do a bit of a work around to get the cameras configured, but after that they work well. (How-to below). I've spoken with Reolink about this, and they claim to be making it easier to setup.Previously I had a bunch of Nest cameras but. I got sick of the subscription fees and the fact google kept making my products worse with new software updates. These have as good or better image quality. Detection of people and animals is better than I expected.How to connect Wi-Fi cameras to non-NVR wifi:0) get the NVR setup, connected to router via Ethernet and with a monitor setup.1) plug camera into router via Ethernet and connect to power supply.2) open camera settings via NVR monitor. Find (and optionally reset) the camera password.3) power off NVR4) using the phone app, add the camera as a stand alone device. (Look for it under "LAN")5) Open the camera's wifi settings and configure to connect to your desired network.6) disconnect camera Ethernet, power on NVR. Camera should show up automatically in NVR.7) delete stand alone camera in the phone app.
C**T
Great system awesome picture quality
This camera system was easy to install and link up. The picture quality is great. This is the second system I've installed. I was able to sync the WiFi cameras to the unit without a hitch. The only hang up I've had so far, is that I had to delete the old camera app to view the new ones. I hope they have a fix so I can integrate both Reolink camera systems.
L**S
Good Value and Quality for Money (but some minuses too)
Purchased for home security in June. Been set up for about 2 weeks. Happy overall for the price with this first-time camera system purchase. First photo is primary view and 2nd photo is the NVR behind my computer desk on a little shelf I made for it. 3rd photo is installed camera with junction box (get them) Read on for more.After countless YouTube reviews, I chose the Reolink RLK8-810B4-A package with 2TB NVR & 4 each 8M camera.I am pleased to say that the system works as advertised. One of the reviews that helped me chose was:https://youtu.be/eGRgZWb5zx0by “The Hookup” (found this channel to be helpful and trustworthy).PRO: Camera quality is great in daylight and acceptable in darkness. I have exterior lights so 3 of the 4 cameras give me color at night.PRO: Setting up the software wasn’t difficult. The app self-loads to your smart phone using the QR code found in the printed material. LIVE View on your phone has about a 4 second time lag which is way better than I have heard for the "Ring" camera which I won't own.PRO: You can name your cameras by their location (recommended) and the default setting puts this on the screen at bottom right with the time showing centered at top.PRO: Digital zoom is pretty good in LIVE view, but it won’t stay zoomed if you wanted that, and you can’t read a license plate from across the street.PRO: MOTION DETECTION The motion sensing portion can be adjusted to work how you want. “PERSON/VEHICLE” detection is much better than “ANY” motion detection. For example the shadow of a tree in the wind gave false notifications until I adjusted the detection zone and selected “Person” instead of “Any”.NOTE: When setting up date and time, pay attention to the format. It comes with a default that is common to Europeans with the day of the month preceding the month (DD/MM/YYYY). This can be confusing, so I went with the more familiar MM/DD/YYYY. ALSO: (important) Adjust the time to match your phone. I had made a note of an event which I tried to find in playback later and just gave up. Turns out that time was off by about an hour or more.CABLE: Here’s what I did with my installation. Per 2 reviewers, I chose to NOT use the Cat 5 cable that came with the kit. I bought Cat 6 and learned how to attach the RJ45 connectors with a crimping tool I bought. This made sense to me as the hardest part is running the cable and why do it twice? “How-to” videos abound on YouTube for this skill. Hint: I took photos with my phone of each completed connector at the locations. This was helpful as it turned out the one of the connectors was defective. It took a while to determine why one camera wasn’t working on this circuit. Turns out the connector had only 7 pins for the 8 wires crimped onto it. You can zoom in on your phone to see such things more clearly. I did use Reolink’s provided Cat 5 bundle to pre-test cameras next to the NVR before connecting at the mounting locations.NOTE: I was not able to make the "watertight lid" for the connections. Instructions are very short on detail. BUY THE JUNCTION BOXES (see my review of this product). It will make a weather tight place to keep your connections from corrosion and makes a neater installation. Yes, they're $24/ea, but you'll be glad when it's all done. You'll need to learn how to attach t he RJ45 connectors after pushing cable through the compression nut (visible in 4th photo).MONITOR: In order to avoid a dedicated monitor I bought one that had HDMI and VGA inputs so I can use my CPU via the VGA and the NVR with the HDMI. I put a switch in between the NVR and monitor. Works good.I bought a CyberPower SL700U Standby UPS system from Amazon which I have dedicated to powering the NVR for when (not if) we have power outages. This one is very compact and includes surge protection. We had a power outage the first night after installation and was worried it might damage the camera with voltage spikes, but since it is powered through a transformer rectifier, I probably needn’t have worried, but went ahead with buying the power backup anyway.CON: DOWNLOADS Selecting a portion of the timeline to export via the USB port is a little marginal in that the download time is pretty lengthy for even small clips. I had hoped to be able to put these clips into my video editing program to eliminate excess “lead-in” and “lead-out” portions, but my software won’t recognize the format (even though it says it is MP4). Had also hoped to be able to use my video editing software to zoom in digitally as it works great for that, but Sony’s “Vegas Movie Studio” © versions 13 & 15 won’t recognize Reolink’s clips. ☹ This was a big disappointment for me. I’ll probably just use my phone to record from my 27” monitor and skip the USB altogether.CON: Had hoped to be able to pull up the app on my laptop via my WiFi, but you can’t download the app to a laptop ☹ The phone app works good but is too small for my old eyes.CON: EMAIL NOTIFICATION Reolink asked for my email’s password in order to send me notifications. NO WAY! China is not getting my password. I just review the detected motion daily.Other than these disappointments, I think the system is a good value for the money. If I were more of a computer geek, I would have bought the Blue Iris software and the required upgraded computer, but it seems you need to dedicate a CPU and monitor just for your camera system. It does give you more freedom in camera makers, but the aforementioned drawbacks and cost are considerations. Reolink is good enough for the price.
Trustpilot
2 weeks ago
5 days ago