
DOWNLOAD THE APP


Customer Services
Copyright © 2025 Desertcart Holdings Limited
DOWNLOAD THE APP

Illuminate Your Space with Ease! 💡
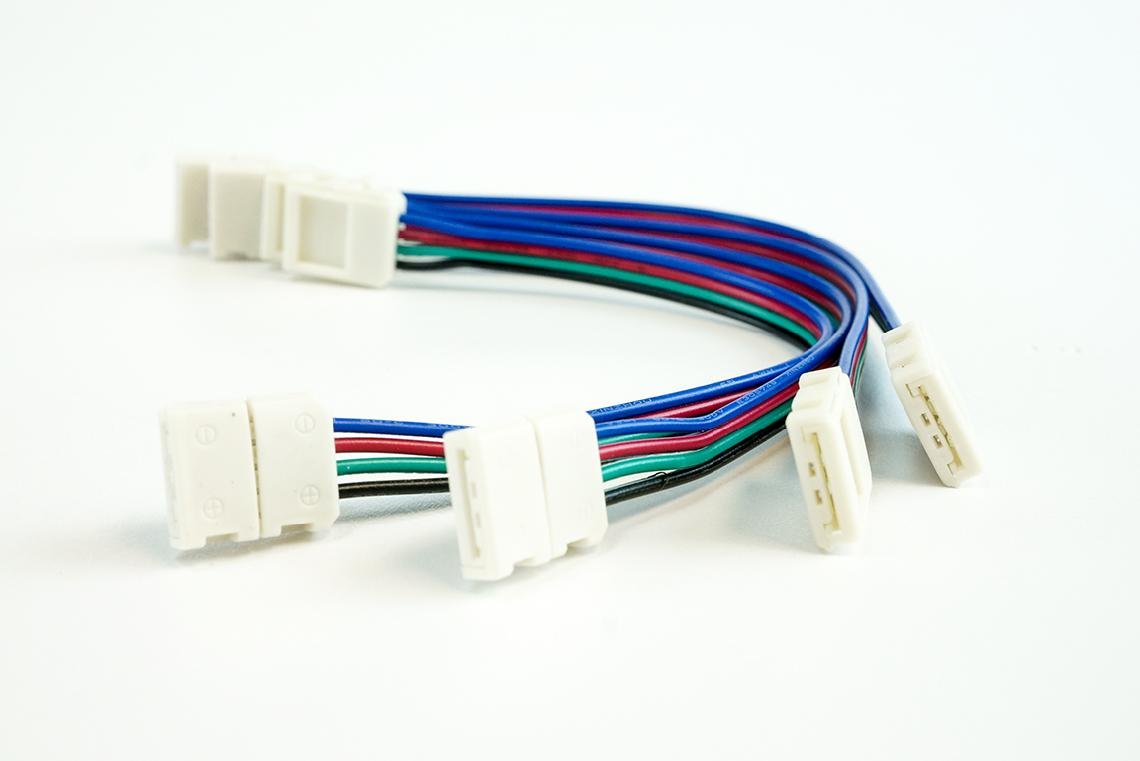
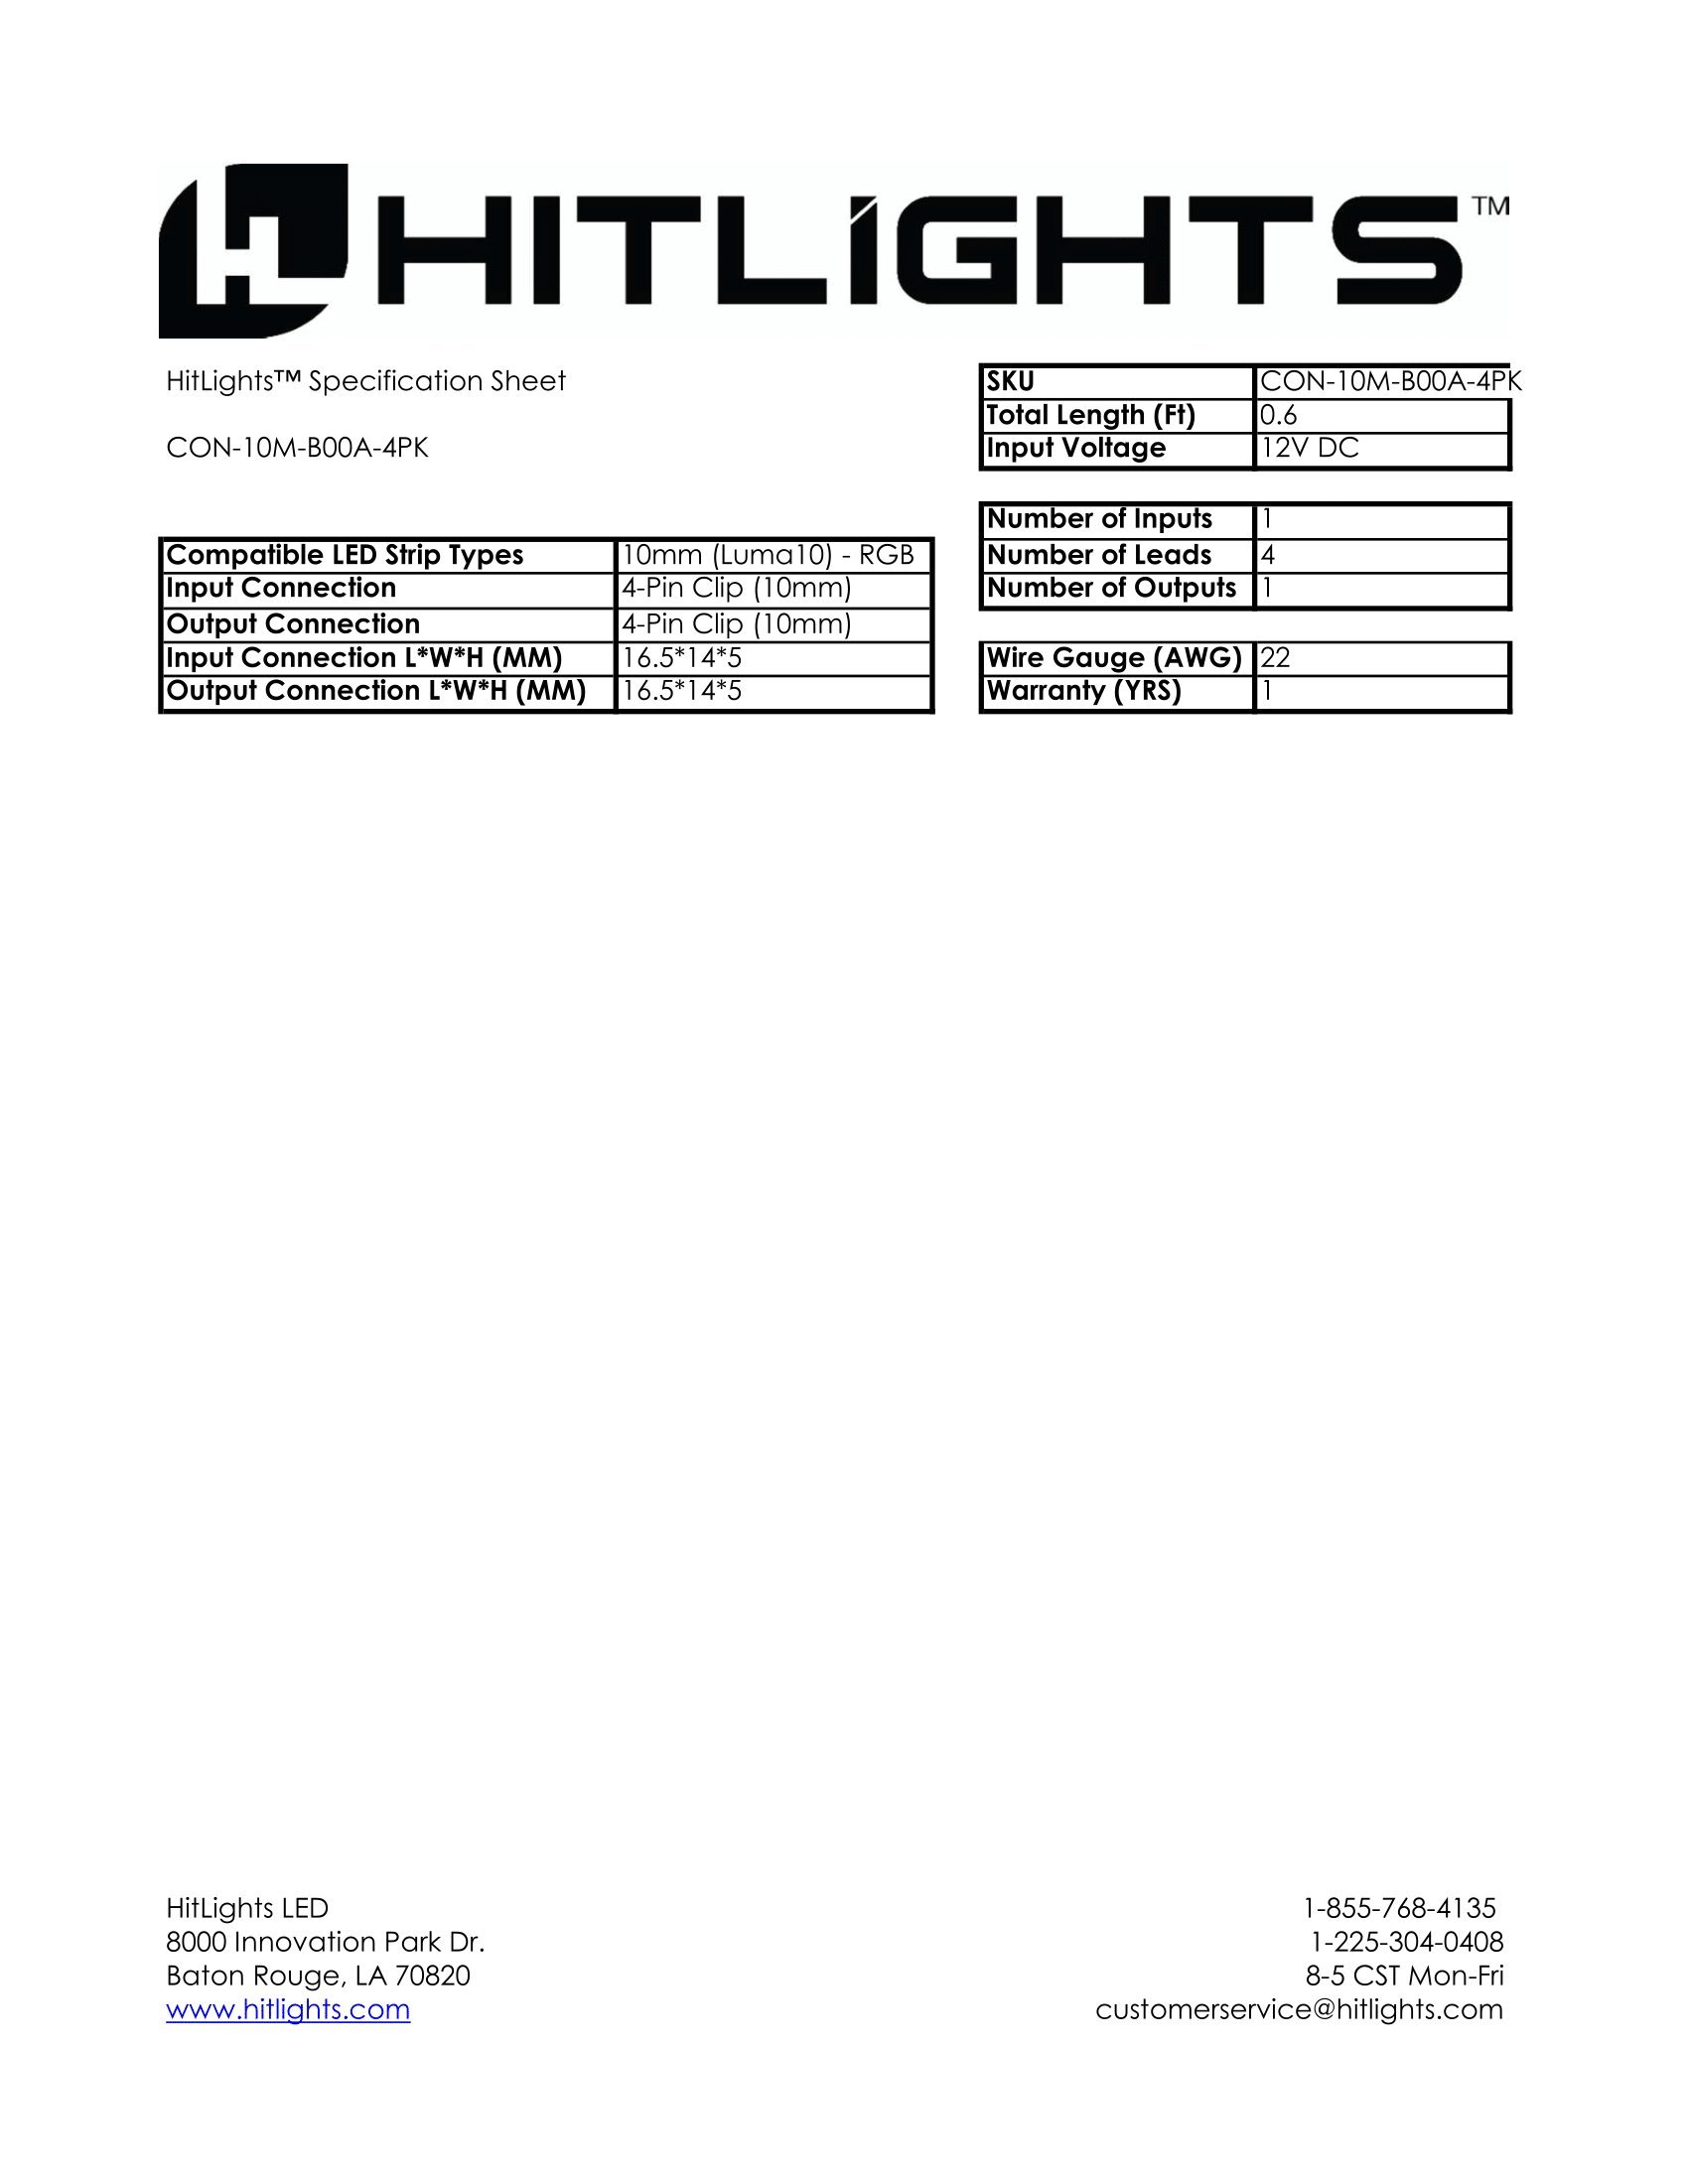
The 10mm (5050) Solderless LED Light Strip Connector Extension offers a reliable and user-friendly solution for connecting and extending LED light strips. Each pack includes four 6-inch connectors that are compatible with any 8mm strips, making it perfect for kitchens, cabinets, and shelving. With no tools required and a one-year warranty, this product ensures a hassle-free installation experience.
A**Y
Worked for me
All of these worked for me. They are a REAL pain in the butt to use, but for me it was easier than soldering 4-conductor wire to the ends of all the strips. If you have the waterproof version of the light strips as I do, you have to peel back the silicone covering. It is also easier using these BEFORE you peel off the tape on the back of the light strip. Otherwise the tape will stick part way in the connector, and cause the strip to bend as it goes in. I actually cut most of these in half, and connected a length of telephone wire between the two ends.Also, make sure that you do not mount the lights upside down like I did. Look at the black wire on the connector. It should go into the "12V" (or ground) piece of copper on the light strip. If you find that it is going into "B" (or Blue) then your strip is upside down. I didnt have to peel off the lights because I just switched the wires before I crimped them. I have found that if one section is giving me a real problem, the easiest thing to do is just cut off one section of the led strip so you have a new surface to use. 9 times out of 10 that fixes the problem.
J**E
They did the job but took some adjusting
They did the job just fine that they are designed for but I learned there are some inherent design issues that make them tricky to use and achieve the desired affect.When you flip open the tab to insert the end of the light strip you will see 2 metal prongs/teeth designed to hold down the light strip to keep it firmly in place when it closes. The problem is, that those metal prongs are often touching which will short out the red and/or green lights. What I have to done to ensure a proper connection and seal took a few steps: 1. I slightly bent back those prongs to where they were not sticking so far down but could still grip. 2. I left the adhesive back on the light strip to allow a better connection, placing the exposed copper ends closer to the connecting prongs. 3. After making sure that the R, G & B lights worked I placed a dab of hot glue over the connections and then firmly closed the cover. This last step prevents anything from moving around and becoming disconnected, seals from moisture and locks the cover.Sadly the quality of one of the strips of lights was more of a problem due to low quality of the adhesive strip ripping the back off the lights and allowing moisture to corrode the copper and shorting out the lights.
G**G
Very Good Extension Cables
Worked very good for the LED light set that I bought earlier. Very convenient to connect the light kit especially under the kitchen cabinets when I had to cut the led lights and then use the extension cables to go up and over cabinets and back under the next set of cabinets. The only minor issue was the end clip did not clamp down hard enough to keep the cut end of the light set to prevent movement. Sometimes it was very sensitive which did not allow a clean connection. Wiggling the cable slightly helped the that issue.Worked very good for the LED light set that I bought earlier. Very convenient to connect the light kit especially under the kitchen cabinets when I had to cut the led lights and then use the extension cables to go up and over cabinets and back under the next set of cabinets. The only minor issue was the end clip did not clamp down hard enough to keep the cut end of the light set to prevent movement. Sometimes it was very sensitive which did not allow a clean connection. Wiggling the cable slightly helped the that issue.
S**H
Done CORRECTLY - they work
As a very few have reviewed, these WILL work. They'll work given (they most helpful review talks about a 2X2 piece of paper) you MUST use these correctly. And correct is putting the terminals UNDER the contacts in the connector. Do NOT lay the LED terminal on top of the connector contacts. If you look at the connector from the end you can see there is a little channel for the LED tape to go in. You do have to woodgie it some (yes with the 3M protector OFF the bottom - exposing the adhesive) but it WILL go in there.ALL THIS BEING SAID. If you get the WATER PROOF kind (like I did) you MUST remove most of the insulating plastic off of the top so the plug will fit. (Thus removing the waterproof-ness. But if you run this part away/out of the wet area(s) - you're fine.)So - don't think "easy" with these...too complex. The pressure from the top doesn't keep everything together like you'd think. Just slide the LED in from the front, UNDER the contact tabs in the plug and VOILA! Success!
J**1
Great Product
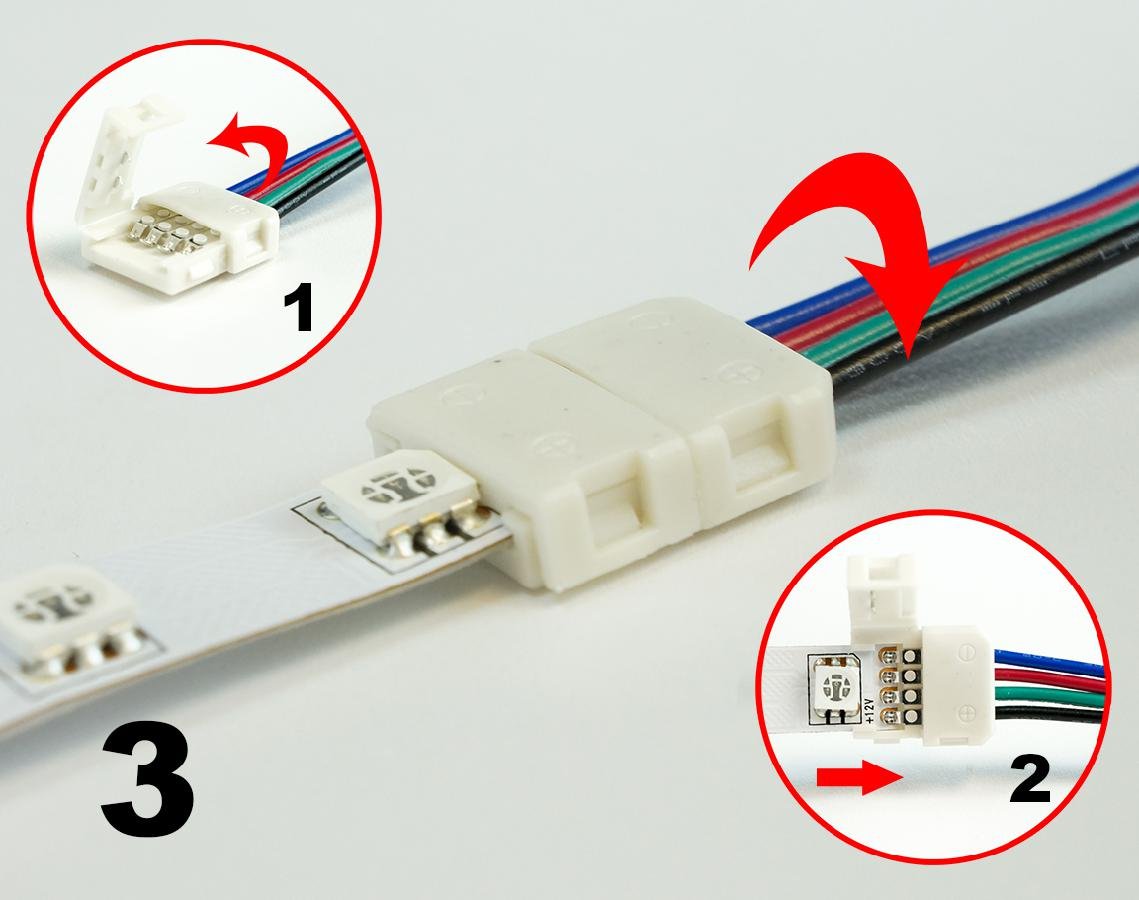
I recently purchased some led light strips to go inside my motorhome. I had to make two cuts in the 16 foot length of the light strip, and I don't have much experience with soldering, and currently do not own a soldering iron, solder, or flux. These connectors filled the bill. They are neat in appearance, and easy to use. I found that making connections was pretty straightforward. Just keep a few things in mind.There is a channel inside these connectors that the LED strip slides into. Make sure you get both ends of the strip under the channel guides before trying to push the strip in.Grasp the LED strip close to the connector when pushing it in, or it will buckle on you, bending the strip and possibly causing damage to the strip.Make sure you don't turn the LED strip around. It is easy to get a section backward. It will seem to slip right in, but if you find that the lights are not working past the connector, chances are you turned the strip around and installed it backwards (reversed/upside down). It won't work that way. (Guess how I found that out?) You can look closely at the strip and find that it is labeled (G, R, B, +12v). Make sure that both pieces you are connecting are labeled parallel to one another.
J**O
Todo bien
Llegaron rapido, tal y como está en el anuncio
M**O
Wrong product for me
My strip is waterproof with a gel cover. So this was the wrong one.
M**O
Wrong product for me
Wasn't the right one as my strip is waterproof and has gel cover.
T**E
Good stuff
Great item
R**O
Recomendable
Buena calidad
Trustpilot
3 weeks ago
4 days ago