🚀 Elevate Your Mac Experience with Aura Pro X2!
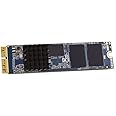
The OWC480GB Aura Pro X2 is a high-performance solid-state drive designed for select 2013 and later Macs. With read speeds up to 3200 MB/s and write speeds of 2400 MB/s, this SSD offers a significant upgrade over original models. It features a custom blade form factor, NVMe interface, and is optimized for macOS 10.13 and later, ensuring your Mac runs cooler and more efficiently.


| Brand | OWC |
| Product Dimensions | 1.5 x 18 x 13 cm; 40 g |
| Item model number | OWCS3DAPT4MB05 |
| Manufacturer | OWC |
| Series | Aura Pro |
| Colour | SSD Only |
| Form Factor | 2.5-inch |
| Hard Drive Size | 480 GB |
| Hard Disk Description | Solid State Drive |
| Hard Drive Interface | NVMe |
| Wattage | 5.7 |
| Hardware Platform | Mac |
| Are Batteries Included | No |
| Item Weight | 40 g |
| Guaranteed software updates until | unknown |
W**L
Amazing.
Upgraded my Mid 2015 15inch MBP from 512 GB to 2TB quick and easily. I found some useful installation instructions on iFixit (there are none included) and these clearly explained how to install the drive.Initially I was at a loss as to how I was going to transfer my system across because rather strangely the included enclosure allows you to house the original SSD but doesn't support the new 2TB drive. However the solution is to back everything up first, take full anti-static precautions (regularly discharge yourself somewhere like a radiator and also don't touch the components directly) then extract the original SSD into the included enclosure, install the new SSD and then hald down 'ALT' on boot to boot from your original SSD now housed externally to the MBP.Once you've done the hardware bit the real work begins getting everything to perform as before. I went through a number of hurdles to get to a fully working system but the below steps worked best for me; this is edited from all the dead ends I went up.1. format your new SSD now inside the MBP.2. Use Carbon Copy Cloner to transfer your drive across (I tried Super Duper! but that failed with the new MacOS file OS).3. Clear your P-RAM (press the Command, Option, P, and R keys at the same time) when you reboot - if you don't I found the machine sort sits there and thinks for quite a while whilst it works out where the system disc is.4. Once you can successfully boot into Mac OS from your new SSD, remove the old one and keep it safe for the time being.5. Reboot and hold down shift to get to the recovery mode.6. Reinstall MacOs from the recovery mode - this shouldn't erase any settings or applications you have installed but seems to iron out any niggles or problems with either booting or running the system.7. Install OS updates and check all your apps are running correctly.The new SSD in my MBP now runs super smoothly. I had some problems with time machine that are probably out of scope for this review that I also needed to resolve but the laptop now boots quicker than before and is no longer creaking through lack of HDD space. It also feels genuinely quicker than before.I do seem to have a corrupted file somewhere within my Applications folder - if I open the applications folder Finder crashes. If I press F4 I can see there is a strangely named application that I can't access or delete. I suspect I had this problem before and cloning the drive carried it over, but it's something to flag.In terms of compatibility and ease of installation I can't fault this upgrade. The hard work really centres around transferring the system across and ironing out all the niggles with MacOs after you've done that. It's an expensive upgrade but will add years of life to your existing laptop.
A**R
Easy to install in MacBook
My trusty late-2014 Macbook is still going strong, but was suffering from too small a hard-drive. After extensive googling, I settled on this one as a replacement - seems pretty fast and the price is good. I ordered it + a penta-lobe screwdriver from Amazon, and both arrived the next day. I needed to preserve the contents of the old drive, and this unit doesn't come with a caddy, but I had a spare 1TB drive onto which I could put a Time Machine backup. Removing the bottom of the laptop was completely straightforward, as was removing the old drive (see various YouTube videos for reference). Getting the new drive in required more of a push than I expected to get it seated ok - but was not difficult. Everything went back together fine and the TimeMachine backup process (see YouTube again) restored everything flawlessly. I'm so happy with the result I thought I'd let other people know!
J**E
Saved me £££
Life saver! I have an older 2013 model MacBook Pro that was now considered "obsolete" by apple. Unfortunately I had a hard drive fault which rendered the MacBook completely unusable. After contacting Apple care, taking it to an apple store and speaking to other people in the repairs field I was told it could be repaired but would cost me close to £600+, which just wasn't worth it for an old model. I couldn't afford a new MacBook so searched the internet and found this to be the hard drive that I would need to replace my old one.After a bit of you-tubing it because clear that MacBooks are modular and you can install the product yourself with the correct screwdriver. A few screws later and this SSD was in place and just needed to install the software.No problems with any of the installation and it was very quick and easy.Cost was great. I managed to double the size and speed of my old hard drive for less than a third of the price Apple quoted for the smaller like 4 like hard drive.Overall absolutely thrilled! managed to keep my MacBook for a while longer, saved myself hundreds and did an upgrade all at the same time with this piece of kit. 10/10Also their aftercare service is fab! I had an issue with sleep wake failure and was put through to a specialist from their team via a phone call and walked through how to fix the issue very quickly!
S**Y
SSD great, tools not so much
Fantastic product which is very easy to install. Works as expected. Seeing much improved read write speeds in my 2015 macbook Pro vs the original ssd. Envoy chassis for the original ssd is beautiful, looks like it was made by Apple. Only complaint is the included tools. The smaller driver for undoing the case screws had one of the 5 points on the head break off, causing me to nearly strip a screw trying to undo them.
G**V
Great upgrade
This is such a worthwhile upgrade for my old MacBook Pro mid 2014. Previously I had a 128Gb drive installed and I constantly had to keep control of how much data was used.Fitting the new SSD in my MacBook Pro was just so easy, as fortunately I already had the screwdrivers needed (after fitting new batteries) to open the case and it took less than 15 mins to complete.I then used Apple Recovery mode to do a fresh Internet install of MacOS Big Sur operating system, which also prompted me to recover all the data I had backed up on my Apple Time Machine. This process took about two and half hours. When completed I was amazed that everything was back on my MacBook with no loss of data.Right now the MacBook is faster than before and I've got loads of space left for applications and data.
Trustpilot
3 weeks ago
2 weeks ago