Desertcart purchases this item on your behalf and handles shipping, customs, and support to Hungary.
🛠️ Pump up your fluid game with precision and power!
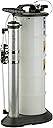
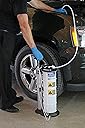
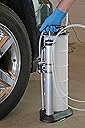
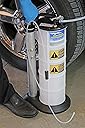
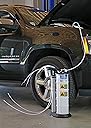
The Mityvac 7201 is a 2.3-gallon manual fluid evacuator and dispenser featuring push-button operation, chemical-resistant polyethylene construction, and automatic overflow prevention. Designed for automotive and industrial fluid management, it combines durability, precision, and portability to streamline oil changes, coolant refills, and more.


| ASIN | B0002SR7TC |
| Best Sellers Rank | #6,943 in Automotive ( See Top 100 in Automotive ) #20 in Garage & Shop Fluid Evacuators |
| Brand | Mityvac |
| Customer Reviews | 4.5 4.5 out of 5 stars (4,355) |
| Date First Available | October 19, 2006 |
| Item Weight | 11.65 pounds |
| Item model number | 7201 |
| Manufacturer | Mityvac |
| Manufacturer Part Number | MV7201 |
| Model | MV7201 |
| Product Dimensions | 9.3 x 13.2 x 25.4 inches |
| Special Features | Portable |
C**E
Indispensible tool for service of German cars
I really enjoy the Mityvac 7201 Fluid Evacuator Plus. I can't say that it makes changing the oil much quicker than using the drain plug or even that much neater but it certainly does make it easier. If you have a car with the oil filter located where you can access it without getting under the car, I would recommend the evacuator without hesitation. If you have to get under the car or truck to change the filter you might as well just drain the oil with the plug. I bought the evacuator about a year ago specifically for use on my 2007 Mercedes E320 Diesel which has the drain plug in a very awkward location. Since then I've used it about a dozen times on both the diesel and my 2002 E46 BMW 330i. I have never had a problem with the performance and my only complaint is that it does not have enough capacity for the Mercedes. This car holds 9 quarts of oil and I have to stop halfway through the evacuation and empty the reservoir. Once the evacuator has been filled, the film of dark oil clinging to the walls prevents seeing the oil level under any lighting conditions. So, I always evacuate about 3 quarts, empty the evacuator, and then evacuate the remainder. This is not a problem with the BMW since the evacuator can empty this car in one step. Before I purchased the evacuator I read some reviews that warned that their evacuator did not come with a gasket between the lid and the side walls. I took mine apart on arrival and it did not have a gasket either. However, the plastic parts fit tightly together and make an air tight seal. It is my theory that some of the people that could not get their evacuators to empty their crankcases have a problem with the length of the suction tube inside the evacuator. For the evacuator to work in pump mode, versus vacuum mode, there is a tube that extends to the bottom of the evacuator, much like drinking a milkshake through a straw, that allows you to pump out the evacuator contents. In my evacuator the tube has very little clearance with the bottom of the unit. I believe in some units the internal tube may actually touch the bottom of the evacuator and prevent or limit the vacuum pulled in the tank from drawing the oil through the suction tube. If you should order an evacuator and then find that it does not work (I suggest testing it in the sink first using water) you should try taking it apart and checking the internal tube length. There of course are many other reasons the units may not work but I thought this tip was worth passing along. Many other reviewers have commented on this as well but I also wanted mention that the unit works much better when the oil is warm. However, I changed my oil once on a 40° day when the oil was at ambient conditions and with a little patience I was able to suck every last drop out. So, it can be done but I would not recommend it. I also wanted to give a couple of tips on tubing. In my cars, the largest tube which will go down the dipsticks is ¼". I buy it in bulk at my local Ace hardware for $0.12 a foot. I only use the ¼" tube one time, discarding it after each use in order to prevent the introduction of dirt into the engine internals and also to avoid the mess of storing an oily piece of tubing. I feed the ¼" tube from the spool it is supplied on into the dipstick until it touches the bottom of the oil pan. I then cut the tubing off the roll, leaving about 6" of tube sticking out of the dipstick tube. I have shortened the length of the factory large diameter tube that is directly connected to the evacuator so that it reaches just from the evacuator when it is sitting within 1' of the fender to the dipstick. The 2 different size pieces of tube are then connected with the included rubber adapter. This gives me the shortest possible run of tubing with the largest diameter tubing possible for each section of the run. I have had very good success with this setup. I do not clean my evacuator after each use but I also don't leave oil in. I immediately switch it into pump mode and pump the oil, using only the large diameter tube, into a container to transport the oil for recycling. Once the evacuator is emptied I will stretch out the large diameter tube to a rag on the ground and allow the oil in the tube to gravity flow out over night. The tube can then be wrapped around the evacuator and it will snap into clips on the side of the unit. I don't like to use the drain plug on the top of the evacuator to empty it. The plug is difficult to get out even when lubed with oil and is it is difficult to pour the oil into other containers. The evacuator should allow you to change the oil with the minimum of mess possible. However no matter how careful I am, I always seem to drip or spray 1 or 2 drops of oil onto myself or the floor. This can be an improvement over the drain plug and pan method though. For example on my Explorer you must carefully control the flow from the drain plug or it comes out with such force that it splashes or sprays the under car components. With the evacuator you also don't have to worry about sloshing oil out of an open pan, oil splashing on the top of one of the closed-top funnel-type pans, or spilling when you transfer oil from a pan into another container. For those car enthusiasts who have a true passion for their cars and this type work, I would recommend having your oil tested periodically by a lab. I recommend Blackstone-labs. Their testing service is very affordable and they can help you determine the true required interval between oil changes for your driving habits and vehicle. For hard to find oils like the Mobil 1 Type M ESP used in all new diesel Mercedes, I would recommend mail ordering your oil from AVlube. This oil is available through the dealership and at Pep Boys but I have found it to be less expensive and more convenient to mail order the oil in bulk. Properly set up, I have found the evacuator to be an indispensible tool for service on my German cars.
R**N
Workhorse of a product!
This tool has been on the job with me for a year and a half and I use it multiple times a day. My boss uses a second one that we bought and his is maybe a month newer than mine and he uses his daily as well. These two we use for evacuating oil out of the crankcase of all sizes of generators from 8 kilowatt up to 250 kilowatt units. I just ordered another one that I intend to use for putting fresh oil back into the generators after evacuating the old oil so this one will have only fresh oil in it. For evacuating oil we used to use an electric pump and a large 5 gallon tank when I came on board to the company. I used this method for a short time and it was cumbersome and sloppy. Powering the electric pump was sometimes not possible and we resorted to using gravity on those units which is time consuming and you run the risk of the small pan overflowing if not emptied before filling. There had to be a better way so I researched on the web and zeroed in on this product. I have become very proficient on its use and the main reasons for continuing to use it are time saving, jobsite neatness, and ease of use in that order. Generators, unlike automobiles, are a stationary machine and so our customers can't drive them into a repair bay for us to work on them. We have to travel to where they are and once there, we have to carry our tools and equipment to where the generator is located on the customer site which can be a great distance away from the service vehicle, sometimes on the roof of large buildings. This thing is a lot easier to deal with compared with a pump and 5 gallon jug. Pictured in my post is the setup that I made to connect to just about any oil drain port and is currently connected to a Kohler 10KW water cooled generator. The previous time that I serviced this generator I had to pull the hose off from the fitting that I'm currently connected to on the inside of the generator and connect it to a barbed fitting on the end of my hose. The barbed fitting and ball valve are still on the end of the hose but now is connected to the adapter shown. It turns out that Kohler uses this method of oil draining on many of their generators with solid metal housings. When my adapter is not connected, there is a standard automotive drain plug there sealing that port. Nobody at the company used the port. They would loosen the hose clamp on the inside of the case, pull the hose off requiring a considerable amount of effort and then use the hose to drain from. It is so much easier using the port. This 10KW unit pictured is really cramped for space inside the case and you have to be a contortionist to get to and loosen the hose clamp and then get the stubborn hose off of the barbed fitting. What a time sucker that was. I include this description in my review because many people tend to use a product as delivered. The fitting in the picture fits an automobile drain hole. There is a whole series of that fitting for just about any oil drain port in the crankcase pan. Notice also that there is a ball valve on that fitting. It is intended to be placed in the drain port on the oil pan and then left there for future maintenance. This may be helpful information for some users and potential users of this product. Now I turn to the durability of the product. It speaks for itself about how durable it is that my unit has gone through almost two years of daily use multiple times a day. I have had only one issue with it that I consider minor, that I solved myself. I started noticing a steady stream of air bubbles in the evacuation hose while in use, not evacuating oil, but disbursing it into the waste oil tank. It puzzled me for a while but I suspected something inside the tank was leaking the pressurized air above the oil and it was making into the exit tube. When I disassembled the top of the unit, I discovered that the tube that the oil enters and exits through is a loosly fitted pressure fitting that is just inserted into a hole in the container top. I removed the hose, added 4 to 5 layers of teflon tape and then reinserted the tube into the hole and reassembled the top of the unit. No more issues with air bubbles. BTW, this lowers the efficiency of the work that you do to evacuate the tank if some of the pressure is escaping during evacuation of the tank. Should the fitting be air tight from the factory? Absolutely! But you have to deal with what you get and I wasn't about to send it back because of this minor issue. Both of our units did this, and I expect the one that I just purchased to do the same unless the factory finally figured out that the pressure fitting was too loose on the inside of the unit. Finally, I really enjoy my job. I retired from 35 years of teaching in an occupational education program in computer repair and networking. Being outside every day and solving problems are very satisfying aspects of my job. That includes solving issues with my equipment. I can't say enough good things about this pump. It is awesome. If my original one should break, it owes me nothing and will be replaced immediately. If that did happen, my clean oil unit would be immediately switched with my unit for use with dirty oil and then the new unit, once it arrives will be used with clean oil. I try to anticipate problems. That's one of the things that my boss likes about me. When he hired me, he let go of three others. So, get out there and get to work.....using this workhorse!
R**Y
Best sucky pump I ever used
I got one of them there fancy European cars with the oil filter on the top, so a friend told me I ought to get me a sucky pump to do my oil changes so I ain't gotta get up under that thing to drain the oil out. Turns out it's good for more than that. It saved my bacon when I overfilled the transmission, 'cause it seems like it only takes about a couple shot glasses worth of ATF to put one of them things from the min to the max line. Then when I broke that darned little plastic dipstick some dipstick engineer thought would be a good idea to bury under radiator hoses and wiring, this thing sucked it right out of the dipstick tube and saved me a day's work since the dipstick tube don't come off and the transmission pan is on the side.
R**O
Mityvac 7201 Fluid Evacuator - Works great on Mercedes
I used this unit to change the oil on two relatively new vehicles: a 2008 Mercedes C350 and a 2009 Nissan 370Z. The unit comes almost fully assembled. Only the hose assembly that goes into the dipstick tube needs to be assembled. Mine showed up with the evacuation valve open, which obviously must be closed before vacuum can be achieved. Just flip it over to close it if yours shows up open as well. There is a slight quality assurance issue: there are four screws at the top that must be tightened "periodically" to assure vacuum. One of the four screws on my unit will not tighten. This is not good...though the unit still functioned as reported, at least for one oil change. For those who are concerned that not all the oil will be evacuated from the engine, please read on. The unit performed as expected on the Mercedes C350, though you will have to periodically pump the unit several more times throughout the process. In all, I probably pumped 50 times. Not excessive and probably some good exercise anyway. I pulled about 8.5 quarts from the engine and refilled with the same amount of fresh Mobile1 0W-40 oil. This brought the dipstick reading to slightly over the halfway point between the "min" and "max" marks. Since the filter assembly is on top, changing the filter was a breeze. The entire process took less than fifteen minutes. The 370Z was a different story. I noticed that the evacuation tube seemed to hit one point inside the engine, then, if I exerted more pressure, I could get it to go in significantly further. I figured the deeper the better, so I pushed it in as far as possible, and then pulled back by about 1/4 inch. I started the evacuator and, as before, had to pump several more times throughout the process (maybe I'm just impatient). However, this time, the oil stopped coming out when only about four quarts had been evacuated. I pumped some more but no more oil would flow out. I pulled the hose back to the first 'stop' and tried pumping again. No more oil. That means that one quart was left in the engine (compensating for the small amount probably inside the oil filter, which remained on the car, though I had previously loosened it slightly). I had to raise the car on some RhinoRamps(TM) to drain the oil the old fashioned way. Doing so, I was able to get the last quart out and change the filter. I know that Mercedes recommends the evacuation method for oil changes. When I paid the local Mercedes dealer more than $240, if memory serves, for the "initial service," (which didn't consist of much more than the oil change and refilling of fluids), I saw them use a similar device to change the oil. Maybe Mercedes designs their engines/oil pans to allow for complete evacuation this way. Obviously, Nissan does not. The device is of a good design. Looking at it, though, I am not quite sure how many oil changes I will get out of it before it stops holding a vacuum, as it certainly doesn't appear to be designed for commercial use (nor was it advertised or priced as such). The way I figure it, I'm already ahead. If it gives me another three or four changes (that's three or four years for the C350), I will be happy.
S**Y
Works well, clean and easy oil changes.
Worked well on my first use on Audi. First time using such a device, my other cars require traditional method under car for filter change and removing oil drain plug. This is much easier, and cleaner, I didn't have any oil mess on hands or ground for the first time ever. I went slow being the first time, and didn't over pressurize tank, so it took a while, probably can cut time in half next time. I did use sand paper to rough up ends of plastic hoses where they fit the coupler, and used worm gear hose clamps to make sure it stayed together, as I didn't want a mess of the hose separating like some other reviews. I think the mfr could do something like this and make the connection better. I also cleaned it out afterward, hopefully it works for a long time. Container also has a pour spout on the container, and makes emptying the oil easy.
U**Y
Saves Time & Cleanup!
UPDATE: NOV. 2017 This thing is holding up great! I've done dozens of oil changes. It's such a pleasure to do it standing up! I love being able to just empty the cylinder into other containers or directly into the waste oil basin at the transfer station--it really pours very well, no spilling over the sides of empty 5L oil containers and I don't need a funnel! It lives in my unheated garage and works fine in even sub freezing weather when I pump hot engine oil into it...no cracks. I've also used it to do a brake job--using a master cylinder top cap with a homemade adapter for the hose, and used it to apply very light pressure, which made a 1 man, 4 wheel brake bleed a breeze. It also cleans very easily so i was able to extract different fluids with no contamination. Every piece can be removed and cleaned. I had borrowed one from a friend and got to test it out before I sunk the money into one of my own. It's a great asset to anyone who changes his/her oil, does brake jobs, or just needs to move fluids. I purchased a "new open box" unit. A great deal, and I expected there to be a few issues: the mount that stabilizes the top of the pump housing to the reservoir had snapped and there was a missing nut. It doesn't affect how it works and I just have to be sure I don't lean to one side when I pump so as to not stress the pump base. I've done a handful of oil changes with it since Nov. 2014 and it's great....no more getting under the vehicle! The one thing that takes a little getting used to is the rate at which it extracts/pumps. The tubes are small, so just be patient. Depending upon how much fluid is being moved will depend upon how many pumps pressurizes the thing. You'll have to pump it up from time to time to maintain pressure. It's very easy to empty the reservoir into other containers and has made oil changes as enjoyable as an oil change can be.
P**R
Could not due without!
Works extremely well and good price.
C**E
Disaster tool
Probably the cleanest oil change system I used. This pump will get the vast majority of the oil out of the vehicles I have used it on...Toyota Camry, Chrysler Pacifica, Jeep Grand Cherokee, Toro zero turn. I pumped out the oil and then pulled the drain plug to see how much was left. In all cases nothing came out of the open drain plug. Now, if the oil filter is bottom or side mounted on the engine there will be some oil coming out from that port. For top mounted oil filters like the pacifica, it was virtually oil mess-free. After you complete the oil change you can pump out the oil into recycling containers or even the big drum at the recycling center. There will be some residual oil in the lines and on the lines where they go into the engine, but from what I'm used to, this is way cleaner. EDIT 8 January 2026 I had to change my review of this disaster tool. I have about ten oil changes with it now and IMHO only one of them really worked well. The first mityvac I got arrived broken. I contacted Mityvac and they were seriously useless. So, sent it back to Amazon and got another one. Here is the deal: There are so many failure modes on this pump. You will get to experience them all. And for an added bonus, when oil spills with this tool, it just doesn't spill, its under pressure. You will be amazed at where oil under pressure can get to. The unit has two hoses because dip sticks come in multiple diameters. You have to connect the small diameter hose to the larger diameter hose. The connector you get is seriously not up to the task. it leaks under pressure and under vacuum. Once you get the oil out of the vehicle you might think to yourself that it will be easy to pump into an empty container. But alas, no such luck. The plastic hoses are stiff enough that they will whip out of the container unless you have a helper holding it in. Remember that under pressure part???? So then you might think well that didn't go as planned, I'll just pop out the plug and pour the oil out. Good luck with that too. If you look up unwieldy in the dictionary, you will probably find a picture of this thing. I have had it with this pump. I've been changing oil for almost 60 years and this POS has convinced me it is way better to get down on the cold garage floor and drain oil the old fashioned way. I have never spilled oil as much as I have using this significantly inferior tool. Edit # 2 I thought I had the "experience" of working thru all of the failure modes on this ridiculous tool, but I was wrong. Yesterday, 20 July 2026 I got to experience even more fails as I tried to use it to extract oil on a Honda Accord. This time it was the seals on the pump started leaking. How much oil did I get out? Only enough to ensure that the extraction tube would drip all over the place. I had to yet again get down on the floor and do it the old fashioned way. So I do maintenance on all the kiddos vehicles. On every one of them, toyotas, honda, dodge, jeep you still have to get underneath the vehicle to remove the filter even if you were able to pump out the oil. I eventually came to the conclusion that this tool actually adds steps and mess to the process. Bottom line, I gave this tool away on the free cycle site. The only laugh I'll get out of this tool is seeing how the paid reviewers try to spin this one....
B**E
instructions to use missing
M**A
Recommended
Do he's job.
P**K
Great oil change tool
Robust build. Easy to use. Great capacity and easy to pour old oil into can. This worked well on my 2017 and then my replacement 2021 Audi A4 TDI. I would say these oil evaluators are great if the oil filter is located on the top of the engine as in the case with my A4. If the oil filter is underneath then the car would need to be raised and plastic guard removed so then you would easily get to the sump nut so why bother with this tool at all ? With my oil filter on top I don't need to lift the car at all, simply suck out the old oil through the dip pipe. It is also great for cleaning out around the removed paper oil filter. The engine and therefore the engine oil needs to be warm & you get a feel as to how far to shove the correct diameter pipe into the dipstick tube until it hits the sump pan. Had approx 5L of old oil out in less than 10 min. Quick, easy oil & oil filter change. Hope it lasts. Have done 3 services now with min fuss. Delighted with it . I leave tubes high to allow to drain back over time. Easy to empty too from spout.
G**R
Must have für KFZ Instandhaltung
Prima Produkt. Prima Qualität. Ein Muss für alle Range Rover V8 5.0 Besitzer, die selber den Öl- und Filterwechsel machen. So easy!
R**A
Mighty easy
Very good easy to use product. Makes fluid evacuation and transfer a breeze. Highly recommend this product.
Trustpilot
1 day ago
2 months ago