Desertcart purchases this item on your behalf and handles shipping, customs, and support to Hungary.
โจ Transform your surfaces into showstoppers with Promise Epoxy! ๐ธ
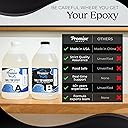
Promise Epoxy Table Top Epoxy Resin Kit (64 oz) offers a user-friendly 1:1 mixing ratio, self-leveling formula, and crystal-clear, food-safe finish. Perfect for bar tops, kitchen tables, and creative projects, it delivers durable, water-resistant protection with American-made quality backed by over 40 years of expertise.


| ASIN | B0788HYTN3 |
| Best Sellers Rank | #1,810 in Industrial & Scientific ( See Top 100 in Industrial & Scientific ) #4 in Industrial Coatings |
| Brand | Promise Epoxy |
| Brand Name | Promise Epoxy |
| Color | Clear |
| Compatible Material | Plastic, Wood |
| Container Type | Can |
| Customer Reviews | 4.4 out of 5 stars 33,349 Reviews |
| Full Cure Time | 72 hours |
| Item Form | Liquid |
| Item Package Quantity | 1 |
| Item Weight | 16 ounces |
| Manufacturer | Promise Epoxy |
| Material | Epoxy Resin |
| Material Type | Epoxy Resin |
| Number of Pieces | 2 |
| Other Special Features of the Product | Food-Safe When Fully Cured, High Gloss Finish, Impact Proof, Self Leveling, Water Resistant |
| Part Number | jkkf224hg |
| Special Feature | Food-Safe When Fully Cured, High Gloss Finish, Impact Proof, Self Leveling, Water Resistant |
| Specific Uses For Product | Art, Craft, Jewelry, Table Top Coating |
| UPC | 818486020807 |
| Unit Count | 63.96 Fluid Ounces |
| Viscosity Level | Medium |
| Volume | 1.89 liters |
| Water Resistance Level | Water Resistant |
D**N
Product Worked Great - WARNING LONG POST
So I have been wanting Epoxy the top of my bar for some time. I have been saving ticket stubs to events I have attended for over 35 years. So, the last thing I wanted to do was screw this up. I read the reviews for LOTS of different products. What I found most helpful was reading about other peoples experiences with the product. Especially people who had never done this before. Therefore, I am going to go ahead and add to the product knowledge of this epoxy. First, I will say what many other posts said - FOLLOW THE DIRECTIONS. If you take short cut, you are going to pay the price. Your epoxy won't set or you will have other issues. So let's start with the mix. I did what everyone else had recommended. I affixed my ticket stubs to my bar counter tops. Now I should also mention this. I have a high counter top and a low counter top. I did a test run on my low counter top. On the lower counter top, I had taken CD jewel case covers (i had hundreds) and affixed them and did the same process. This was my test run. It did not turn out perfect. However, the imperfections were 100% MY FAULT. I read some 2 and 3 star ratings and looking back on them now, I would venture to say a lot of the screw ups I read were user error. Not trying to be hard on the DIY user, but much of the complaints I read were user screw ups. My test runs had issues because I didn't anticipate a lot of things. Now back to the mix. First, don't go cheap. Use a two new containers EVERY TIME you do a mix. My counter top was big - 2' x 10'. When I did my first test, I did it with a quart plastic mixing container. That would have taken me all night. I quickly switched to a 5 quart bucket. Get the ones that have the ounces marked on the side. I mixed batches 64 oz at a time. I did just like it said. Mix for 5 minutes and then transfer to a second - clean container and mix for 3 minutes. I just used Alexa for this part. About the mixing - this stuff is hard to mix together. I did my first batch or two with a paint stick. Eight minutes of that is brutal. I read a review with a guy who had used a paddle paint mixer on a drill. So, I decided to give it a try. First time, I screwed up. I thought use a high speed - full trigger - and get it mixed good. That was stupid. Just creates one big air bubble - actually thousands that make the mix look like milk. i was able to use a heat gun to get the bubble out. However, it took forever!!!! Second time, I just pulled the trigger until the paddle started spinning - lowest setting possible. I just moved it around and reversed the paddle every couple of minutes. Worked great. I don't think it came out with any more bubbles and they came out easily. Pouring the mixture was something most people didn't really talk about. When you do your seal coat, you can move it around with a blade. Be gentle or you will create valleys. Now on the flood coat, no one ever said to move the product around. The indication is that it is self-leveling. I would say that is accurate to a point. If you just pour it and let it run, it is going to stay really thick - between 3/8 inch and 1/2 inch. I didn't want it that thick. So, just like the seal coat, I moved it around again with a blade. I just used a 6 inch putty knife. This stuff is STICKY. I bought a 40 pack of rags from Home Depot and a gallon of denatured alcohol. I used this stuff a lot to wipe things off and clean up my putty knife. Once I poured out all the product on the bar top, I just worked it around making sure I got it up tight in the corners. I does self-level and it was just a thinner coat than the 1/2 inch. I used a heat gun to get out bubbles once I poured the epoxy out. I liked the gun because mine has a fan, think hairdryer, and covered more area. The bubbles come right out. It was a very easy process. However, don't do it once and leave it. You will get sneaky ones that creep up out of no where. I went back and checked it every 30 minutes for the first two hours of dry time. Ok, last couple of items. First, temperature - I kept the temp in my basement between 70 & 75 the entire time. Do what they say and don't let it go below 70. This will screw with the curing process. The final thing I would say is this. Once you have mixed it, the consistency is like thick honey. My bar is 3/4 inch laminated oak plywood. I have taken a piece of 1"x3" and made a half inch dado cut and used this trim piece to cover the edge of the ply wood. It fit really snug. I thought there was no way this was going to seep in, behind, down, and then back out of that piece of trim. Well, it did in a couple of places. if I was doing this again, I would run a bead of caulk on the under side of the bar to prevent those drips from happening. I was able to wipe it all up and keep the underside wiped down, but I had to do this for like two hours until the product got thick enough it no longer seeped out. Ok, sorry this is so long. But, i found the long review really helpful as I planned my project. I used two of the two gallon kits to do my upper and lower bar. Keep your environment as dust free as possible. Little threads and dust particles will get on the top and there is nothing you can do. This includes shutting heat vents in ceiling that are close to bar (learned that on my lower top.) . Final comment - TAKE YOUR TIME. This is not a go fast process. You have to be willing to go slow and be patient. I included a couple of pictures of the finished product. Love the way it turned out.
J**ร
This product is absolutely, positively fantastic !!!!!!!!!!!!!!!
First, for those who want a quick review... This product is fantastic. Cures hard and crystal clear. Definitely would buy again. No regrets. For those who want an in depth... I bought the one gallon quantity of resin. I had enough to finish my 2-tier domino table and had some left over. My first pour was perfect. The second, not so much. It was totally my fault, so here are some tips. First, make sure whatever you pour over is sealed. I had a poster of the Puerto Rican flag for the top layer of my table. I glued the poster to the table with 3M spray glue. When the glue dried, I then covered the entire poster in Modge Podge glue...twice. Modge Podge glue dries perfectly clear without affecting the color of the ink in the poster. After the Modge Podge was dry, I gathered my supplies. You will need a propane torch, level, paint brush, clean mixing container, clean spoon to mix with, and acetone (for clean-up). Also, my work had holes in it that I had to "dam" up so the resin would not all leak out. I used duct tape on the bottom of the table as I did not care if it was embedded in the resin because you will not be able to see it. Make sure your work is level. The resin is very runny and will flow downhill if not even. In a clean bowl, mix 50/50, resin and hardener. MAKE ABSOLUTELY SURE IT IS 50/50. I eyeballed it from the container. I poured in the resin first. It is the thicker of the two components. I set the bottle down and mixed in the hardener until the level of the hardener matched the resin. However, I did not wait for all the thick resin to flow down from the sides. When everything settled, there was a one inch difference. I did not notice until I had finished pouring on my table. The result was resin the did not harden. It was very tacky and stayed that way. If this happens to you, do not worry. After it dried as much as it will, wipe it perfectly clean and pour a fresh (properly measured) batch on top. After you have 50% resin and 50% hardener in your container, mix well. This is also a very important step. The first time, I mixed with an old slotted spoon. The second time, I got creative. I had a brand new paint can opener that was straight at one end, but had a "circle" at the other. I stuck the straight end into my cordless drill and used it as a mixer. It worked fantastic. After your compound is thoroughly mixed (about 6-7 minutes by hand), paint a thin coat on every square inch of your art work. It will look wet. If any spot appears to be dry, apply resin there. Once everything is covered in a thin layer of resin, make your pour. Do not allow the resin to pool deeper than 1/8". If you want it thicker than 1/8", use multiple coats. Spread the resin out evenly. It will look very cloudy, especially if you used the mixer to combine your resin and hardener. I could barely see the artwork through the cloudiness. Do not worry. Make sure the compound is spread out evenly, covering every inch. Since I had a table, I painted the sides with the resin and let it drip off the sides onto a large piece of plastic protecting my floor. That way, the table was covered on all sides. Once the mixture is spread evenly, fire up your blow torch. Quickly run the flame across the surface of the resin. Do not let is set in one spot for too long as it will burn. You will see all the cloudiness start to vanish. (The cloudiness are tiny air bubbles trapped in the resin.). I went over the entire table four times. It took about two minutes as I moved the flame rather quickly. This will get out ALL of the bubbles and make the resin 100% clear. Anything that lands on the table (dirt, bugs, nerf darts) will be there forever so it is important to protect your work at this point. It will take 72 hours to fully cure, but the table will be hard to the touch in 24 hours. It will be beautiful when you are finished.
J**E
It CAN produce amazing results, but it has many nuances that you need to understand
For first time users, I would highly recommend mixing small amounts and trying little jobs. The product can produce amazing results BUT has many nuances. This is my 2nd kit (and was substantially better than the first from a different manufacturer). I used the product in a cool garage - 55-60f so realize my comments relate to THIS TEMPERATURE. This is a big deal as the viscosity changes dramatically based on temp. If you're using this in the summer in Phoenix in your garage with the door open, this will flow like water! Viscosity will dictate 1) how this flows and if not properly contained completely, how quickly it drips out 2) how it traps bubbles and how thick you can/should pour it 3) if it will level itself out or not. There is NO optimal temperature as you need to figure out how to use it and then decide what works best for your application. I needed a build up to about 1" in certain areas of my project. I took 4-5 applications to get it there based on temp and bubble trap. To that, adding epoxy in layers is super easy, takes no prep other than keeping to clean and then pouring again within 24-36hrs. In fact, I routinely needed to sand edges off based on my forming method (packaging tape which worked pretty well but did allow for some dripping at times) AND POURING FRESH EPOXY OVER MATTE SANDED AREAS RENEWED it to CLEAR AGAIN. This was fantastic when I first tried this and realized I didn't need to sand down with 400-600 grit before repouring. This made reworking an area so easy. Using wax paper or parchment paper under your project works great. It peels off easily after cured Using a heat gun can help a lot. It eliminated a lot of bubbles that came to the surface. It also quickly warms up the epoxy which increases flow which again, can be good or bad depending on your application. When it thins out, more bubbles can also come to the surface and burst. Heat guns can be used to shape the epoxy for up to 2 hours or more after initial pour. I used it to level out the product when it won't cover an area 100%. Once I set it outside after it'd been sitting for a few hours in my garage to cure in the sun. It actually started to move in direct sunshine at 70F after 6 hrs!!! This does not set quickly at 60f. Curing - it is noted in the instructions and is true that it takes a LONG time to fully cure (up to 3 days I believe). If you want to sand an area, it is gummy for the first 12-24 hours making sanding difficult if you want to keep working. Heating it up will cure it more quickly as it'll move the reaction forward faster, but it's not going to happen in minutes or even a few hours. Overall, I think this is a great product. I will use it again for sure. Just really think about how it works both chemically and it's physical traits to help you figure out how to manipulate it. Try small first and don't get in a hurry. It's taken me 2 weeks of working on my project every day to finally get it right mixing 6-10 oz at a time for several sq feet of uneven surface (root ball I'm encasing)
A**N
Expensive but works great unless it ... doesn't
Sorry for the super long review that follows. I have been building a large bar in our basement and I used this product to coat 2 large bartops that I had built using oak, then stained. One surface turned out perfectly with no problems. The other, not so much. The epoxy didn't cure properly after the flood coat and was a massive sticky/soupy mess. I was fortunately able to save it (see below) but for some time I thought it was ruined for good and I would need to rebuild the bartop. It's not like the stuff can be sanded down when it's all gummy and sticky. Keep in mind this in NOT like a polyurethane lacquer. It's an epoxy glue that you mix up in large quantity and dump onto a surface and allow to cure. A plastic paddle or foam brush is used to sort of push it around as it spreads. Anyway, my tips are below: 1) If you're not familiar with this stuff, BEFORE ORDERING go to the website and read the directions. You need to order ALOT. Including the seal and flood coats, you will need about 1.25 gallons per 12 sf. You won't get away with less. If you try to skimp, you'll end up with craters on the surface where it didn't spread. For a counter or table, plan on spending a couple hundred bucks, at least. If you screw up, you'll need even more. 2) Read the mixing directions very carefully. As you mix, the hardener will want to settle on top as a thin, clear layer. Make sure you are constantly pushing this down into the epoxy as you stir. This is where I got burned, as did (I suspect) a few other angry reviewers. One reviewer used a cement paddle mixer ... I suspect he/she didn't get that layer on top properly mixed in. 3) As above, you're dumping epoxy glue. Protect the surrounding area carefully and have denatured alcohol ready to go. This cleans it nicely. 4) Remember this stuff cures as a chemical reaction, it doesn't "dry". If it's not hard in 24 to 48 hrs, it's not gonna be. In 10 years it will still be sticky. The only fix will be to recoat. See below. 5) Worst case scenario is the stuff is used as a flood coat over a large, precious surface and it doesn't cure. This happened to me. I read one of the one star reviews here where a $1000 piece of furniture was ruined and my situation was very similar. The bartop was very sticky, nearly cured in some areas, and puddles of honey in others. And everything in between. I cleaned the more liquid areas with denatured alcohol and (many) rags. The thicker, gummy areas were soaked with the alcohol and scraped with a plastic scraper. I didn't use metal for fear of gouging the wood. I got the surface to the point where it was all one irregular, but relatively firm and very tacky surface. There were some abrupt/sharp looking surfaces at the edges of where I had scraped. I used a heat gun to melt these and other raised or highly disrupted areas to smoother transitions. Then I did another flood coat, and it was (thankfully) fine. So, overall, I am happy with the product. It looks like glass and everyone asks me how I did it. I do think the mixing process is a bit too unforgiving, but if you stick with the pro marine directions and what I mentioned above, you should be okay. If it doesn't cure completely, you have to recoat. It's the only fix. This brings me to my second greivance: this stuff gets expensive quickly. You need to buy a lot and if it doesn't cure, you need to buy even more.
A**R
Pretty vague directions for such an expensive product.
Iโll start by saying that this product is as advertised. It does come out with an awesome looking finish but I have to admit, itโs a fairly expensive learning curve. I had just bought my first home and decided I was going to build all new counter tops to save money. I had built four maple counter tops, of varying sizes, with the intention of coating them with this. Iโm now three months in and theyโre holding up well. The first thing I have to note.. get more than you think you need. The second piece of advise- do this when you have a lot of time to spend with it while itโs setting up. I took the advise of another reviewer and ordered more than I needed. I am SO glad for that review, as even with the extra, it didnโt leave much room for error. The general application seems to invite waste when youโre pouring it over the edges. To get a nice thick coat on the edge, it needs a good flow of epoxy. I think I should have done a test run with a small project, but being that this stuff was as expensive as it was, I didnโt want to needlessly waste any. I was fairly confident things would go well. My only real issue came in the form of bubbles. I watched all the videos and I read all the advise. I used a heat gun initially to pop bubbles but learned the propane torch did a much better job. I think my problem occurred when I did my seal coat. I let it set for the amount of time the instructions had said. I noticed I had some bubbles that emerged hours after applying the first coat. (If I was able to babysit it for longer it could have been easier to chase.) After waiting the time the instructions said to wait, the epoxy was still slightly tacky. With a pretty vague set of instructions, I wasnโt sure if the first coat was supposed to be this way so the next coat could adhere better or if the first coat was supposed to be solid. As I tried to follow the instructions, I continued with my second coat. I think this is where my problem occurred. I believe that because my first coat was letting air (gasses?) escape from the wood, my second coat would ultimately have the same bubble problems. Popping the bubbles with the torch seemed to work well. I stayed with the project for 15 minutes after application, no more bubbles present, I came back the next day to find two of my counter tops had bubbles. I think being with the curing epoxy longer would allow you to chase the bubbles with heat and prevent that. I also wonder if letting the first coat completely cure would have prevented it also. (Again, lack of decent instructions I went with my gut instinct.) Overall they came out with a great looking finish. Perfectly clear, almost like glass. It doesnโt seem to scratch easily, but time will tell as we havenโt been too rough on them. I would recommend trying this out if you can stomach the cost, however if youโre going to coat something expensive, you might try a practice piece first. In my case, I built the counters myself, if I messed them up I wasnโt going to be overly upset.
S**R
Hard finish, Crystal clear, great product for bar top
This product was used to cover a live edge bar top for my home bar. Overall the product was easy to work with and if you have done this type of pour finish before, nothing here will surprise you. It is a little more expensive than most but the results were outstanding. I did 5 pours and the finish was clear with no yellowing or hazing. I took the advise of some of the commenters and read the directions carefully and followed them to a โtโ. I did this project over the winter to I cranked my heater in the shop to maintain 76 degrees because the instructions stated it need 75 or above to cure properly. FYI curing time for me was about 8 hours to the point it was no longer settling (hardened) and 24 hours to me hard. I had to wait 72 hours before I could sand (2000 grit) for following coats. I opted not to pour subsequent coats at 12 hours (sanding not needed per instructions) because in the past I would sometimes get light hazing with other products. I used a heat gun on low to deal with the bubbles and that worked like a charm....plumbers tourch works well too...but I ran out of gas midway so went with he heat gun. Donโt forget to do a seal coat on your top before you do the first pours. Also this stuff will find every crack and opening in your wood so expect some leakage and run off....I put cheap painters plastic tarps on the floor and over my saw horses and that worked perfect. Take time to seal up any through cracks or opening because it will run out and you will never get the top smooth. I proprably could have done better with more pours but given it is a bar top, at some point I will need to refinish (stuff is hard so maybe a while!) so I can address that then. 1. Read directions....follow them 2. Prep your surface. Make it as smooth and uniformally flat as possible 3. Seal the wood with a light coat of polyurethane and be sure to sand before you pour 4. Seal any cracks or holes from botom 5. Use tack rag to remove any dust or dirt prior to each pour 6. Use heat gun or plumbers tourch to remove bubbles 7. Tarp floor and anything else you donโt want this stuff to stick too 8. Buy disposable plastic mixing cups and flat stirring sticks...you will need one set for each pour you can not use again 9. Buy and be use the yellow plastic spreaders since you will need this to move the product around 10. Be sure to do this in an area that is bug or dust free ( as humanly possible ). You will be surprised how much crap will somehow make it to your top after you pour! 11. Pack patience. Take your time and you will be rewarded
R**E
Amazing product!
This product worked absolutely PERFECT for my countertop project. Iโm beyond thrilled with the results. Everything went on smooth and gave me just enough time to accomplish what I needed to before the product set. Now, if youโve never worked with Epoxy Resin there are a few VERY important things you need to keep in mind. Iโve worked with a good amount of resin and done a ton of research on this stuff, hereโs all my tips and tricks Iโve picked up for doing countertops. Hope they help! 1) Temperature is CRITICAL. Your space MUST be between 75-85 degrees for the first 24 hours or you run the risk of your resin not setting properly. Iโve tested this theory on purpose and it didnโt turn out right. Even if it is miserable working in that temperature, you wonโt regret it when your project turns out right. Scraping resin off your project because you decided to not do this, is literally the worst thing. Just picture runny, sticky, glue like bubblegum that you are trying to get off something. And water DOES NOT WORK for cleanup. Just FYI. Rubbing alcohol gets it off your skin pretty good. But not all of it. 2) Mixing the product for the right amount of time AND dumping it and remixing in a second container is very important. Donโt skip this step. Itโs annoying and seems unnecessarily, but really you need to just do it. Yes, even if youโre using an electric mixer, which, side note, generates a lot of bubbles! So if youโre going for glass smooth, stick to a paint mixing stick. Constantly scrape the sides and bottom of your bucket to make sure youโre not leaving any unmixed product. Also, itโs best not to use a mixing container that has corners, stick to a bucket or something that is circular and does not have any wax coating on it. 3) Pouring more is better than pouring less, if you donโt pour enough youโre trying to drag the Epoxy across a surface and it wonโt cover evenly. 4) Using a foam roller is great to help spread the Epoxy evenly, but it will absorb lots of resin. Which is good if you are doing a lip or edge of your countertops. You can get away with it well enough. Or I use a plastic paint scraper. That works pretty well too! 5) With this product I didnโt need to use a torch or heat gun very much because I didnโt have many bubbles. I personally like to use a heat gun opposed to a blowtorch because I feel like the heat gun doesnโt get as hot as the blowtorch but it pops the bubbles well enough and you donโt run the risk of scorching your Epoxy as much. 6) If you do decide to mix paint into your resin, make sure itโs Acrylic. Or you can use spray paint. That works well with resin. If you do decide to use any kind of metallic paint, donโt leave it sitting in the bucket for too long. For whatever reason, I left a bucket of resin with metallic spray paint mixed in sitting for a little too long and it got WAY too hot and bubbled up and started melting my bucket... so just a heads up about that. Donโt leave your resin sitting in a small container for too long. 7) Prep your surface well. My countertops had laminate on top so I sanded that well and applied a primer coat (just found a water based paint from Loweโs.) let that dry completely and it worked great. I purchased two 2 gallon kits and it did a base coat, a second coat, and a final flood (top) coat, (3 coats total.) My countertops are approximately 38 square feet and I just barely had enough. If youโre not experienced with using Epoxy resin, Iโd say you should probably get a little extra just to be safe. Whew!! Hope all that helps someone out there! Good luck!
C**Z
Refused to set fully after 6 months, marshmallow consistency that may have ruined my molds
I feel bad having to say this but this is the only resin brand or purchase I've made that I absolutely loathe. For my experience, do not buy this. I've used a lot of different resin brands and types, both epoxy and UV, on many different projects from 3D molds for medium projects or smaller decorations to the typical thin layered molds for jewelry. All other epoxy resin has been fine. I may have more bubbles in it or this or that, And it may not set as hard or perfectly as I want here and there, but ultimately even from my very first attempt when I had no idea what I was doing I've always had the product set in the long run. This is the first and only time I've had resin that absolutely refused to ever set. Or I should say, after literal months being left untouched in the garage where it could have heat and then cold as the freaking seasons changed it proceeded to only set on the very very bottom part touching the silicone molds on the coaster set I tried to make, and in the 3D holder for those coasters it basically never set at all. I followed the directions to a t and I even used a scale and cups to properly measure everything to make sure I was doing everything correctly. I don't even use the scale on some of the other brands when I'm supposed to which is why this is so frustrating. Because even when I have flubbed up or been a little lazy on other brands it has never ever been an actual issue if you just give it enough time. This however despite having been poured in late August or early September 2024 has still retained the consistency of half melted marshmallows even in February 2025. It's actually so bad that I think I'm going to have to throw out these brand new molds I was using them in plus this big mold tray I use to catch overflow. At some point I discovered with other resin that was being stubborn I could do a mixture of Dawn dish soap and white vinegar and soak it for a while and then scrub it and it tends to clear things off. I left this stuff alone for about 6 months and it wouldn't set so then I tried to pull out what I could and even using really nice latex gloves I went through multiple pairs and still couldn't get the stickiness out. Because it would catch on to my gloves and it had enough pull that basically all I was doing was getting pissed off and succeeding at times with getting some of the stuff off of it and other times it just essentially stayed in place. There's also this brand of paint and art wipes by hippie crafter that are phenomenal and I can't live without at this point. They have been great for removing resin mess and getting it off my hands and everything. Even THEY couldn't handle this mess. When I tried using them to scrape up any of the sticky resin it essentially just ripped them apart and decided to glue down pieces of the blue wipes here and there. I then let it soak for over a week or maybe two in the dawn and vinegar solution and that helped only a little bit even with me switching it out at one point. At this point I had to set everything aside to dry in the hopes that maybe it would set this time and I could break it off like normal and recover my molds because I'm going to be really annoyed if I have to throw them out. I haven't even tried touching it since I set it aside maybe a week or two ago because frankly it pisses me off to think about it and it's such a mess I don't want to deal with it. The tray I mentioned is one of the first purchases I made when I first got into resin a couple years ago. It's technically a really well made thick silicone resin mold for creating a box or a tray as a deep mold but I use it as something to hold my resin projects midway because it's easier to carry around. That thing has had so much use with so many different products and never once have I been worried I would have to throw it out but I genuinely worry I might have to throw it out because of this product destroying it. Simply because I can't get the melted marshmallow crap off of it. I will say that when I first poured it it was very clear and it looked like the projects were going to be beautiful. That's another reason I'm annoyed with this because one of the coasters had layers of dried flowers in it and I took a lot of time arranging them in different levels. It was going to be one of the prettier things I'd ever made. Which is one reason why I tried leaving it for months first inside in temperature controlled areas and then eventually out in the garage because the smell was too much. And since it wasn't setting if you so much has bumped it you would mess up the surface and I didn't want to make it look dumb. So it spent really hot days and really cold days over half a year untouched in the garage, with more warm days than cold. That may not be ideal but it was the only choice I had because it refused to set. And even with that an ideal temperature it should have set over 6 months. The fact that it did set on the part that touched the silicone molds tells me that it was capable of setting so I don't know what the deal was with the rest of it. The only thing I could think was maybe I didn't mix it as well or long as I was supposed to but again I have made so many projects and I have been honestly a little too lazy on some of them which has included probably not mixing quite enough on some sets. Every other brand and epoxy AB and anything else I've used has handled that no problem. The only time I ever had any issue was very early on when I think I didn't mix it quite right and even then the project set, they just were kind of bendy and so since I was doing keys and other jewelry type items I can't really use them because they can get ripped apart. But they rip apart because they're not as strong as they could be or it's possible I accidentally bought soft epoxy cuz I didn't know that existed at the time. I've even been really lazy at times and not even really followed the perfect directions for baby amounts because I may be only had so much left of each by the ends of the bottles. And that's never been a problem. Also to be clear most of the time I'm very specific about it and I am using exact measurements whether it be by volume or weight or whatever it is that the directions say. And I followed the directions on this exactly. Yet I've never had such a horrible experience. I don't like leaving bad reviews but given the fact that I've never had this issue with anything else I've ever bought in the years that I've been doing this, I wouldn't feel right not warning someone else about it. Since other people have had better luck it's possible part of this is user error but that's also part of my argument for why I still wouldn't purchase this. Because there was more chance for user error on many other kinds and brands I've bought over the years and they handled it but this one didn't. So even though the only user error I think I might have done is potentially in the actual mixing time or speed of it, I still don't think it makes any sense that it would set on contact for some things and not for other parts no matter how long of a time passes. And if it at least wouldn't be the melt and marshmallow consistency and I could just pour it out that would be fine but it's also completely impossible to remove. It's a bummer because I was excited about having food grade on coasters and I was actually making these as presents for a friend I hadn't seen in well over a decade. I went to make it later than I normally would, only giving about 72 hours before the plane ride, but they should have been set enough for me to bring with. Instead I couldn't move them and proceeded to not move them for probably two to three or four weeks or maybe even more inside before I finally had to give up and move them into the garage in the hopes that maybe it would set there.
K**D
Good quality
Fast shipping
C**R
Entrega a tiempo y satisfecho.
Entrega a tiempo y satisfecho con el producto, buen material.
A**O
ุฑุงุฆุญุฉ ุงูู ูุชุฌ
ู ุจุฏุฆููุง ูู ู ุฎูุงู ุงูุชุฌุฑุจุฉ ุงูุฃููู ูุง ุจุฃุณ ุจุงูู ูุชุฌ ุ ูููู ุฑุงุฆุญุชู ู ุฒุนุฌุฉ ุฌุฏูุง ุฌุฏูุง ุฌุฏูุง ุฌุฏูุง .
U**.
ใใฎๅๅใฏๆๆชใงใใ
ใพใๅบๅ่ ใฎๅฏพๅฟใใจใฆใๆชใใงใใ 3้ฑ้ใๅพ ใฃใใฎใซๅๅใๅฑใใใซใ้ฃ็ตกใใฆใๅฏพๅฟใใใชใใ ๅๅใใชใใฎใชใใฐๆณจๆใใๆฅใซ่ฟ้ใใใในใใงใใ ๅๅใๅบๅ่ ใๆๆชใงใใ
ู **ุฏ
ุฌูุฏ ูู ุง ูู ุงููุตู ููู ูู ููู ู ุญูู ุฉ ุงูุงุบูุงู ุจุดูู ุฌูุฏ ูุชุณุฑู ุฌุฒุก ู ูู
ุฌูุฏ ูู ุง ูู ุงููุตู ููู ูู ููู ู ุญูู ุฉ ุงูุงุบูุงู ุจุดูู ุฌูุฏ ูุชุณุฑุจ ุฌุฒุก ู ูู ุงูู ุงูุฎุงุฑุฌ
Trustpilot
4 days ago
2 months ago