Desertcart purchases this item on your behalf and handles shipping, customs, and support to Hungary.
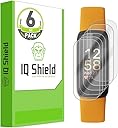
๐ก๏ธ Protect your Inspire 3 in styleโbecause your wrist deserves flawless clarity!
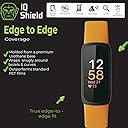
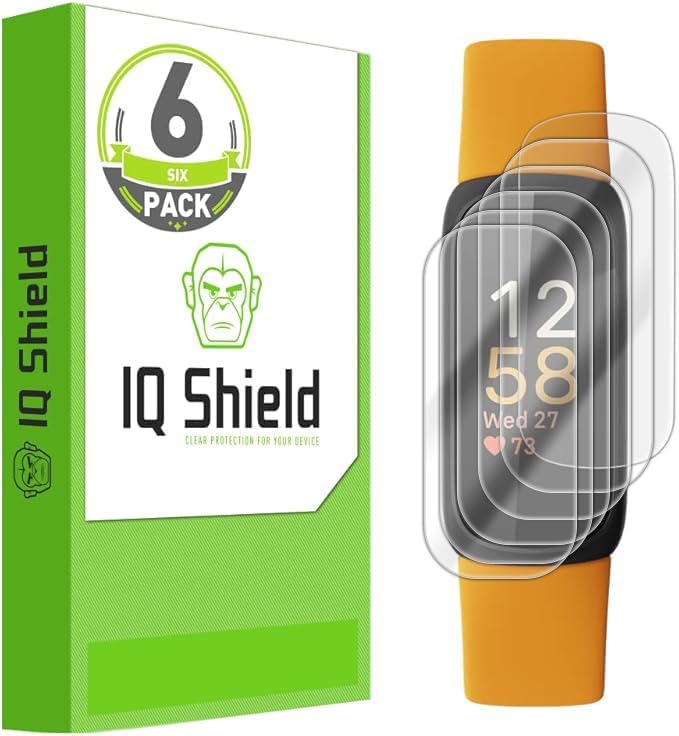
IQShieldโs 6-pack screen protectors for Fitbit Inspire 3 combine ultra-thin, flexible TPU film with smart adhesive technology for bubble-free, easy installation. Featuring anti-scratch, non-yellowing clarity and self-healing properties, these protectors ensure maximum coverage and durability while maintaining touchscreen responsiveness. Backed by a lifetime replacement warranty, IQShield offers premium protection that keeps your wearable looking brand new.


| Asin | B0BJ7Q64KZ |
| Best Sellers Rank | #10,152 in Cell Phones & Accessories (See Top 100 in Cell Phones & Accessories) #721 in Cell Phone Screen Protectors |
| Brand Name | IQShield |
| Clarity | 10 |
| Compatible Devices | Fitbit Inspire 3 |
| Compatible Phone Models | Fitbit Inspire 3 |
| Compatible Wearable Computer Models | Fitbit Inspire HR, Fitbit inspire 3 |
| Customer Reviews | 4.3 4.3 out of 5 stars (22,841) 4.3 out of 5 stars |
| Finish Type | Glossy |
| Item Dimensions L X W | 1.5"L x 0.78"W |
| Item Hardness | 2H |
| Manufacturer | IQShield |
| Material | Thermoplastic Polyurethane |
| Model Name | IQ41698 |
| Model Number | IQ41698 |
| Number Of Items | 6 |
| Part Number | IQ41698 |
| Screen Size | 1 inches |
| Screen Surface Description | Glossy |
| Special Features | Scratch Resistant |
| Unit Count | 6 Count |
| Upc | 843475122712 |
| Water Resistance Level | Water Resistant |
User
Good screen protrector, incorrect installation instructions
This Fitbit Charge 5/6 TPU screen protector is nearly invisible once installed, as shown in one of my attached pictures. Surprisingly for this type of protector, it is very smooth to the touch and responsive, almost like a glass screen protector. I am quite pleased with these so far, although I have only just installed one today so I donโt know the longevity of them. But they are a good value for the six pack. The six pack of protectors comes with everything you need for installing them, including alcohol wipes, a microfiber cloth, dust stickers, and a squeegee. However, the biggest problem I had is with them is the installation instructions. First, this screen protector DOES NOT use the liquid spray installation method I have used with other protectors from this brand. Unfortunately, the Amazon sales page for these has a video showing that method of installation, which is not what these use. Second, they do have installation instructions on the outside of the package for these, but they are for a phone screen protector and are at best confusing. I ended up ruining one of the protectors since the instructions really did not match the actual installation method. The instructions on the package, which are shown in another of my attached pictures, discuss partially lifting up stickers #2 and #3 and using the squeegee to push towards the end of the protector. However, labels for #2 and #3 are both on one sticker at the center of the protector, not two stickers projecting past the ends as shown. Second, you do not use the squeegee to push like they describe. Instead, you actually have to pull out and discard the thicker bottom layer from under each end of the protector so that the remaining actual protector now will adhere to the screen. So basically the proper steps are the following:1. Clean the screen of your device with the included microfiber cloth and dust remover stickers. making sure that the screen is free of dust. debris and fingerprints.2. Using the sticker labeled "#1." remove the bottom prolective layer. Once removed, align the screen protector to the screen of the device and gently press down on protector to secure it in place. Note that the bottom layer is not really adhesive, it is just a split rubber sheet that somewhat sticks to the screen, but only at its highest part.3. Once you get the protector aligned, hold the bottom end against the deviceโs screen and gently lift up the top end of the entire protector. Carefully peel out the top half of the rubber layer from under the remaining layers of the screen protector, then press the protector back down securely onto the screen.4. Now hold the top end of the screen protector against the deviceโs screen and gently lift up the bottom end of the entire protector. Carefully peel out the bottom half of the rubber layer from under the remaining layers of the screen protector, then press the protector down securely onto the screen.5. Starting at the center of the screen, any bubbles can easily be pushed towards the edges of the device using the included squeegee. Finally, use sticker #4 to peel away the top protective layer.6. Using your fingers or the palm af your hand, firmly press down on the edges of the screen protector.But once you get past the poor installation instructions, these are actually nice, high quality screen protectors.
User
LITERALLY INSTALLED IN LESS THAN 10 MINUTES WITHOUT BEING PARANOID - CANNOT GET BETTER THAN THIS
So I need to start off with the fact that I LITERALLY have years of experience in applying different screen protectors for different devices over the past decade (2020 now guys lol).I have installed tempered glass to self adhesive mainly. I have never used or applied this kind of screen protector before - but usually applying tempered glass and self adhesive screen protectors make me PARANOID. I mean, finding the CLEANEST place possible, with adequate lighting, and telling anyone within a 10 foot radius of me to NOT DISTRACT OR DISTURB ME so I can make sure NO DUST, NO BUBBLES, AND NO HAIR gets underneath the screen protector I am attempting to apply.I watched the video on how to do this while on the toilet, then washed my hands thoroughly after I was done, went into the bedroom, didn't bother being paranoid about doing the installation on the bed, and in under 5 minutes, I had successfully applied this screen protector. I KNOW the video says it may take 20 minutes of holding down each side, and waiting 1 to 2 days for bubbles to go away.Don't listen to that crap.INSTEAD, literally follow what they say in the installation video about using the applicator to swipe from left to right and adjusting as you go until it's right. THEN JUST GO HAM ON THOSE EDGES! KEEP SCRAPING USING THE APPLICATOR AGAINST THOSE EDGES! LITERALLY! I'M NOT KIDDING. JUST KEEP USING THE APPLICATOR TO CONTOUR TO THE SHAPE OF YOUR DEVICE AROUND THE EDGES AS YOU SCRAPE AND KEEP MOVING THE LIQUID OUT FROM UNDERNEATH THE SCREEN PROTECTOR.Then voila, you will have a PERFECT installation of these screen protectors. I did it successfully on the FIRST TRY FOR BOTH MY VERSA 2 AND MY BOYFRIENDS!Ya know what the BEST part is? It looks SO CRISP and CLEAR! You can't even tell it's on the device - that is if you take your nail and try to see if you accidentally left a bubble and try to move it.... then you can see how it's self healing by accident.... Like I did while writing this review. Turns out, I did not have anything underneath the screen by the way, I was just double checking hahaha.ANYWAYS - these work GREAT for ANY case you plan on using with the device, whether it be one of those plastic ones that cover the screen too, like I have, or the STURDY SUPCASE like my boyfriend has! Or if you want it just without the case and alone, it's so flawless and unnoticeable, it's beautiful!I would buy these again and I've already suggested these to my friend for her Samsung Galaxy Watch Active!
User
Great protector, but instructions are wrong โ hereโs how to install it properly
IQ Shield shipped this with instructions meant for a phone, not a watch. The instructions on their website are for an older spray-based version, which no longer applies to this new dry-apply design.I tried following the instructions but wasted one protector before figuring out how to do it correctly. Here's the process that worked perfectly โ no spray, no tape required:Clean the screen thoroughly.Peel off Tab 1 to expose the adhesive.Position the protector carefully on the screen.Hold the โCโ side firmly against the watch, then:Lift the โBโ side more than 90 degrees.Push down on the top of the opaque B-side panel โ it will slide away from the film as you press down.Now hold the B side in place, lift the โCโ side, and do the same โ push down and let the panel slip out.Squeegee out as many bubbles as you can.After that, remove Tab D (the outer clear layer).Finish with a final squeegee to remove any remaining bubbles.โ The result: clear and bubble-free.โ The problem: IQ Shield hasnโt updated their instructions to match this new product. If you follow the old process, youโll trap the opaque panels under the screen.This method works โ but it shouldnโt have taken trial and error to figure it out.
User
Iโve tried many screen protectors and the IQ Shield is one of the Best
Over the years Iโve had a variety of Fitbits and have tried a variety of screen protectors. These range from the soft, flexible film to the hard glass types. I just upgraded to a Versa 2 and was disappointed in the fact that the remaining protectors I had from my Versa would not fit the Versa 2. Although the two watches look similar the faces are different in design. The original Versa has a flat face with sharp fall off at the perimeter of the face. The Versa 2 has a rounded radius at the perimeter of the face and thus needs a shield that will โWrapโ over that edge. Without the ability to cascade over the radius the shield would lift off at the edges. The IQ is a flexible film shield that comes flat on the paper carrier it is shipped on but as you apply it to the face of the watch it will mold to the shape of the radius. Be sure the face is clean from the center all the way around the edges. Using the liquid application spray you can apply the shield and then adjust it on the face to precisely locate it and align the edges to the radius. This is critical to good adhesion. You have some time that you can slide it slightly for perfect alignment. But donโt take too long. You will have to force the edges into place by rotating your thumbs around the face to push the shield edges down. I used the lint cloth I was given to lightly put pressure on the edges without making the shield move. As the shield dried the edges went flat around the radius. The end result was a perfectly aligned, fully invisible application.I wanted a glass shield since I had one on my Versa but they are not available for the Versa 2 because if the face edge radius. I have had this field IQ installed for 3 weeks and couldnโt be happier. I marred the shield when I brushed against an object recently and the shield took it well with no lasting scrapes. The touch pad feature works great and so far I have not experienced any edge deterioration. I recommend the IQ Shield.
User
PERFECT in every way!!! (And I'm probably one of the pickiest people ever when it comes to these things!)
To start, you should know that I'm extremely anal about getting a "clean" look. I LOVE the idea of protectors and always start out with them when I buy some new gadget like this, whether it's a phone, tablet, etc. I mean, if you can protect something and not have it be noticeable, why not?! But there's aaaalways that one little piece of lint that gets stuck in there or it's just sliiiightly off center...you know, just enough to not be very noticeable but enough that it's all you see every time you look at it. (I notice those tiny details - which can be both a blessing and a curse!)When I ordered this, I didn't know it would come with a liquid spray and was pretty skeptical about using it, especially since it said to spray it on the adhesive side. However, I did, and it was like a wonder-worker! The instructions said to put it on your fingers to prevent fingerprints, so that's what I did. Sure enough - no prints! I don't know if they would've showed up if I hadn't used it, but since it turned out so great, I won't even try it with the next one I put on.I don't know the exact purpose of the liquid, but I followed the instructions to a tee and the IQ Shield is flawless. You truly can't tell at ALL that it's even on there. The liquid did allow me to move it around a bit once it was on the face and adjust it so that it was just right, which was great. (I'm now wondering if it'll work with my phone covers too...)The sizing is absolutely exact. It covers the Blaze face right to the edges, but doesn't go over at all. This is only my second day with it on so I'm not sure how long it'll last, but it came with plenty of the liquid spray and 6 different shields, so between that and the fit/look, this is definitely worth every penny! I'd buy again in a heartbeat and would highly recommend to anyone looking for a screen protector!
User
Ok but hard to get bubbles out during install - Updated 7/25/20
This seems like an ok screen protector. Itโs basically a plastic film that glues onto your screen.The issue Iโve had so far is it took me two attempts to get one installed anything like ok because the thing is so slippery itโs hard to get the bubbles out and keep it in position. The first screen actually had ridges in it so these would not release the air, so it went in the trash.Second screen fit ok with some effort, but there is one bubble that I could not remove, and despite what the instructions said about it going away in 2 to 3 days, itโs still there. Thereโs a card in there stating that the installation process if full covered under a warranty, but supplies no information of how to get hold of the manufacturer to claim more screens....Would it help protect from scratching the watch screen. Yes definitely. Would it protect from an impact. Doubtful, but that not what this is for.Update 7/25/20The bubble is still there and the corners are now starting to peel. I havenโt replaced it as yet as I want to get as much life out of each screen protector as possible and Iโm already down 2 of them. Important to note that I do wear my watch when swimming, so take this into account with the wear and tear.Still unable to find out who I am supposed to contact with regards to the screen installation warranty this item claims to have, therefore the warranty is useless. This, along with the installation issue and peeling corners loses it another star
User
Great product/Good Value
I purchased this after reading reviews, despite some negative ones. Figured that with 6 screen protectors in the package, and a lifetime warranty, I could just replace it when it started to fail. I have been pleasantly surprised to see that the naysayers may have just about done it wrong. I got the shield up on the first try, making sure I let it cure overnight. Come morning, the screen looked like it didn't even have a shield on it, yet the protection is there. The wet feature was actually good because it allowed me to move the shield around until I got it just right. It looks great and there is absolutely no loss of sensitivity. It's been on there for over a month now and there is no peeling, scratching, or moving.
User
Not a ZAGG, but not a problem!
I just recently purchased a Fitbit Blaze. Since I work in an environment where getting bumped by various heavy objects is inevitable, I started looking for something that would make sure the Blaze's screen wouldn't be a casualty. These screen protectors are the answer.My first choice for screen protectors is usually ZAGG. Their products are readily-available both online and in big-box retailers everywhere, so it's not hard to bump into one of their products. I'm probably like many of you in that I've never heard of IQ Shield. However, these Fitbit Blaze screen protectors are just as much of a quality product as something ZAGG would produce, and IQ Shield is certainly not asking a ZAGG-level price for their product. If IQ Shield's prices are this reasonable, I just might have to check out what else they have to offer.They give you six of these screen protectors in the package just in case you scratch yours or you accidentally damage one in the install process. I doubt I'll ever use the other five, but it's nice to know I have them if I need them.Application-wise, these screen protectors are not hard to install. Just clean the face of the device with the included cloth, spray your fingers and the adhesive side of the protector with the installation solution, place the protector on the device, and squeegee out the bubbles. Done. It probably took me 60 seconds to complete the entire process, and the finished product looks perfect. I was going to go for the glass protector because these vinyl ones often look chintzy after they're installed, but I'm actually glad I ended up going for the regular ones instead. The "Clear Screen" option looks like the screen protector isn't there at all. That's exactly the look I wanted.I am perfectly satisfied with these screen protectors, and I'd gladly buy them again or recommend them to anyone who's looking for something to protect the screen of their Blaze. I don't think you'll be disappointed.
User
10/10 easy to install
This was so easy to install, not bulky, and will protect the screen from scratches while keeping it small and clean looking. Love it! I applied it quickly, no bubbles, no problems!
User
Five Stars
Excellent product. Saw the video on YouTube, how to use it and then it was a breeze
User
Great product for curved screen, Fitbit Sense
Having followed the installation video to the letter, I have had absolutely no issues with the protector coming off, even to the extent where hard screen protectors for a Fitbit Versa, have under the same wearing conditions!
User
Find a better supplier
Product delivered did not contain IQ Liquid component which is vital to effective application - find a better supplier
User
Easy to apply
Very easy to apply screen protector and it provided a few extra screen protectors
Trustpilot
2 weeks ago
2 weeks ago