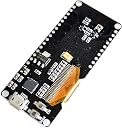
Desertcart purchases this item on your behalf and handles shipping, customs, and support to Hungary.
🚀 Elevate your IoT game with the ultimate compact wireless dev board!
The HiLetgo ESP32 ESP-32 0.96" OLED Development Board combines dual-mode 2.4 GHz Wi-Fi and Bluetooth low power technology with an integrated OLED display, all powered by efficient TSMC 40nm chips. Designed for Arduino AP STA compatibility, it supports multiple wireless modes and LUA programming, making it a versatile, compact, and scalable solution for rapid IoT prototyping and deployment.
| ASIN | B072HBW53G |
| Best Sellers Rank | #5,069 in Single Board Computers (Computers & Accessories) |
| Brand | HiLetgo |
| Compatible Devices | Arduino AP STA |
| Connectivity Technology | Bluetooth, Wi-Fi |
| Customer Reviews | 3.9 out of 5 stars 54 Reviews |
| Item Dimensions L x W x H | 2.52"L x 1.02"W x 0.96"H |
| Manufacturer | HiLetgo |
| Memory Storage Capacity | 2 MB |
| Mfr Part Number | 3-01-1290 |
| Model Name | ESP-WROOM-32 ESP32 ESP-32 |
| Model Number | 8541582783 |
| Number of Items | 1 |
| Operating System | FreeRTOS |
| Processor Count | 2 |
| RAM Memory Technology | LPDDR4 |
| Wireless Communication Standard | Bluetooth |
| Wireless Compability | Bluetooth |
E**.
Five minutes to IoT!
Five minutes to IoT! This board is very easy to use with the Arduino IDE. 1) Add the additional board manager URL by going to File->Preferences 2) Add the ESP32 boards by going to Tools->Board->Board Manager and typing "ESP32" in the search bar 3) Select "WEMOS LOLIN32" from Tools->Board. Ensure you have the correct COM port. 4) Pick a sketch from File->Examples and upload to the board. I used "SimpleTime" which connects to your wifi (enter SSID and password on lines 4 and 5 of the sketch) and gets the current time using NTP. It then echoes this time to the serial monitor. Bottom right shows the client list from my router showing the ESP32 has connected. Great little board for all your internet-enabled projects, the built in display is just awesome for debugging and status.
D**.
Pinout Diagram
A good board with a standard ESP32 chip. The built-in screen is very convenient on an wireless chip. No specs exist, so find the pinout i deduced below.
N**D
Works
Bought this and installed TiltBridge to access my Tilt hydrometer. This device worked great and have had no issues with it. Paired with the appropriate software it allowed me to view my hydrometer parameters via network, even while out of town. The other day I noticed it was still plugged in and running after about 4 months continuously screen is still bright. No issues connected right to WiFi and Bluetooth worked great from about 12 feet through a brick wall and mini fridge.
J**N
No instructions or schematic.
There are definitely some gotchas with this board. As far as i can tell there is no schematic. I emailed the company (Hiletgo) and no response. Gotcha #1. You must press and hold the BOOT button for a few seconds when Arduino or Pio starts to program. Workaround: solder 1.0uF cap from pin 3 (EN) on the module to pin 1 (GND). Gotcha #2. OLED uses gpio 4 and 5 for I2C. Do not use these for other purposes else your display will not work. Gotcha #3. GPIO12 (Pin MTDI) must be logic low on power up or else micro won't boot up. Gotcha #4. GPIO0 must be logic HIGH on power up or else micro won't boot up.
J**J
Nice development board
This board is very easy to use with the Arduino IDE.Great little board for all your internet-enabled projects, the built in display is just awesome for debugging and status. A complete development system- text, graphics, GPIO, SPI, I2C, serial, USB, dual core processor, Bluetooth, wifi, programmable with Arduino tools, Lua, c, micro - Python
D**N
Best electronics display combo for the price!
This is a great dev board for any project that needs a display. No extra connections needed except USB for power. Would be great to display local weather, time for the nearest bus or train, or status on other smart home sensors. Get started by installing ESP32 support in the Arduino IDE and downloading the ThingPulse/esp8266-oled-ssd1306 library from GitHub. It includes a few examples to get started (attached photos taken from this example code). I'm really excited to play with this board some more.
D**X
Nice ESP32 board, but has PWM issues at low frequencies
This is a very nice ESP32 board. The integrated OLED display is super-convenient for debugging and IoT projects that can benefit from a display. Everything works as expected when coding via MicroPython, and GPIO operation is generally solid, but PWM output has some issues at lower frequencies (<5 kHz). This isn't a big deal for most applications, but servo motors operating at 50 Hz can't be driven using PWM -- I tried this with 4 different kinds of servos with no luck, and finally had to write a custom loop to manage the timing "by hand".
Z**E
Extremely confusing pinouts
This board is great... unless you want to actually connect the pins to anything. I thought the build-in display would be a nice convenience, and instead ended up with hours and hours of pain. It comes with zero instructions. The HiLetgo website is currently not really even loading (I get some HTML that partially loads without CSS). Fine, I'm comfortable with a simple pinout diagram. I first tried to attach a sensor to a GPIO pin, and all of a sudden started received errors when trying to flash the device. Tried pins 5 and 4, and it flashed fine — except those are required for the SSD1306. Ooookay... try a different pin? nope, another flash error: —— Configuring flash size... Warning: Could not auto-detect Flash size (FlashID=0xffffff, SizeID=0xff), defaulting to 4MB Compressed 8192 bytes to 47... A fatal error occurred: Timed out waiting for packet content —— This happens every time I have anything at all connected to (most) pins. I bought two of these boards, so it's not a problem with the device itself. Want to use I2C? Good luck. It's used by the display, and I've yet to figure out how to use something like the SHT31 for a temperature/humidity reading. One reviewer seemed to indicate that he got it working with What are the alternate (0x45) I2C pins? I still have no idea.
I**A
Arduinoで使ってみました。
ディスプレイはI2C接続(SDA=5/SCL=4)、文字色は白色でした。 U8G2ライブラリでは、下記の宣言で利用できました。 U8G2_SSD1306_128X64_NONAME_F_SW_I2C u8g2(U8G2_R0, /* clock=*/ 4, /* data=*/ 5, /* reset=*/ U8X8_PIN_NONE); 標準のI2C(SDA=21/SCL=21)はピンが出ていません。 なぜかディスプレイに利用している、4,5ピンがあるんですよね。 個人的には、ディプレイ用に標準のI2C(SDA=21/SCL=21)を利用し 4,5ピンは自由に使えるといいと思うのですが....
M**N
Another undocumented WROOM-32
Sigh, bought this a while back and didn't get around to using it. ZERO documentation about the chip and getting it working properly in moderm Arduino IDE is a challenge. Comes up fine as a generic ESP32 dev board but ... the display, not so much. It seems to be I2C based but no example code anywhere seems to make the display do anything. Have tried a ton of tutorials but no go. Waste of time and money unless you are an expert I guess. I've been a coder for over 4 decades and I can't get the screen to init and tired of wasting time and effort on it. I will get a brand name documented and supported board and if you are new to arduino I highly suggest you do as well.
S**D
OTA updates are harder to set up vs other ESP
Had to constantly access the Boot button to program, and ended up breaking the LCD from pulling it out of a 3D printed case.
Trustpilot
1 week ago
3 weeks ago