Desertcart purchases this item on your behalf and handles shipping, customs, and support to Hungary.
โ๏ธ Fix your defroster like a proโstay clear, stay warm, and never miss a winter drive!
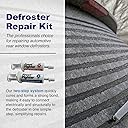
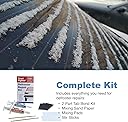
The Frost Fighter 2000 Rear Window Defroster Tab Bonding Repair Kit features a high silver-content conductive adhesive that quickly cures to restore electrical and structural connections on rear defroster tabs. Approved by General Motors, this easy-to-use two-part epoxy delivers professional-grade, high-amperage repairs that save costly windshield replacements. Perfect for DIY enthusiasts seeking reliable, long-lasting defroster functionality.
| ASIN | B01EAMB1W4 |
| Best Sellers Rank | #24,103 in Automotive ( See Top 100 in Automotive ) #39 in Windshield & Glass Repair Tools |
| Brand | Frost Fighter |
| Brand Name | Frost Fighter |
| Color | Silver |
| Customer Reviews | 4.4 out of 5 stars 604 Reviews |
| Door Material Type | Metal |
| Door Orientation | Reversible |
| Item Dimensions D x W x H | 8"D x 4"W x 1.5"H |
| Item Highlight | 2000 |
| Item Weight | 0.27 g |
| Manufacturer | Frost Fighter |
| Manufacturer Part Number | 2000 (Duplicate SKU) |
| Model Name | FF2000 |
| Model Number | 5841757416 |
| Number of Items | 1 |
| Product Dimensions | 8"D x 4"W x 1.5"H |
| Specification Met | General Motors Approval |
| UPC | 640901541709 |
| Unit Count | 1 Count |
H**O
Works, but it helps to heat cure
I used this product to repair the defroster on a 2018 Chevy Volt. One of the defroster tabs detached from the rear windshield. Because the frame covers much of the connection area, soldering equipment would not fit in there, and the shop said they would have to replace the windshield (several hundred dollars at a minimum). The Frost Fighter stuff is kind of expensive, but that may be because it is 80% silver, and it seems to be formulated to be very conductive when cured. Using a multimeter on the leftover epoxy on the mixing card gives a good continuity check. The defroster tab is very large on the Volt, but there was enough epoxy to do potentially a couple of repairs. I followed the directions pretty closely, mixing the two parts for about 45 seconds before application. I applied the mixture to the contact area on the windshield and on the tab. Using a heat gun, I warmed the area to about 130F, as measured with a non-contact thermometer, for 30 minutes. The epoxy didn't really start to hold until about 15 to 20 minutes in, so for this particular situation it was necessary to wedge something over the tab to keep it firmly in place. After the heat cure was complete, I tested the defroster and verified it heated up. Then, as per the instructions, I mixed up a bit more epoxy and applied it along the edges of the tab to such as to build up the conduction path between the defroster grid and the tab. Another 30 minutes with the heat gun finished up the operation. The defroster is now functioning, and I will be observing how well the repair holds up to the vibration of driving. In any case, it was much less expensive than replacing the windshield! The photos show the defroster connection area with the trim panels removed, before and after the repair. The thin gap limited the ability to apply the epoxy smoothly, but that area is not visible with the trim panels installed anyway.
J**N
worked perfectly
worked perfectly
N**E
Great deal
Worked great!
R**F
This stuff works!
I tried NAPA's window defroster tab glue. It said that it conducts electricity. It didn't. It didn't even contain any aluminum or silver in the epoxy! After I got that junk off the window (and it took a little while using acetone), I threw the old tab away since I had bought a new tab on Amazon. The product comes with two tubes, or parts of the mix. I squeezed out two equal piles of them and stirred them together. After sanding the grid with 1000 grit wet/dry sandpaper (the sandpaper that comes with the kit, I felt was too course for sanding the grid areas.), I used the swabs contained in the kit to swab the area with epoxy and swabbed the bottom of the tab. I simply stuck the tab onto the window and put a little extra onto the tab legs. After about two hours, the epoxy was hard enough for me to reinstall the window and gently connect the tab. I checked the grid and tab to make sure there was conductivity between the tab and the grid. There is! And with that, the repair was done! Easy Peasy!
T**Y
Expensive, but it does work well.
This stuff works great. Fixed my Toyota Camry defroster by reattaching 2 different tabs. I considered using a soldering gun, it might have worked but I didnโt want to risk breaking the glass and it was in a tight spot. I k picked a star off due to the price. Itโs pricy, butit works well.
C**M
Worked!! - F-150 rear slide window connectors
My 2017 F-150 was the sliding rear center window - for years the center sliding window would not defrost but the rest of the rear window would defrost. I found that the connector had come loose. Ford said I would have to replace the entire rear window because they do not repair this! Followed directions and it is working just fine! I left the mixed portion in a small cup to monitor how it dried -- this is some tough stuff, my little stirring stick would not come out of the epoxy once it was dry. ALSO - Just use a small dab! If you use too much and press the rubber piece back on it could ooze and cause cross contact on the + and - terminals! A little expensive but A LOT cheaper than a new window!!
B**N
Works great!
The defroster in my wrangler has been out of service for about 2 years, so I finally found something that would fix it. Used a heat gun to help it cure, and now as solid as can be. I can now see out of the back window in the winter!
A**8
Didnโt work
Returned it as it didnโt work. Good value but sad it didnโt work for my jeep.
A**Y
็กฌๅใๆฉใไฝฟใใใใ
ใใใฉใใฌใฎใฟใใ่ฑ่ฝใใ้้ปใ่็ฑๆงใ็กฌๅ้ๅบฆใชใฉใฎ่ฆณ็นใใใใใใชๆฅ็ๆใ่ฉฆใใพใใใใใใใไธ็ชๅฎ็จ็ใงใใใไพกๆ ผใ้ซใใฎใๅฏไธใฎๆฌ ็นใงใใใญใ
S**R
Really works
It's now been over a month since I repaired my broken tab. It's rock solid. Unlike other repair attempts (using other methods like silver bearing solder) this is really looking like a repair that will last. I travel some bumpy roads, and I am really impressed. The kit is very easy to use. The recommended half-hour curing using a heat gun is a step that I think really made a difference. It was no longer tacky by the end of it, and I believe that made it solid from the get-go. I tested the conductivity, and it was perfect. Probably not the cheapest, but worth it!
A**G
Great Product
Works very good, follow instruction and product is solid and secures the the tab with a strong bond. Used this replace the tab on Jeep wrangler rear defrost.
L**O
Fixed the problem of detached rear defroster tab.
Followed the instructions but fixed the connector after a few days to ensure proper adhesion.
D**K
Money saver.
A little tricky to apply to the window but it worked and saved me quite a bit of money at the dealership. Would recommend.
Trustpilot
2 months ago
1 month ago