


BETOOLL Easy 1-2-3 A-Frame 2 Brackets Swing Set Bracket with Mounting Hardware (Green)
Product ID: 336178602
Details
- ColorGreen
- BrandBETOOLL
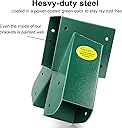
- MaterialSteel
- Item dimensions L x W x H11.61 x 9.84 x
- Item Weight19 Pounds
Desertcart purchases this item on your behalf and handles shipping, customs, and support to Hungary.
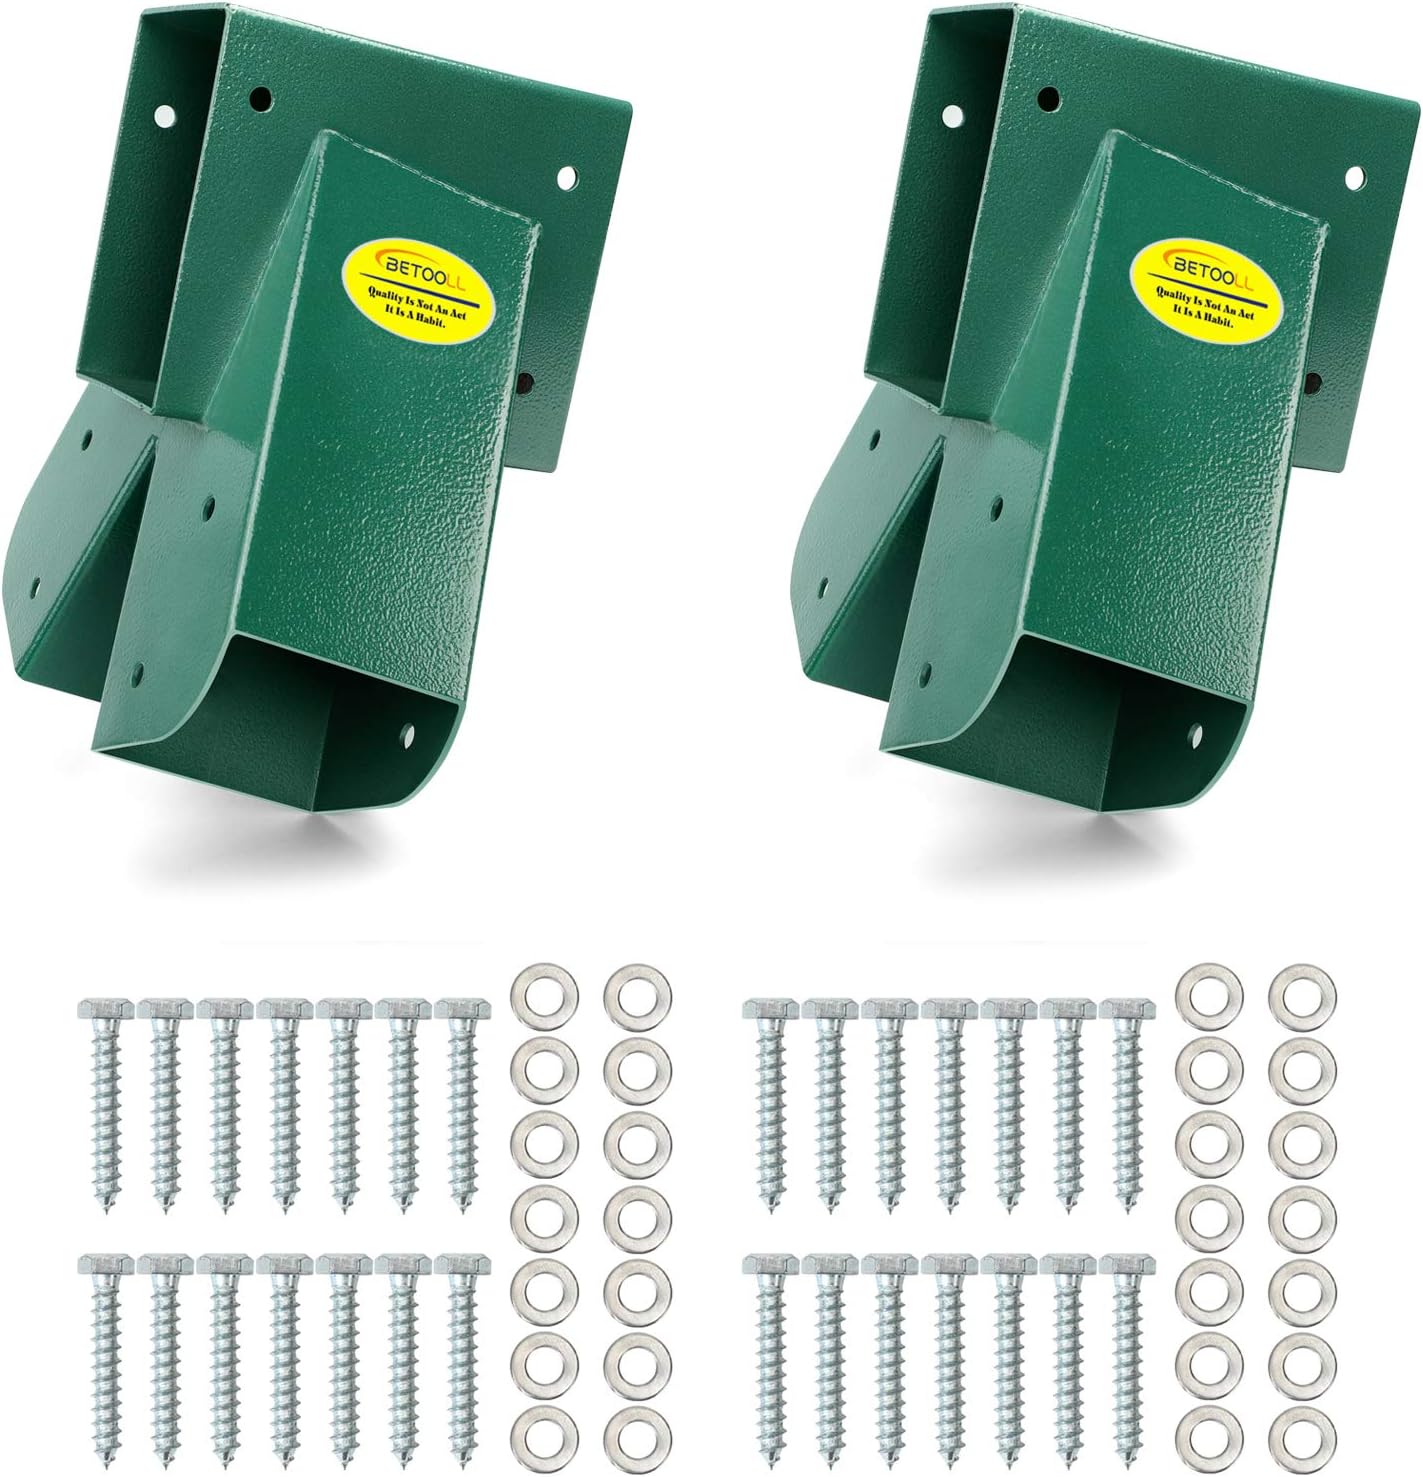
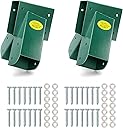
Choose BETOOLL A Frame Brackets,let us help guide you on building the best Backyard Swing Set Kit Includes: 2 Brackets 28pcs Lag Screws 28pcs Washers Note: If you want to use your own hardware,we recommend using a 5/16 3” lag screw amp; 5/16” washers. Feel free to email us if there's any issue before or after . Your case will be taken seriously. 18 month manufacturer since order date.We'll do our best to keep our .


| Manufacturer's Suggested Maximum Weight | 110000 Pounds |
| Model Number | HW8801 |
| Assembly Required | No |
| Batteries Required | No |
| Batteries Included | No |
| Colour | Green |
| Product Dimensions | 29.49 x 24.99 x 17.09 cm; 8.62 kg |
| Item model number | HW8801 |
| Item Weight | 8 kg 620 g |
J**N
Sizing is inaccurate and the posts need to be cut smaller be aware! Its a pain
The product seems strong and well built. However, I had posts delivered 4 x 4 and 6 x 4 as specified, I expected the receiving slots to be 4 inch square on the inside. However, they are not they are just shy of a 1/4 of an inch on each edge too small. ( on 4 x 4 slots) So you must trim each post end, now this is real pain if you do not have the tools for trimming. I have seen others post that it was easy to knock in, I can only assume you did not have exact 4 x 4 posts. I find this totally illogical, I am UK based and a 4x4 post is a very common posts size and used for decking etc. Why not make a bracket they slide into? In fact why say they do? Then ship all the way to the UK for me to find out, they do not? I am now going to have to do the trimming as sending back to the USA will be a royal pain in the !! So just be aware that you should have the tools to trim, or get your post supplier to take off the required amount. Maybe get the bracket and take with you to order if it is a local company, sadly I did not.
J**N
Can't buy this size wood in Australia
I bought these brackets from the USA to make my son a swing set for his birthday but guess what - no one stocks 4 x 6 timber in Australia so they are useless. Also, the insides of the brackets are welded uneven and have been put together poorly. Will be posting back to next week.
D**.
Bracket quality is amazing.... however
Bracket quality is amazing.... however 1 slight drawback is The measurements of 4x4 and 6x4 is the outer measurements for your bracket, while the wood is the same so I had to buy a plainer to trim down the wood. Would have been good if you had rather specified the inner dimensions as this is what is critical or order to wood correctly.
W**N
Sturdy Brackets
I used these with a 14 foot 4x6. I hung enough of the timber outside the end of the brackets to leave exactly 152" (12 foot 8 inches) between the start of one bracket to the start of the other bracket. I hung 2 swings (alternating not side by side) a trapeze and a rope/disc swing. Leaving 18" from end of first bracket to hinge on first swing hanger, then 17" for actual space between swing chains (swing holes were spaced at 15" allowing for 1 inch on either side to space outwards), then again 18" space between trapeze. Then exactly 16" for trapeze since those you want exactly up and down from holes, then 18" to 2nd swing followed by 17" for that swing. Then 24" space to rope followed by 24" space to end of opposite bracket.No one else clarified spacing anywhere so I thought I would.D
P**E
SOLID - brackets make a strong swing set.
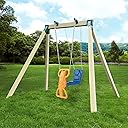
2020 Swing set TIPS :1. Lumber (purchase separately): pressure treated. The completed A-frame dimensions will be (up to) :12' Long x 8' Deep x 7'8" High. The swing set should be set up in a location with at least 6 feet of clearance in front and back.a. TOP BEAM is a 4 x 6 pressure treated beam. A single 4x6 is required.i. LENGTH of top beam - you decide. The manufacturer recommends using one kiln-dried 4x6 timber -114" (9 ½ feet) in length. Manufacturer warns that the top beam will bend and warp if it is longer than 144” (12 feet long).ii. Three swings – you may want a 132” top beam to adequately fit 3 swings safely spaced apart. (18” per swing, 16” per space between swings, 16” on each end between the outside swings and the frame, plus 7” of beam inside each bracket at each end). [ 7—16 – 18—16—18—16 – 18 – 16 –7 ]iii. Your top beam length will vary depending on what you hang from it. Examples: two swings, a porch style swing, a tire swing or a “disc” swing, a combination of different swings. You’ll need to research the recommended spacing to safely use each, cut your beam length accordingly, and decide where to place your swing hangers. Don’t forget to leave 7” on each end for the metal brackets.b. LEGS – Manufacturer recommends using four kiln-dried pressure treated 4x4 timber - 96" (8 feet long) side support legs. Longer legs are an option; however, you need to be careful not to make the frame too top heavy (tip hazard).c. CROSS BEAM - Optional cross member on each end. You can choose to add a 2x6 pressure treated cross beam across the legs on each end for extra strength. Length – you decide - The length of the cross beam will depend on how high up you place it across the legs.d. STAIN - You may want to stain your lumber prior to installation. Pressure treated lumber should be dried out prior to staining.2. INSTALLATION: Building the frame.a. FIRST attach the brackets to 4x6 top beam. Hopefully, you will discover that your 4x6 beam fits easily into the bracket – mine did!i. Beginner TIP #1: for fitting the wood beam into the bracket. If your 4x6 beam is too tight to fit the bracket try shaving down the ends of the 4x6 top beam slightly with a plane, or a belt sander, or a chisel in order to get the bracket to fit over it.ii. Beginner TIP #2: for fitting the wood beam into the bracket. If your 4x6 beam is too tight you may want to apply ski wax and dish soap to the wood and bracket to make inserting the wood into the bracket easier.iii. Beginner TIP #3: IMPORTANT… position your 2 brackets so that the frame LEGS will flair outward on each end of the beam (and not slant toward the middle of the swing set).After fitting the beam inside the bracket, secure the brackets in place on each end of the beam by pre-drilling holes for the lag screws (included). Ratchet the lag screws into place.b. SECOND – with the beam on its back on the ground, attach SWING HANGERS (purchased separately) after carefully measuring and leaving recommended spacing between each set of swing hangers and between the outside swings and the swing set frame. You may need to research this for your unique set of swings. (The spacing for 3 swings on a 132” beam is detailed below).c. THIRD - slide the 4x4 legs into the brackets with the beam lying on its back on the ground (top down). Depending on the fit of your 4x4 legs you may need to use the tips listed earlier regarding inserting the beam into the bracket.d. NEXT, after fitting the LEGS inside the bracket, secure the brackets in place on each LEG by pre-drilling holes for the lag screws (included). Ratchet the lag screws into place.e. Optional: Finally, you may decide to add a 2x4 (or 2x6) CROSS PIECE on each end of the frame for added stability. Secure the cross piece between the legs with long exterior deck screws or lag bolts (purchased separately).3. SPACING OF SWINGS.a. For three swings: In order to leave the recommended space between THREE swings the 4x6 beam is cut to a 132” length. (18” per swing, 16” spacing, plus 7” on each end inside the brackets). [ 7—16 – 18—16—18—16 – 18 – 16 –7 ]b. Spacing for two swings, a porch style swing, a tire swing or a “disc” swing will vary. You will need to research proper spacing for whichever type of swings you choose to install. You may decide to use a shorter top beam if you are only installing one swing, two swings, a porch style swing, or a single tire swing. Do your research before cutting the beam.4. STAIN WOOD with a redwood stain/sealer combination. You may choose to stain the wood first before you install brackets or swing hangers.MOVING INTO POSITION & SETTING UP – This frame is heavy. Be sure to have at least two adults to roll it over and move it into position. Beginner TIP – adding cross pieces on each end of the frame not only strengthens the frame; it will give you an easier position to lift from, so that two people can more easily move the frame around.I still need to angle cut the bottom of my 4X4 legs so they will sit flat on the concrete pavers I placed under each leg. I’ve found that putting pavers under the 4x4s will prevent rotting. In addition, I am going to use a heavy gauge wire and ground anchors to hold the swing set down and prevent the frame from rocking.
Trustpilot
1 month ago
2 weeks ago