🌿 Elevate your space with nature’s boldest statement.
This Innovative Stencils Tree Top Branches Wall Decal is a large-scale, matte black vinyl sticker measuring 100" wide by 44" high. Made entirely in the USA from premium materials, it offers permanent, weather-resistant durability for both indoor and outdoor use. Designed for easy wall mounting with included instructions, it brings a sleek, nature-inspired aesthetic featuring tree branches and birds, perfect for adding sophisticated organic flair to any room.
Brand | Innovative Stencils |
Color | Black |
Item dimensions L x W x H | 100 x 0.1 x 44 inches |
Recommended Uses For Product | Wall |
Theme | nature |
Special Feature | Permanent |
Number of Pieces | 1 |
Style | Left to Right |
Age Range (Description) | Kid |
Reusability | Single Use |
Item Form | Sheet |
Pattern | Tree |
Finish Type | Matte |
Animal theme | birds |
Number of Items | 1 |
Target Audience | Children |
Global Trade Identification Number | 00799493832167 |
UPC | 799493832167 785577182532 |
Manufacturer | Innovative Stencils |
Part Number | 1130 |
Item Weight | 1 pounds |
Product Dimensions | 100 x 0.1 x 44 inches |
Country of Origin | USA |
Item model number | 1130 |
Size | 100" wide x 44" high |
Finish | Matte |
Installation Method | Wall Mount |
Item Package Quantity | 1 |
Special Features | Permanent |
Batteries Included? | No |
Batteries Required? | No |
S**9
Gorgeous results when you TAKE YOUR TIME!!
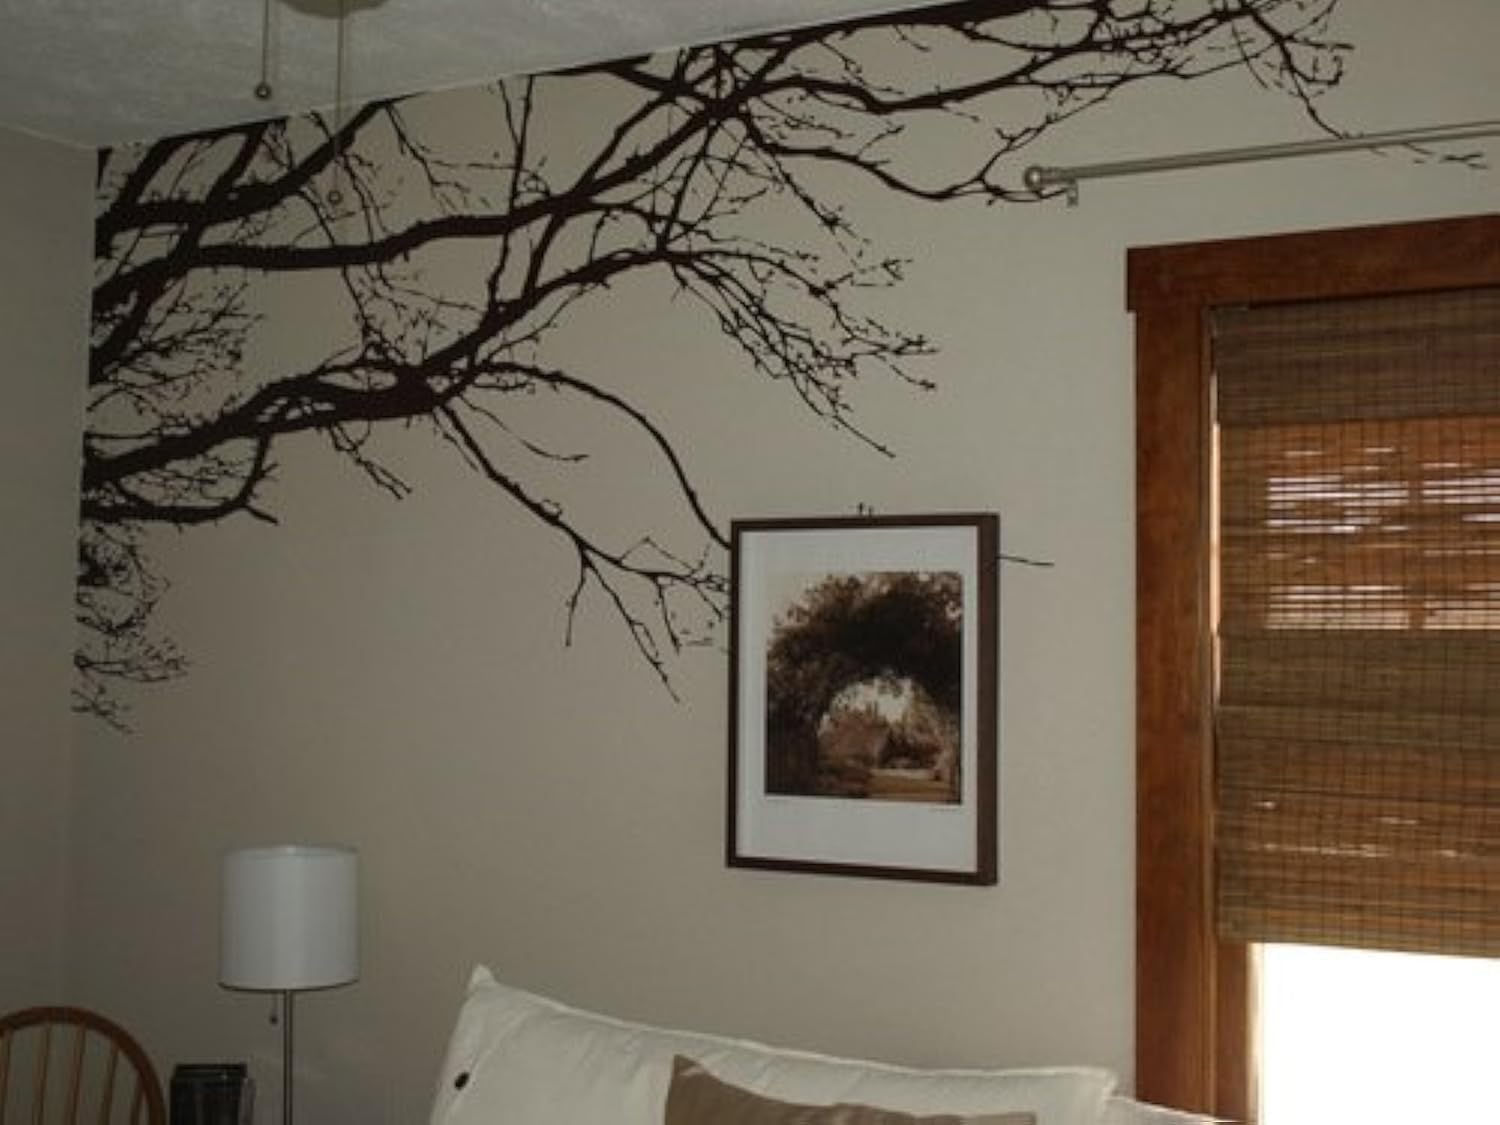
I got my order fast, as expected with Amazon Prime. When I unboxed this decal, it was longer than I expected. The picture off the product looks much shorter in length than what I expected. So be aware and read the dimensions. It is about 100 inches across (left to right).Installation!!! Do not be intimidated by the amount of decal you see. Wipe down your wall to remove any dust particles to ensure a good stick (I used a damp paper towel, and let the wall dry). My advice, CUT AS YOU GO. Use a ladder or something to climb on, and have a box cutter/xacto knife to trim any parts that may not line up. Even with taking my time, some misalignments happened. I used a box cutter to trim the pieces that didn’t align, and that worked. I applied the corner part first and worked from top to bottom first (1st picture). Then I applied the rest across (2nd picture). I cut the decal as I went and used painters tape to keep everything together on the wall. This made it easier to peel and apply the decal. Once you removed the paper part of the decal, to then stick it to the wall, make sure you pull as close to the wall as possible, and slowly. This prevents tugging and stretching of the decal. Rub over the decal while the more transparent paper is still covering it to remove any air bubbles. Once you start peeling, it’s beautiful. Also be aware, GAPS might happen, it happened to me. DON’T BE DISCOURAGED!!! I kept going until I finished the application and then I trimmed parts here and there to create strips to apply over and gaps. PROBLEM SOLVED!! I would recommend this decal to everyone, and I encourage you to take your time. The end result is worth it.
T**9
Excellent quality
Patience is key. If you're wanting a spooky look, this will do. If you're wanting a bird themed room, you MUST try this. I have received MANY compliments thus far when people walk into the room. Very artsy and can be used as spooky or warm. I chose to theme it warm.
T**K
Looks AWESOME!!!
I originally thought I ordered the black (which is what I wanted) but when it arrived it was white. I went to check my amazon purchase online and saw that I accidentally selected white -__-. Instead of returning, I decided to put up anyway to see how it would look and it LOOKS AWESOME! compliments the wall very well. I put it on a red wall. the whole room is red white beige and gray. my 22 year old bachelor pad looks like something out of a magazine.However. Putting it up is not an easy task. it says use two people in the directions but I live alone, and am impatient at waiting for someone to help. What worked for me was cutting it into 3 large sections and applying it that way. it still wasn't perfect and some pieces ripped off but you cant tell since it is already rugged looking which makes it better not to notice imperfections in applying. Ill put up a picture. you will notice that in the top left corner of mine a big chunk ripped out of the branch. but no one notices.
E**L
Worth it!!! Here is my process with the pics
I really like the final result!!! SERIOUSLY, if I can recommend anything would be to read all of the reviews and take all the tips and tricks from all of them. Some of the tricks that I used was first clean your wall with a damp cloth. Make sure it’s dry next I sectioned off the big decal into I believe five or six sections and I numbered each section. I also labeled each section which was the top, which I think was one of the most important things. I also made sure to trim the top and the edges that were going next to the wall before I put them on the wall , I also used a blow dryer and a tennis ball. Once I had the transfer paper stuck to the wall I heated it up with the blow dryer and ran a tennis ball over it to make sure it got in all the grooves and probably the biggest thing is to go slow and take your time. This will actually make the process a lot faster. Worth the time worth the money looks amazing.
M**L
Dont Use Attached Directions...Use Mine, Will Save You Hours
The only reason i am giving this a 4 star is because the end result looks amazing. I couldn't have asked it to come out any better. The HUGE but is that it was a pain in the a** to assemble. Putting it on the wall was the easy part. *DO NOT pay not attention to the directions that it comes with, its confusing and actually makes the job harder. Just cut it in 2 feet sections (top to bottom) and peel the blue part off before putting it on the wall and place on the wall and line everything up as you go along. Its ok if you mess up, you can just pull it off and realign it again. That took no time. The biggest time suck was getting the clear paper off without ripping the decal off the wall bc the decal sticks to the paper very easily. Peel away in very tiny sections while simultaneously using a credit card to smooth out and catch any part of the decal that seems to be coming off with the paper. Also try and peel in the direction of the branches, that will make it go faster (but still take you forever). This took me a grand total of 3 hours, and 2 bottles of wine.
L**.
Turned out even better than expected.
I dont normally give 5 stars but I couldnt be happier with tge way this turned out. Installing it took some time but I mannaged to get it done by myself with just a blowdryer and a tennis ball. I have textured walls and ive seen allot of people saying it shouldnt be added over texture but I figured id give it a try. It doesnt stick berry well at first so you have to go slow and be careful when removing your transfer tape. I saw a tip online that said to use a tennis ball instead of a credit card for textured walls because it helps the vinyl conform to the texture. But id say the hair dryer is the most important thing. Once you heat it up a little it will stretch around roughness of the texture and get a good stick. Once you've heated it all up and pressed it down with your tennis ball it doesnt even look like a decal, it looks like its painted on with black paint! I even went around two coreners with it (one was a rounded outside corner, the other a square inside corner) and once it was warm it would strech a little to get down in the corner. Overall i would definitely recomend this product. 5 stars.
D**0
Take your time
This thing looks awesome! It comes off the application paper with ease and doesn’t fall off the wall once applied! 10/10 would buy again.
Trustpilot
1 week ago
1 day ago