

🏄♂️ Ride in Style and Comfort!
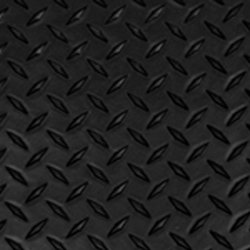
The Sea-Doo Traction Mats for 1996-2002 GTX and 1997-2000 GTI models feature a durable black diamond plate design, 1/4 inch thick EVA foam for enhanced grip and comfort, and an easy-to-apply pressure-sensitive adhesive for a seamless installation.
R**S
Great kit, easy to install. Take your time!
Take your time when installing, the final result will pay off!Drill out rivets with 1/8" drill bit. Don't go through the fiberglass if you don't have to. A good sharp cobalt bit will make your life easier.Peel off old mats. Pressure wash, dry, then clean areas with acetone.Fill holes with MARINE 5 minute epoxy.I installed the rear deck peice and upper foot rests first, then worked towards the rear.Looks great and so comfortable on your feet.Will buy for 2nd ski very soon.97 Seadoo GTX
J**E
Look great and easy install
Replace the upholstery on the seats and updated the worn out traction pads with these new traction mats. They look great, it will be interesting to see how well they stand up.
A**T
Great company, great product
A company that stands behind their products! Had a small issue that customer service handled quickly and to my satisfaction. Traction mats look great and fit perfect on my 1999 Sea-Doo GTX RFI. So nice to take the OEM plastic mats off and put these for an updated look.
D**E
Good looking!
Very pleased with these mats. They’re not the heavy rubber material like the original Seadoo mat, more like the material flip flop sandals are made of, should be durable enough. I went with the wishbone, looking for maximum foot traction. I’ll probably go with the diamond plate on my other boat. Wishbone looks like it will collect a lot of pebbles, might be hard to wash out. I used wire cutters to cut the rivets, then a punch to knock them through the hull. Most ended up in the floatation styrofoam but I did collect quite a few after washing out the hull. Definitely use the acetone and be liberal with it. That and outlining with a pencil was very helpful, working your way from the back. I plugged my rivet holes with white silicone caulking, should be more than adequate. Overall very pleased with the product and installation. Made my 97 GTX look new again.
M**2
Perfect fit
So easy to do yourself! The hardest part was getting the old residue off before install. They look great
R**
Well worth getting. Machine looks great
Easy to install. Layout prior to sticking on. Replace the old curled up garbage with these!!
L**N
Legit
Legit
S**E
The review that suggested you start at the rear of the ski is correct as after this large piece is in the rest are easy to install
First on removing the rivets I would not drill them out but nip them with a flat end wire cutter so the hole does not get any bigger than they need to be. Then use a nail punch to depress them, fill the holes with epoxy and sand flat after it dries. The review that suggested you start at the rear of the ski is correct as after this large piece is in the rest are easy to install. It also helps to have two people to insure proper alignment of the large rear piece as well. Do follow the instructions and pencil in each mat before you try to stick them and you will be very happy with the finished product.
Trustpilot
1 month ago
2 days ago